Witnessing
From MedITEX - Wiki
(Difference between revisions)
| Line 12: | Line 12: | ||
</table> | </table> | ||
<p>2. Save and execute the query.</p> | <p>2. Save and execute the query.</p> | ||
| − | <p> | + | <table border="0"> |
| + | <tbody> | ||
| + | <tr> | ||
| + | <td> | ||
| + | <p>[[Image:witness3.jpg|none|740px|thumb|middle|link=http://wiki.meditex-software.com/images/witness3.jpg|]]</p> | ||
| + | </td> | ||
| + | </tr> | ||
| + | </tbody> | ||
| + | </table> | ||
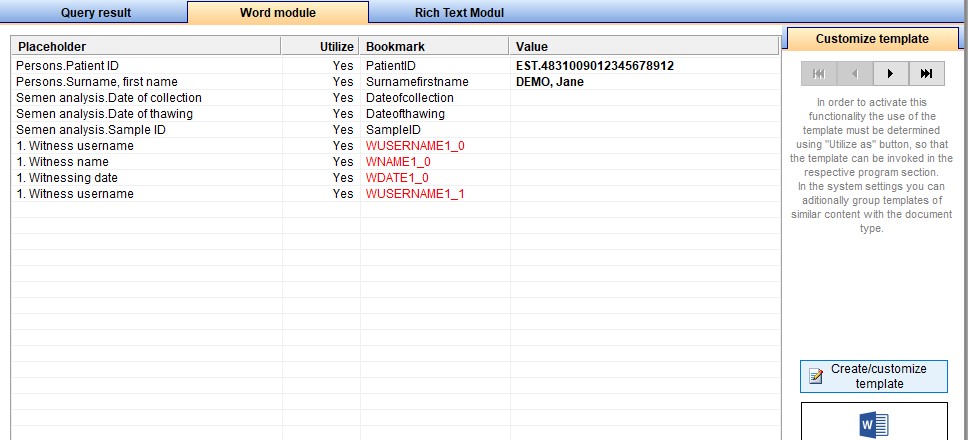
<p>3. Under <strong>Word module</strong> tabsheet, the <strong>Additional placeholders</strong> button displays a menu with <strong>Witnessing</strong> fields/bookmarks.</p> | <p>3. Under <strong>Word module</strong> tabsheet, the <strong>Additional placeholders</strong> button displays a menu with <strong>Witnessing</strong> fields/bookmarks.</p> | ||
| − | <p> | + | <table border="0"> |
| + | <tbody> | ||
| + | <tr> | ||
| + | <td> | ||
| + | <p>[[Image:witness4.jpg|none|740px|thumb|middle|link=http://wiki.meditex-software.com/images/witness4.jpg|]]</p> | ||
| + | </td> | ||
| + | </tr> | ||
| + | </tbody> | ||
| + | </table> | ||
| + | <table border="0"> | ||
| + | <tbody> | ||
| + | <tr> | ||
| + | <td> | ||
| + | <p>[[Image:witness5.jpg|none|740px|thumb|middle|link=http://wiki.meditex-software.com/images/witness5.jpg|]]</p> | ||
| + | </td> | ||
| + | </tr> | ||
| + | </tbody> | ||
| + | </table> | ||
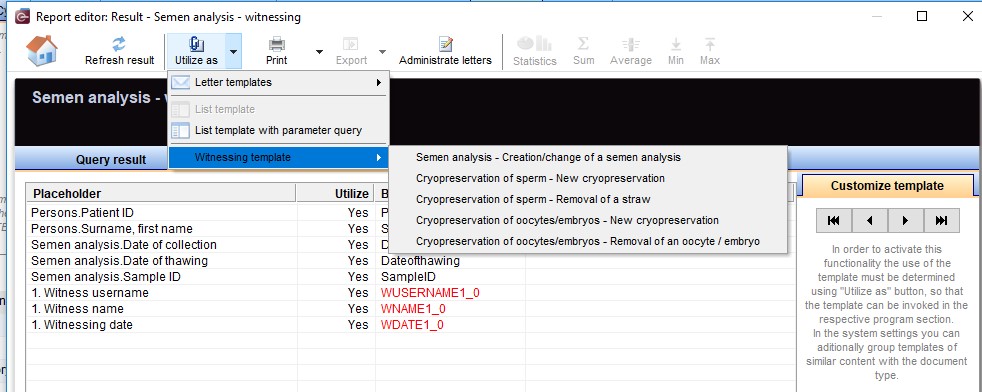
<p>4. Choose the MedITEX action to which the <strong>Witnessing template</strong> should be assigned, under <strong>Utilize as</strong> menu.</p> | <p>4. Choose the MedITEX action to which the <strong>Witnessing template</strong> should be assigned, under <strong>Utilize as</strong> menu.</p> | ||
| − | <p> | + | <table border="0"> |
| + | <tbody> | ||
| + | <tr> | ||
| + | <td> | ||
| + | <p>[[Image:witness6.jpg|none|740px|thumb|middle|link=http://wiki.meditex-software.com/images/witness6.jpg|]]</p> | ||
| + | </td> | ||
| + | </tr> | ||
| + | </tbody> | ||
| + | </table> | ||
<p>5. Create or customize the template by clicking on the <strong>Create/customize template</strong> button.</p> | <p>5. Create or customize the template by clicking on the <strong>Create/customize template</strong> button.</p> | ||
| + | <table border="0"> | ||
| + | <tbody> | ||
| + | <tr> | ||
| + | <td> | ||
| + | <p>[[Image:witness7.jpg|none|740px|thumb|middle|link=http://wiki.meditex-software.com/images/witness7.jpg|]]</p> | ||
| + | </td> | ||
| + | </tr> | ||
| + | </tbody> | ||
| + | </table> | ||
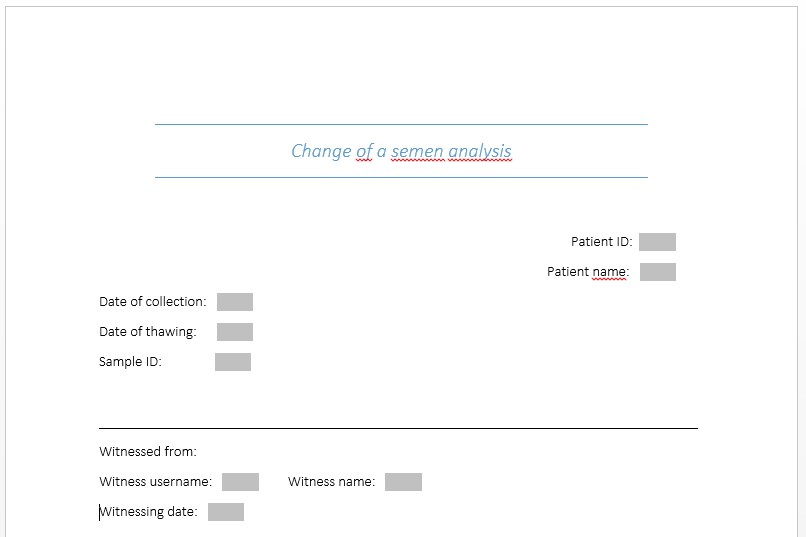
| + | <p>This is an example of a customised template:</p> | ||
| + | <table border="0"> | ||
| + | <tbody> | ||
| + | <tr> | ||
| + | <td> | ||
| + | <p>[[Image:witness8.jpg|none|740px|thumb|middle|link=http://wiki.meditex-software.com/images/witness8.jpg|]]</p> | ||
| + | </td> | ||
| + | </tr> | ||
| + | </tbody> | ||
| + | </table> | ||
Revision as of 11:02, 28 January 2019
To add a Witness report to a MedITEX action, follow these steps:
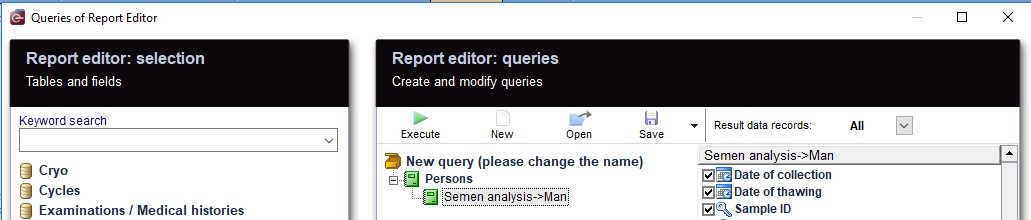
1. Open the Report Editor and build a query with the fields needed in the Witnessing template.
 |
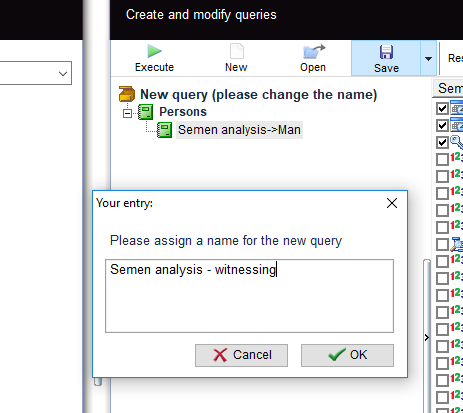
2. Save and execute the query.
 |
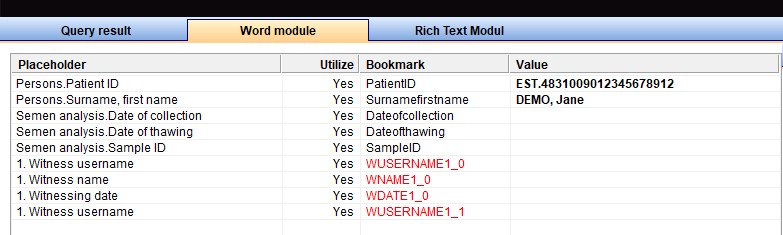
3. Under Word module tabsheet, the Additional placeholders button displays a menu with Witnessing fields/bookmarks.
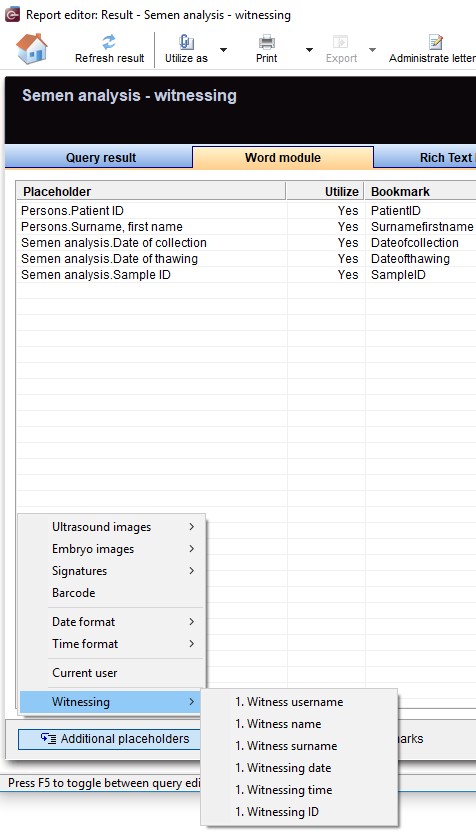 |
 |
4. Choose the MedITEX action to which the Witnessing template should be assigned, under Utilize as menu.
 |
5. Create or customize the template by clicking on the Create/customize template button.
 |
This is an example of a customised template:
 |