How to donate frozen oocytes or embryos?
From MedITEX - Wiki
| Line 90: | Line 90: | ||
</table> | </table> | ||
<p style="text-align: center;"> </p> | <p style="text-align: center;"> </p> | ||
| − | <p>Another way of cryopreserving material is through the | + | <p>Another way of cryopreserving material is through the <strong>Table representation</strong> view. Double-click the red cell for <strong>Cryo </strong>(1). The cryopreservation window will open and you must enter all information necessary and check <strong>For donation</strong> (2).</p> |
<p><em>Note: using this view, detailed properties will not be recorded for individual oocytes/embryos (3). </em></p> | <p><em>Note: using this view, detailed properties will not be recorded for individual oocytes/embryos (3). </em></p> | ||
<table style="margin-left: auto; margin-right: auto;" border="0"> | <table style="margin-left: auto; margin-right: auto;" border="0"> | ||
Revision as of 15:56, 6 December 2012
In order to donate frozen oocytes/embryos, a few prerequisites need to be fulfilled.
Contents |
Donor
The option Person is: Donor (Ooc./Emb.) needs to be checked for the donor of the oocytes/embryos. These are the steps:
- Click on Demographics (female) then, double-click the green area on the right.
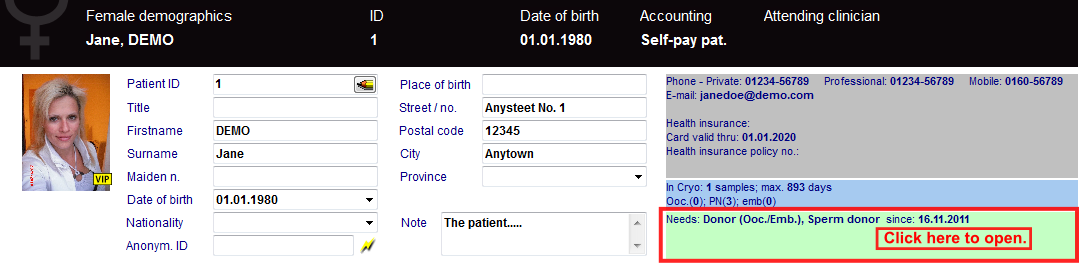 |
- On the opened window Person and donor information, you need to check that the Person is: Donor (Ooc./Emb.).
| <img src="/images/PandDInfo1.1Red.png" alt="" width="612" height="184" /> |
Change to the recipient patient.
Recipient
The option Person needs: Donor (Ooc./Emb.) needs to be checked for the recipient of the oocytes/embryos. These are the steps:
- Click on Demographics (female) then, double-click the green area on the right.
| |
- On the opened window Person and donor information, you need to check that the Person needs: Donor (Ooc./Emb.).
| <img src="/images/PandDInfo1.3Red.png" alt="" width="612" height="184" /> |
Donor's cycle
To create a cycle, click on the '+' button at the bottom left corner of the main patient's window.
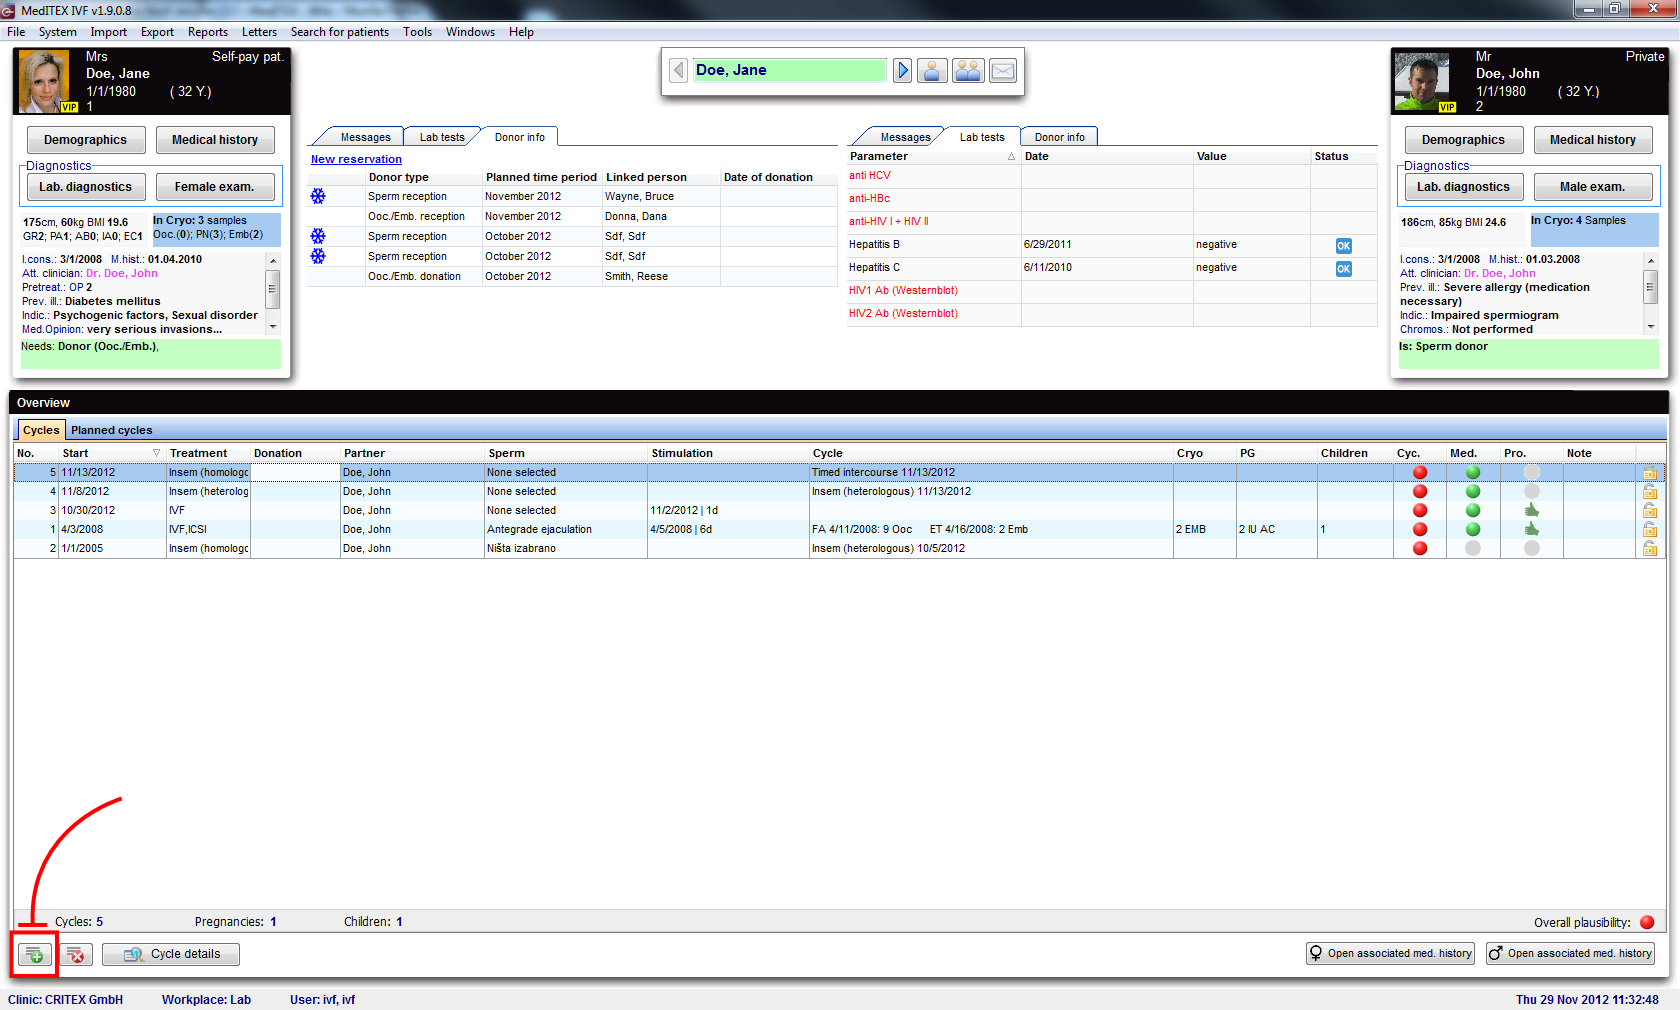 |
Create either Only aspiration or any IVF/ICSI cycles and check Donation (Ooc/Emb).
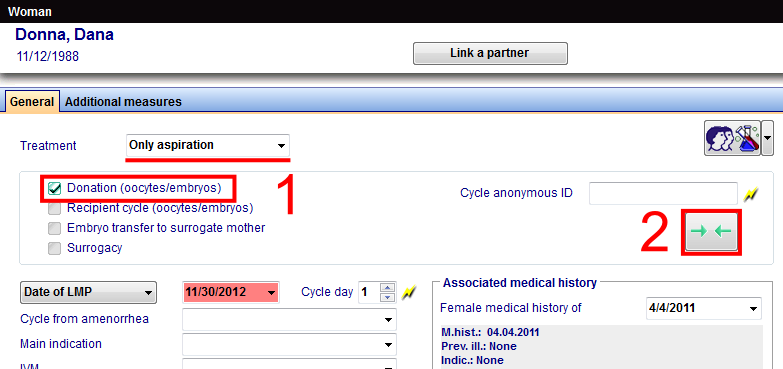 |
After creating the cycle, switch to Aspiration and select the amount of oocytes collected.
In order to cryopreserve oocytes, change to Cryo/Donation. Switch to the Graphical representation and select the desired material (1). Right-click on it and choose Cryopreservation. The cryopreservation window will open. You must enter all information necessary and check For donation (2).
 |
This is how Graphical representation will look after cryopreservation.
| <img src="/images/DonationCryo4.png" alt="" width="495" height="498" /> |
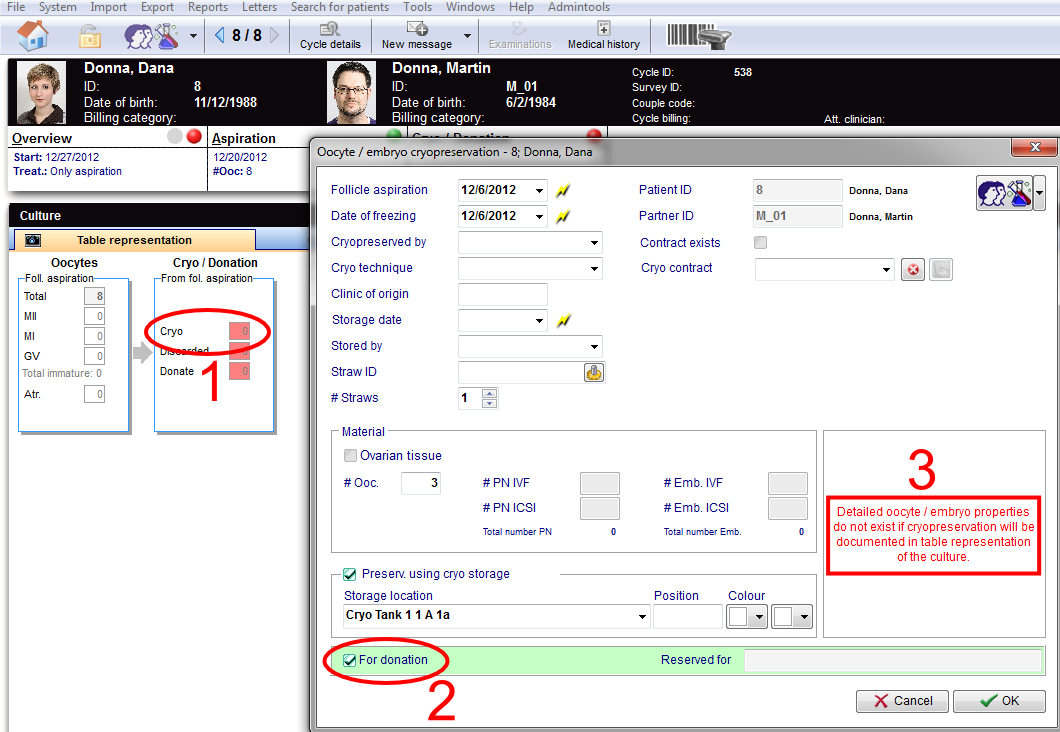
Another way of cryopreserving material is through the Table representation view. Double-click the red cell for Cryo (1). The cryopreservation window will open and you must enter all information necessary and check For donation (2).
Note: using this view, detailed properties will not be recorded for individual oocytes/embryos (3).
 |
This is how the table will look if you cryopreserve all oocytes.
| <img src="/images/DonationCryo2.png" alt="" width="268" height="208" /> |
Straw reservation
After the material is cryopreserved, we need to reserve straws so we can continue with the donation process.
On the recipient’s main screen, open Matcher (Donor info -> New reservation). On the Cryo donation tab (1) search the donor you need and choose the straws you want to have reserved (2). Click on the matcher button (3).
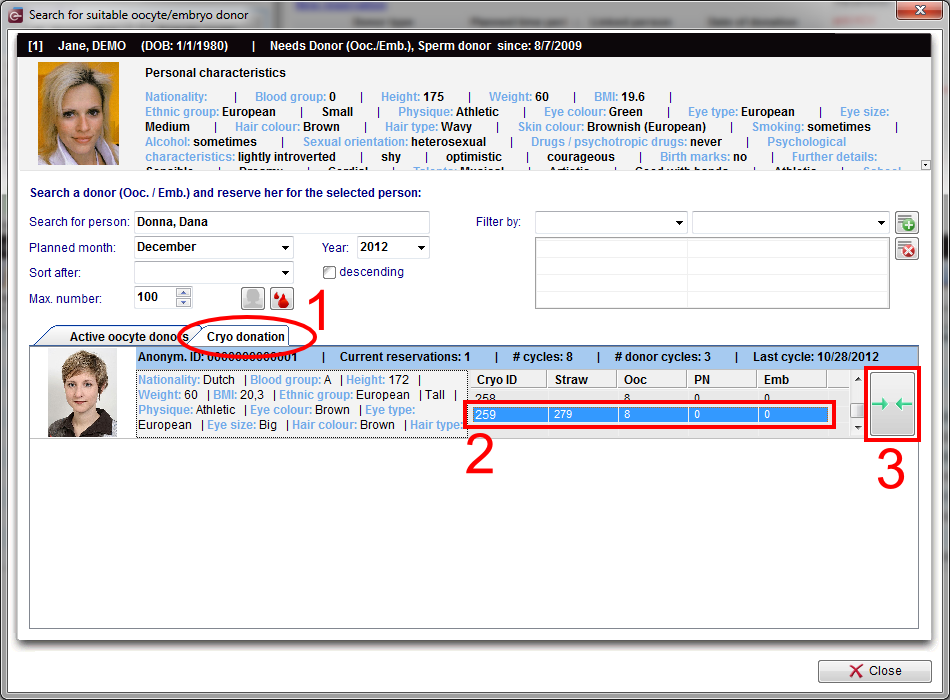 |
Now we are able to see the reserved straws in the recipient’s cryo area. From the patient’s main screen, double-click the blue area.
| <img src="/images/DonationCryo7Red.png" alt="" width="277" height="321" /> |
If the Reserved material area is not visible, click on the bar at the bottom of the window (1).
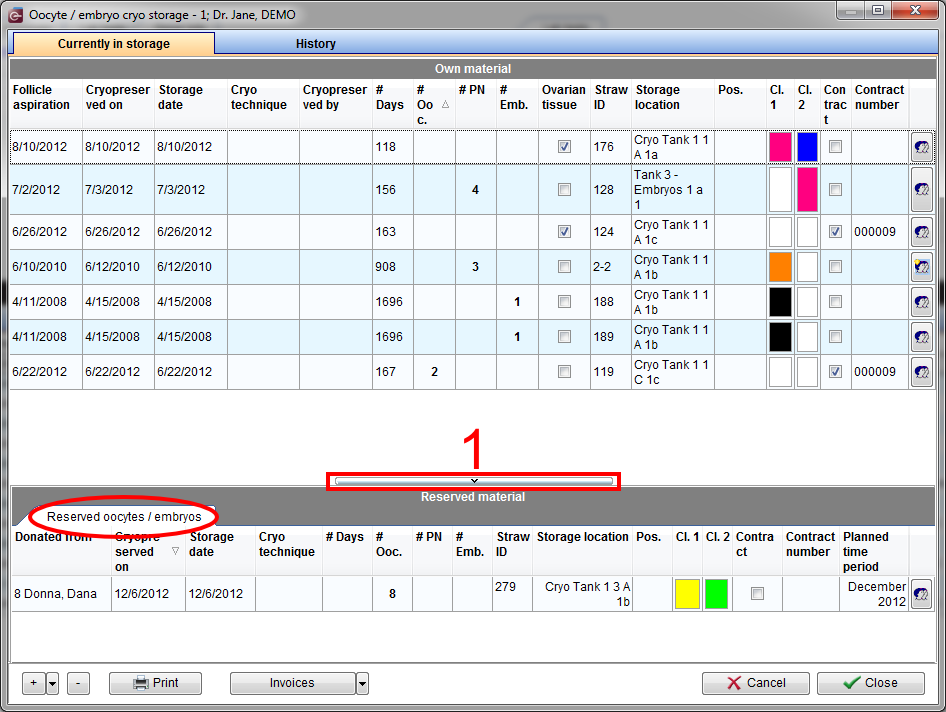 |
| <a href="/index.php?title=MedITEX_IVF_how_to">Back to the How to</a> | <a href="#top">Back to top</a> |