Free / QM fields
From MedITEX - Wiki
This highly flexible function, allows you to selectively assign additional processes, staff, material including batches, times, notes and other definable fields to the individual input areas.
You can configure the QM fields in the settings and it is very important you perform such configuration before entering data.
The following pages explain how you can enter data in a QM domain. Follow this procedure for all QM fields in MedITEX IVF.
- After clicking on a QM field, the corresponding QM screen will open.
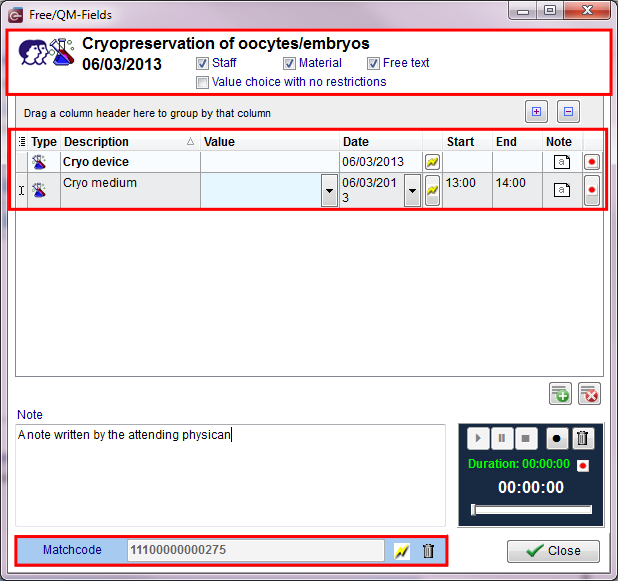 |
Top part
- In the upper left corner you can see the respective QM domain (Cryopreservation of oocytes/embryos). The window contains all items (from the QM assignment selection) which have been assigned to this QM field in the settings.
- Uncheck the boxes Staff, Material or Free text to hide items of these categories.
-
Click on the column headers (Description, Value, etc.) to sort the items accordingly. Click here to read more about managing lists.
-
Check the box Value choice with no restrictions to display values (Material, Batches or Staff) which have been set to "inactive" in the settings.
List
 |
Description of fields:
- Type: symbols indicating the category of the item: Staff
 , Material
  or Free fields
  .
. - Description: item name.
- Value: if values have already been assigned to the field in the settings, you can choose them by clicking the button in the column next to the field. Here, you can also choose materials or free text fields.
- Date: here you can enter the relevant date (DD/MM/YYYY). Press the lightning symbol on the right edge of the field to add the current date.
- Start: here you can add a start time for the item (hh:mm).
- End: here you can add an end time for the item (hh:mm).
- Note: here you can add a note to the item. Click on the field to open the editor.
|
 |
|
| If you do not wish to document as much information for a certain QM field, select the item and press the Delete button. Click OK to close the screen. | |
 |
|
| If you need other fields from staff, material or free fields, go to the system settings and add more field to this area. |
Bottom part
 |
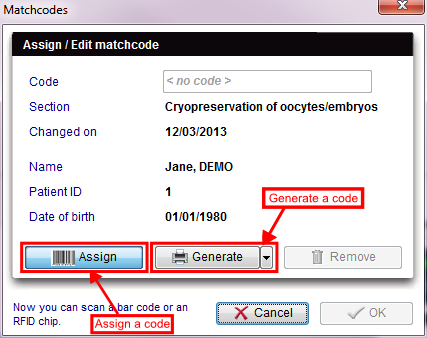
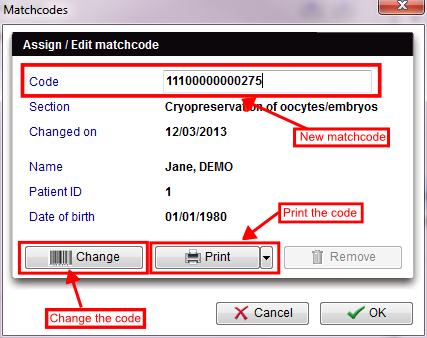
Click the lightning symbol to open the editing window. Delete an available code with the trashcan. |
 |
|
 |
 |
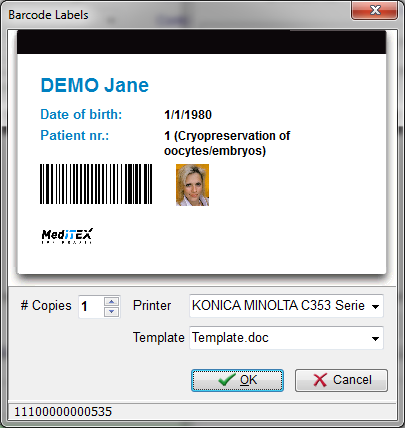 |
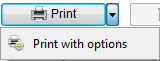
If you click Print with options, the following window will be opened. Choose the number of copies, the name of the printer and the name of the template. |
| Back to top |