Welcome to MedITEX IVF
From MedITEX - Wiki
MedITEX IVF is our all-in-one IT solution for reproductive medicine. It allows doctors and experts in fertility centers perfect quality assurance and documentation of therapies. MedITEX IVF is a platform that enables you to collect all data relevant to diagnostics and therapy.
It consolidates information from diverse data sources (IVF, lab, ultrasound, hormone lab, consulting room, operation room, registration desk). For this purpose, the platform can easily be adapted to the individual requirements of the respective reproductive medical center. All important data can immediately be documented and retrieved from various working areas, and all this can be done paperless.
Contents |
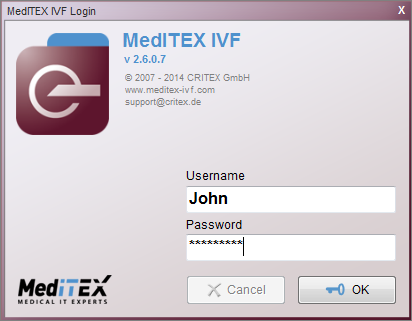
Safty comes first: Individual passwords
When starting MedITEX IVF, you will be asked to enter your username and password:
 |
|
Settings: Define your individual structure
The MedITEX IVF settings are of utmost importance. They allow you to adapt the program to your center's specific conditions and circumstances.
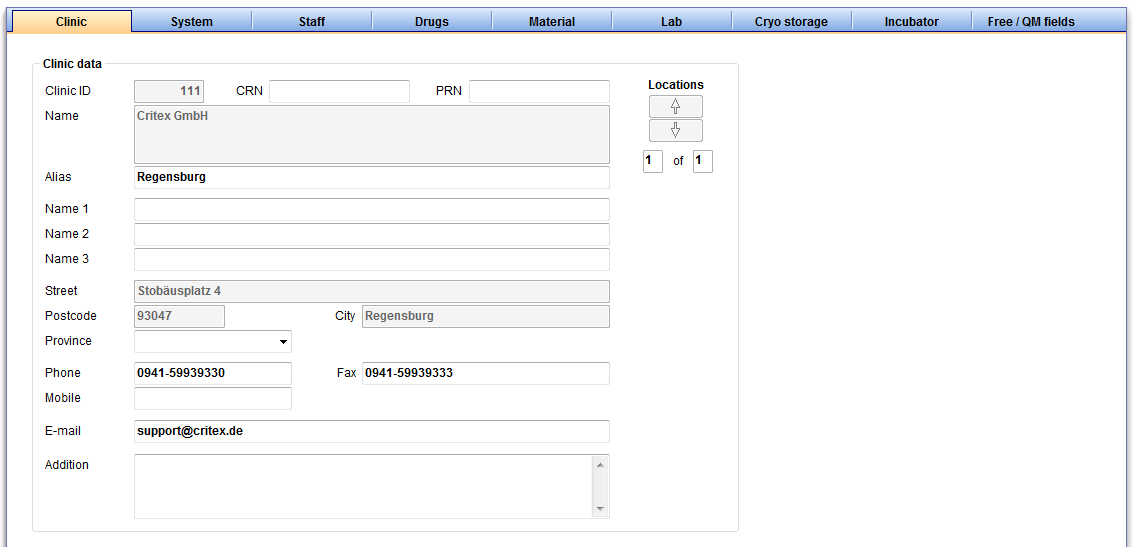 |
- This includes system settings, adding or editing existing drugs, manage materials and interfaces to accounting and laboratory programs, and also organize the cryo storage. The definition of QM/free fields and the content of selected system tables are also managed in the settings.
- It is crucial to define the settings fully and correctly before using MedITEX IVF.
Interface
After logging in with your individual password you will first see the MedITEX IVF main window. On the main screen you will see important patient-related information of the selected couple, such as epicrisis and CAVE messages, as well as an overview of all previous therapies.
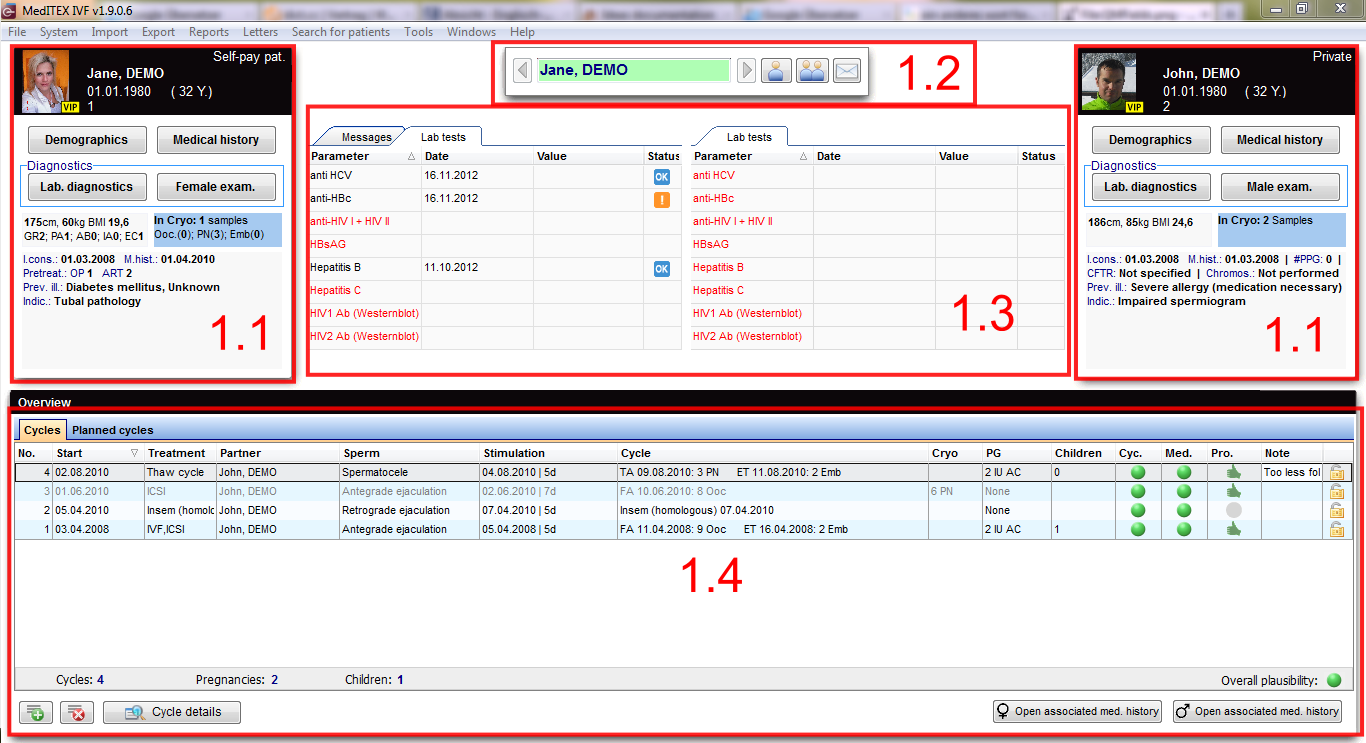 |
From this view you can access all areas within the program, add new patients, create cycles, import and export data and perform all other program operations.
Settings and referrer details can be accessed through the menu-item “System”. Different list-reports, error management and a special report editor are accessible through the menu-item “Reports”.
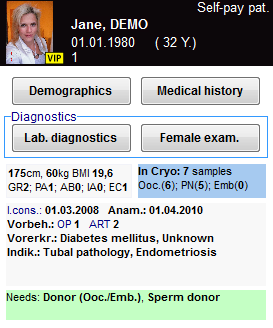
Female and male information area
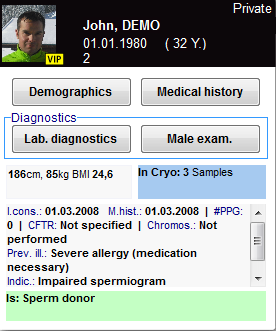
The panels with the data of the female patient (left) and her current partner (right) are used for displaying an overview of the most important patient and medical data, and for accessing all individual patient information. Here you can access patient data, relevant documents, medical histories, samples in cryo storage, laboratory diagnostics, examinations and donations.
 |
 |
|
On the top part of the starting window are indicated the female and male information area (female on the left and male on the right). Each panel displays:
It is possible to access directy to the medical history by clicking on the grey boxes, to the cryostorage for that given patient by clicking on the bluebox or to the donor section by clicking on the green box. Note: The section related to donor information may be not available if donation is not allowed in user's country. |
|
Search for patients
 |
| Go one patient back / forward. |
|
 |
Insert a single patient. |
| Insert a new couple. |
|
| Open all messages in the Communication overview. |
In this section it is possible to search for existing patients or create new patients or couples. To search for a patient just type in surname, date of birth or patient ID. It is also possible to type a part of surname or patient ID in order to find all the patients with the same root. The patient may be selected just double clicking on her/his name. The patient will be shown along with her/his partner (if present).
Messages,lab findings and Donor informations
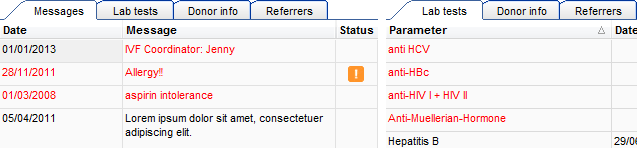 |
| In this area are published the results of lab diagnostics or attention/note messages. You will also find information on linked sperm donations. Choose in the system settings which are the lab parameter to be published. If the parameter is red it means that the lab test has reached the expiry date set by the user. The attention/note messages may be created by the user in the Medical History section. Double clicking on a row containing a message, a finding or the sperm donor info will open the related window. |
Overview of cycles
 |
 |
In the bottom section of the page are summarized the outcome of the previous treatments. The meaning of the columns is explainded in the cycle section.
QM fields: Individual quality management
It is you who knows which data you wish to document:
- You need a study number for certain therapies? No problem.
- You would like to test – for a trial period of one month – what the temperature in the IVF laboratory was during the ICSI and if a window was open? With MedITEX IVF you can do that.
- You are using four different puncture needles and wish to store their users and batch numbers? And add a comment? No problem either.
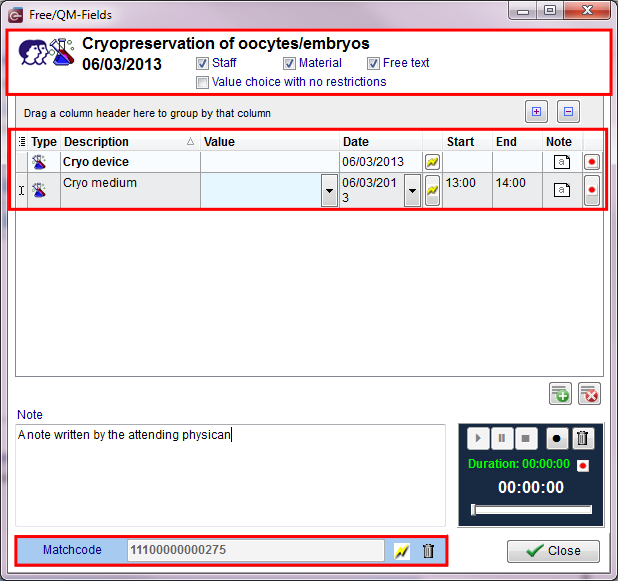
MedITEX IVF offers a continuous QM concept that allows you to add any number of persons, materials, free fields and times to almost any input window. All of this information can be accessed using special buttons, the QM fields.
 |
The QM concept allows you to flexibly define your own “individual” MedITEX IVF. This additional information can of course also be analyzed, together with standard, “hard-coded” fields.
In the QM window you can also record and play voice messages, and use matchcodes with a bar-code reader or a RFID chip.
You can define the content of all QM fields in the settings under the tab “Free / QM Fields” in System -> Settings.
Managing Lists
Every list in MedITEX IVF has several important features:
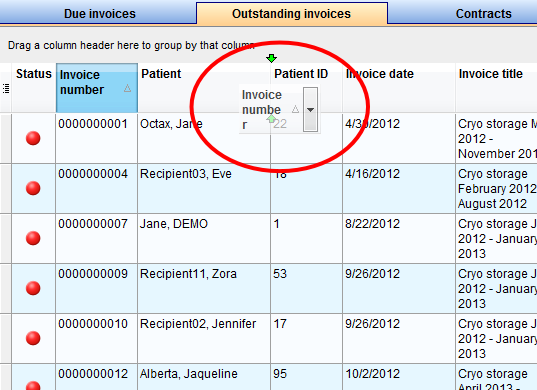
Sort and filter
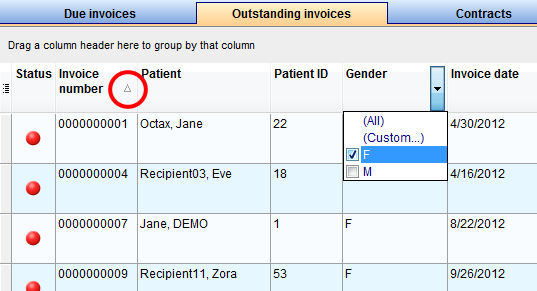
Clicking on the arrow next to the column header, you can filter the table content by the information contained in that row. Therefore, only the information that was checked will be displayed.
To sort the list ascending or descending, simply click on the blue header of the desired column.
For this example, the list is sorted ascending by Invoice number (red circle) and is filtered by Gender so it only shows female patients.
 |
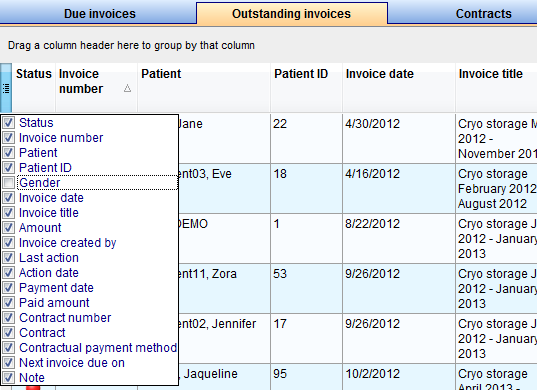
Hide show columns
Some lists have a special button on the left side of the header. This button allows you to hide and move columns.
For this example, the column Gender was unchecked. So when you compare it with the picture above, the whole column Gender is no longer available.
To move columns around from this button, simply click and drag the name of a column up and down. Two green arrows will help positioning the column in place.
 |
Arrange columns
It is also possible to move columns around the list simply by clicking and dragging. Two green arrows will help positioning the column in place.
 |
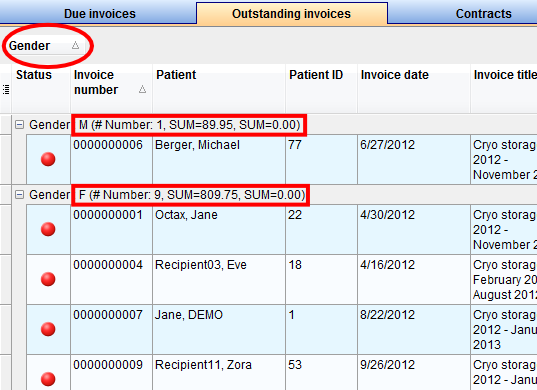
Group
It is also possible to group the content of lists in MedITEXIVF. In order to do that, simply drag a column to the dark gray area on the top of the list. Grouping by more than one column is possible as well.
To revert the list to its original form, simply drag the column back in place.
For this example, the table was grouped by Gender.
 |
Persistence
One of the biggest advantages of managing lists is that each one is saved individually for a user. So next time you log in, MedITEX IVF will display your lists just the way you left them.
| Back to the MedITEX IVF manual | Back to top |