Tab patient appointment
From MedITEX - Wiki
(Difference between revisions)
| Line 77: | Line 77: | ||
<tbody> | <tbody> | ||
<tr> | <tr> | ||
| − | <td>[[Image:NoteIVFInfo.png|none|740px|thumb|left|link=http://wiki.meditex-software.com/images/NoteIVFInfo.png|]</td> | + | <td>[[Image:NoteIVFInfo.png|none|740px|thumb|left|link=http://wiki.meditex-software.com/images/NoteIVFInfo.png|]]</td> |
</tr> | </tr> | ||
<tr> | <tr> | ||
| Line 86: | Line 86: | ||
</tr> | </tr> | ||
<tr> | <tr> | ||
| − | <td>[[Image:NotePredefinedNotes.png|none|740px|thumb|left|link=http://wiki.meditex-software.com/images/NotePredefinedNotes.png|]</td> | + | <td>[[Image:NotePredefinedNotes.png|none|740px|thumb|left|link=http://wiki.meditex-software.com/images/NotePredefinedNotes.png|]]</td> |
</tr> | </tr> | ||
</tbody> | </tbody> | ||
Revision as of 18:12, 15 January 2013
| <img src="/images/patientAppointment.png" alt="" width="498" height="814" /> |
Buttons
Some buttons have special functionalities. Click on it to have more information.
| <img style="display: block; margin-left: auto; margin-right: auto;" src="/images/Plus.png" alt="" /> | Add resource or Note. |
| <img style="display: block; margin-left: auto; margin-right: auto;" src="/images/DeleteX.png" alt="" width="26" height="24" /> | Remove selected resource. |
| <img style="display: block; margin-left: auto; margin-right: auto;" src="/images/CopyAppointment.png" alt="" width="114" height="27" /> | Copy the selected appointment and save it as a new one. |
| <a href="/index.php?title=Scheduler_main_page"><img style="display: block; margin-left: auto; margin-right: auto;" src="/images/DeleteWord.png" alt="" /></a> | Delete the appointment. After deleting, go back to the main window. |
| <a href="/index.php?title=Scheduler_main_page"><img style="display: block; margin-left: auto; margin-right: auto;" src="/images/CancelX.png" alt="" /></a> | Cancel your entry. After canceling, go back to the main window. |
| <a href="/index.php?title=Scheduler_main_page"><img style="display: block; margin-left: auto; margin-right: auto;" src="/images/Save.png" alt="" width="116" height="29" /></a> | Save your entry. After saving, go back to the main window. |
Clickable areas
Some clickable areas have special functionalities. Click on it to have more information.
| <a href="/index.php?title=Scheduler patient data"><img style="display: block; margin-left: auto; margin-right: auto;" src="/images/Patient.png" alt="" width="239" height="108" /></a> |
Personal data of the patient. The loupe show the mask with the personal data of the patient. With the "-'"button can you delete the patient appointment. |
| <img style="display: block; margin-left: auto; margin-right: auto;" src="/images/Treatment.png" alt="" width="253" height="113" /> | Choose the Treatment and the subject. A filter can be set. |
| <img style="display: block; margin-left: auto; margin-right: auto;" src="/images/Start.png" alt="" width="333" height="36" /> | Set the date on the left an the time on the right. |
| <img style="display: block; margin-left: auto; margin-right: auto;" src="/images/Reminder.png" alt="" width="263" height="28" /> | Appointment Reminder. Change the reminder time. |
| <img style="display: block; margin-left: auto; margin-right: auto;" src="/images/Note.png" alt="" width="486" height="98" /> | Add important notes to this appointment. |
Notes
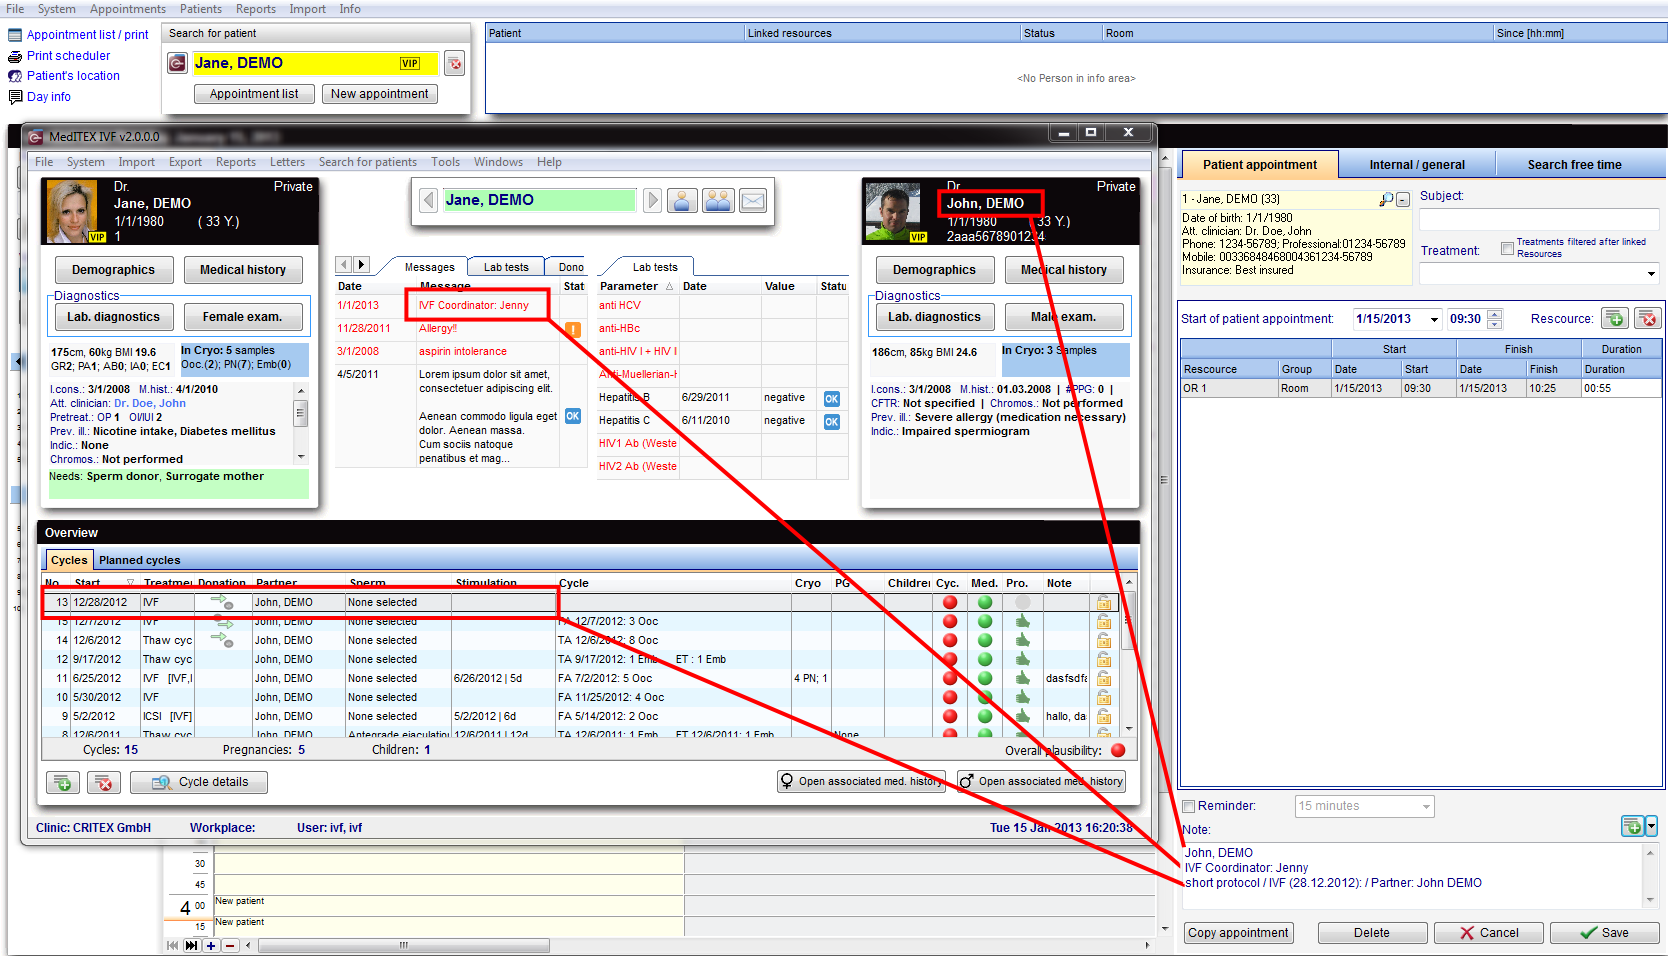
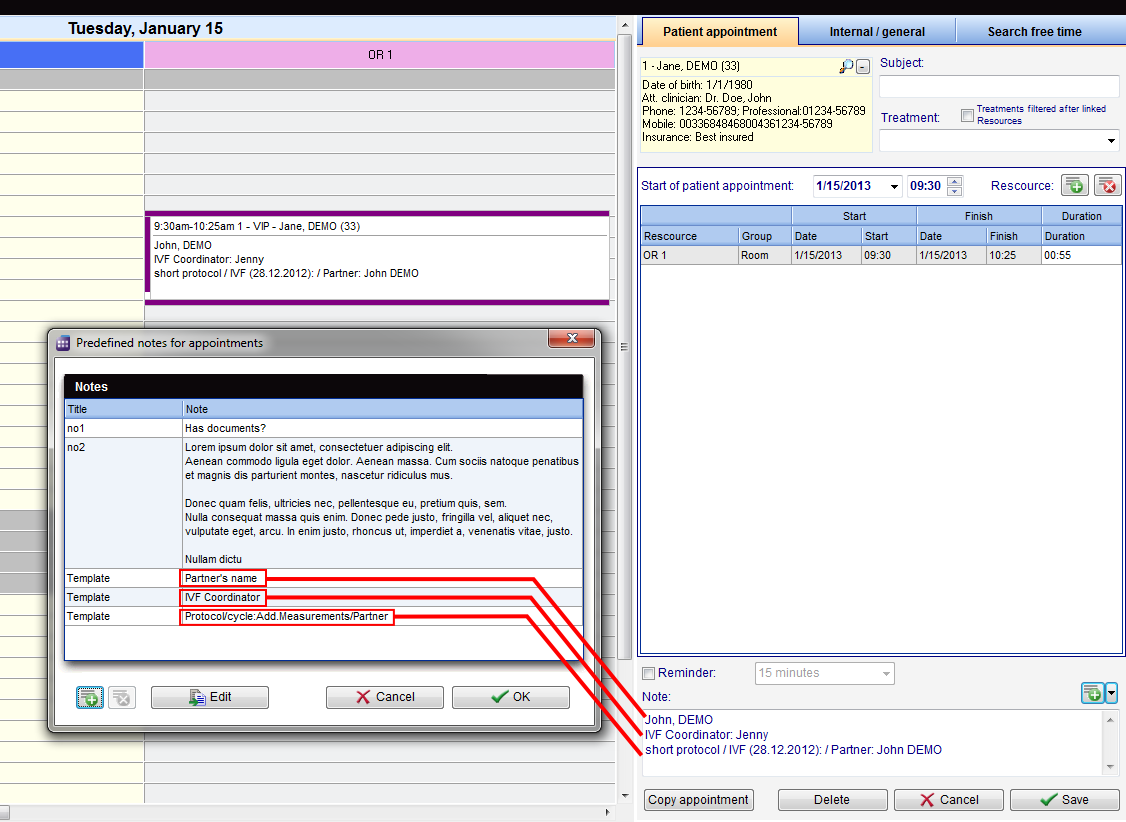
Notes, in the Appointment editor, have the ability to display any information required by the clinic.
This area has two basic functions:
 |
| <img style="display: block; margin-left: auto; margin-right: auto;" src="/images/NoteMouseOver.png" alt="" /> |
| <img style="display: block; margin-left: auto; margin-right: auto;" src="/images/NoteOnAppointment.png" alt="" width="354" height="96" /> |
 |
| <a href="/index.php?title=MedITEX_Scheduler_manual">Back to the MedITEX Scheduler menu </a> | <a href="#top">Back to top</a> |