Scheduler Views
From MedITEX - Wiki
| Line 67: | Line 67: | ||
<h3>Number of displayed resources</h3> | <h3>Number of displayed resources</h3> | ||
<p>When you start MedITEX Scheduler and you have more than three resources defined, the schedule will usually display 4 resources. In the bottom of the schedule you will find small navigation buttons. With "+" you can increase the number of the resources in your view, and with "–" decrease it.</p> | <p>When you start MedITEX Scheduler and you have more than three resources defined, the schedule will usually display 4 resources. In the bottom of the schedule you will find small navigation buttons. With "+" you can increase the number of the resources in your view, and with "–" decrease it.</p> | ||
| − | <table border="0"> | + | <table style="margin-left: auto; margin-right: auto;" border="0"> |
<tbody> | <tbody> | ||
<tr> | <tr> | ||
| − | <td><img src="/images/MainWindowN.png" alt=" | + | <td><img src="/images/MainWindowN.png" alt="" /></td> |
</tr> | </tr> | ||
<tr> | <tr> | ||
| Line 89: | Line 89: | ||
<p style="text-align: justify;"> </p> | <p style="text-align: justify;"> </p> | ||
</td> | </td> | ||
| − | <td><img src="/images/MainDefineRed.png" alt="" /> | + | <td><img style="display: block; margin-left: auto; margin-right: auto;" src="/images/MainDefineRed.png" alt="" /> |
<p> </p> | <p> </p> | ||
| − | <img style="vertical-align: top;" src="/images/fig35.png" alt=" | + | <img style="vertical-align: top;" src="/images/fig35.png" alt="" /></td> |
</tr> | </tr> | ||
</tbody> | </tbody> | ||
| Line 130: | Line 130: | ||
</tbody> | </tbody> | ||
</table> | </table> | ||
| − | |||
<table style="float: right;" border="0"> | <table style="float: right;" border="0"> | ||
<tbody> | <tbody> | ||
Revision as of 10:31, 15 January 2013
There are several possibilities to view the schedule in MedITEX Scheduler. Each user can determine independently from others the order of displayed resources, and which ones should be shown at all. It is also possible to save different presentations in order to use these definitions in the resource quick selection. Upon start of MedITEX Scheduler the resources will always be displayed in the “Day view” which can easily be changed by selecting more days in the months navigation on the left, or by using the buttons “W” for work week view or “T” for time grid view.
Contents |
Scheduler views
Different views
Use the buttons “D”, “W” and “T” to change the view of the schedule in day, work week or time grid view.
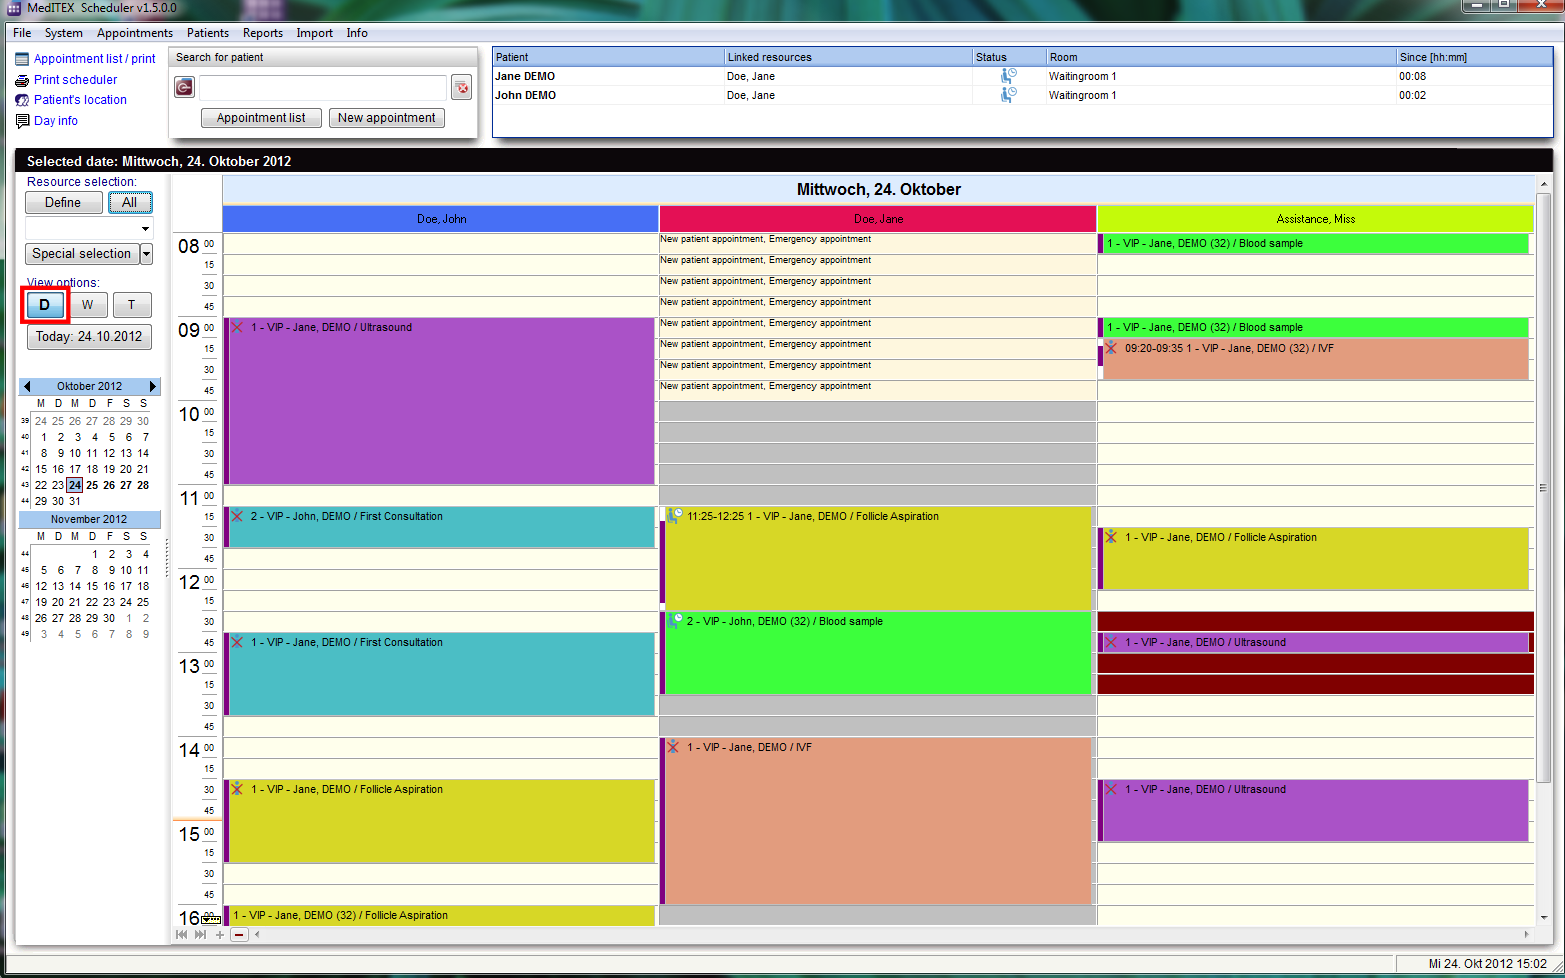 |
| View of a day. |
 |
| View of a work week. |
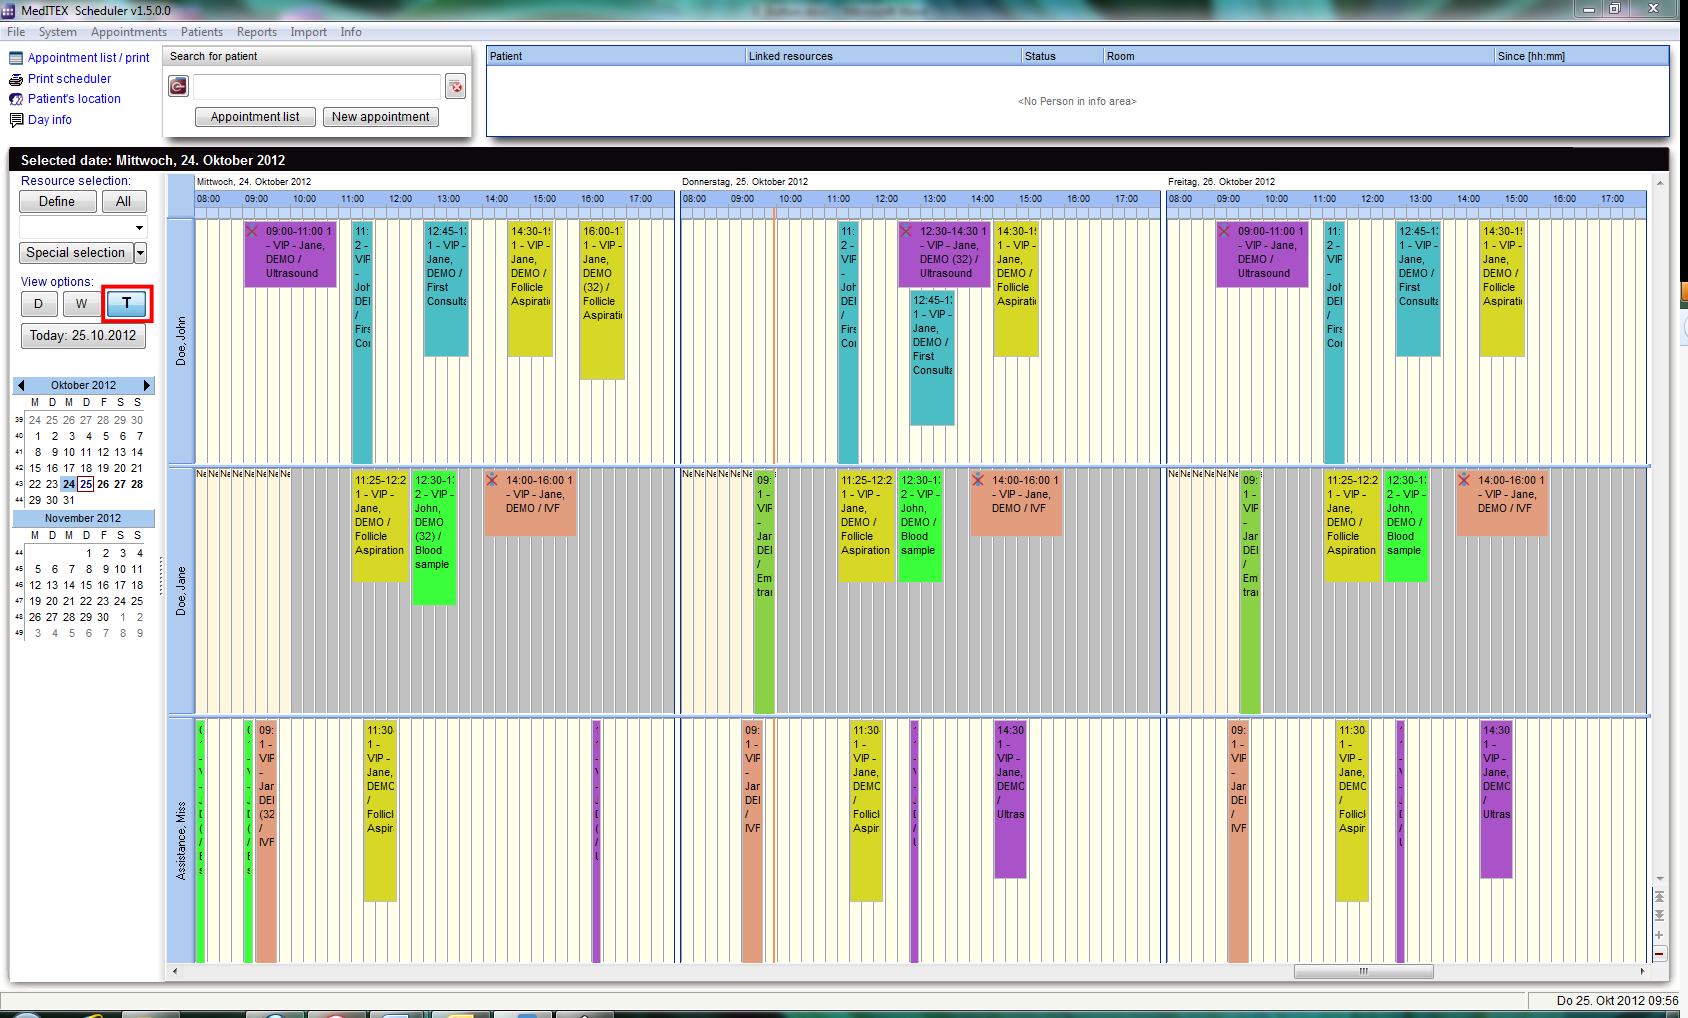 |
| View in a time grid. |
If “Day view” is active, it is possible to select several days in the months navigation.
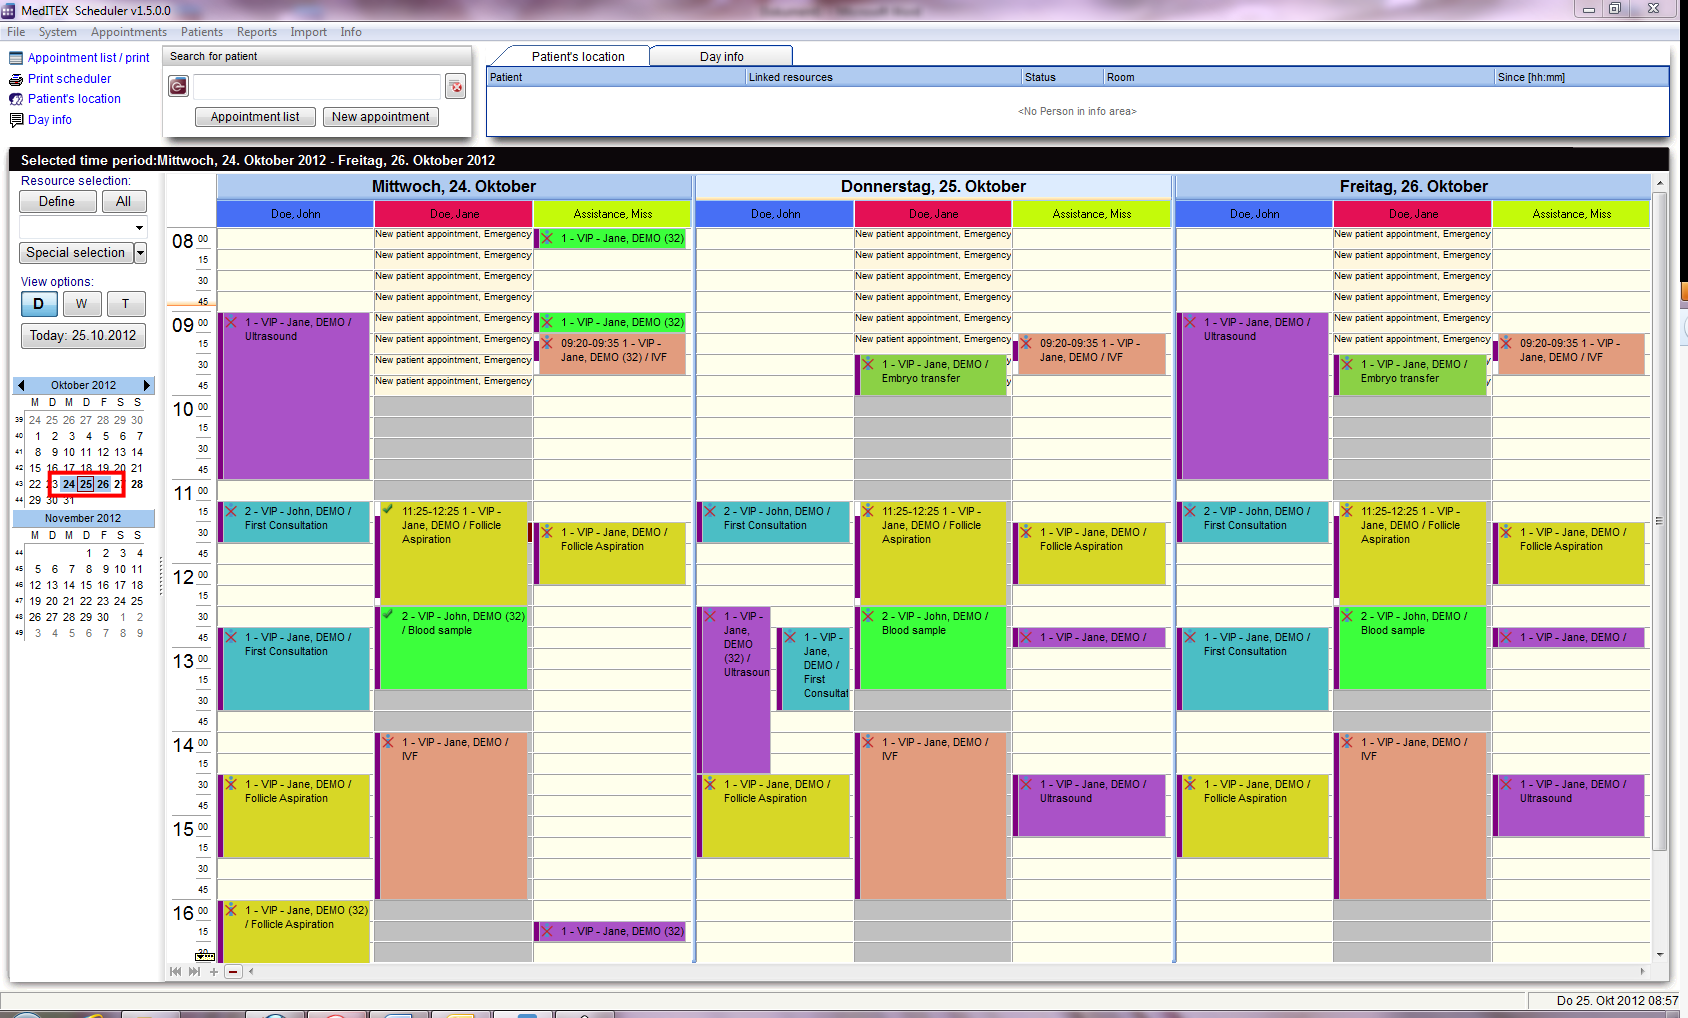 |
| View of several days. |
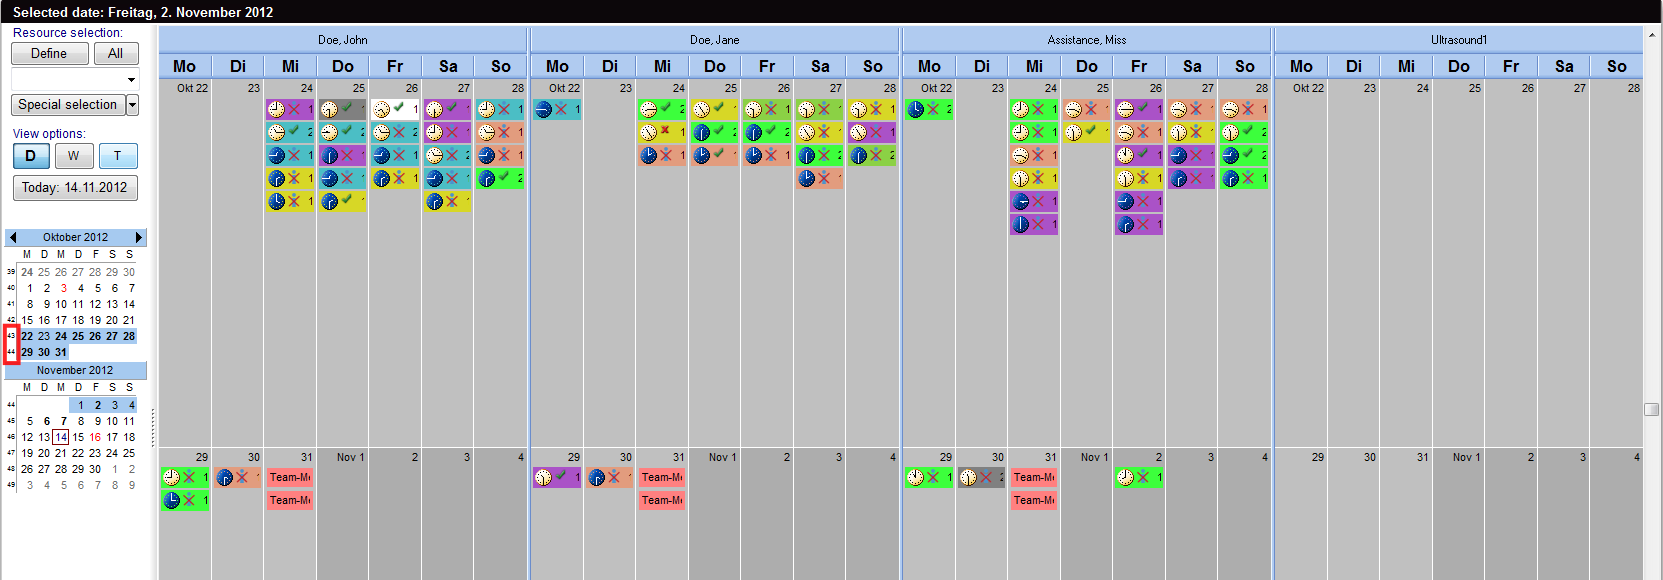 |
| Another option is to mark full weeks with a click on the week number. Here you can see two marked weeks. |
Number of displayed resources
When you start MedITEX Scheduler and you have more than three resources defined, the schedule will usually display 4 resources. In the bottom of the schedule you will find small navigation buttons. With "+" you can increase the number of the resources in your view, and with "–" decrease it.
| <img src="/images/MainWindowN.png" alt="" /> |
| Change the visible resources. |
Resource representation
Display order of resources
|
With a click on the button “Define” you can open a list with all existing and active resources, which were defined in the settings. With this list it is possible to vary the order of resources by moving the selected resource up or down using the corresponding buttons on the right side. This order will be saved for each user individually. So if you quit Scheduler and log back in, you will see the order as you have left.
|
<img style="display: block; margin-left: auto; margin-right: auto;" src="/images/MainDefineRed.png" alt="" />
<img style="vertical-align: top;" src="/images/fig35.png" alt="" /> |
Quick selection of different sets of resources
All groups that contain at least one resource are listed in the drop-down box beneath “Resource selection”. If you select one of these groups, all resources belonging to this group will immediately be displayed in the calendar.
 |
 |
Besides selecting groups of resources defined in Scheduler settings, you can also define your own set of resources: by using the “Resource selection” view (accessible on “Define” button), you can create your own combination of resources for a quicker selection, which you have to save as set by giving a name in the field “Title” and clicking on “OK”. These sets will be saved individually for each user.
| In the following example, the three resources “Doe, John”, “OR 2” and “Nurse 1” are selected and saved as a set named “OR 1”. | <img src="/images/ResourceSelNewRed.png" alt="" width="520" height="466" /> |
 |
| These definitions will be shown in the drop down list for a quicker selection, together with predefined resource groups. |
| <a href="/index.php?title=MedITEX_Scheduler_manual">Back to the MedITEX Scheduler menu </a> | <a href="#top">Back to top</a> |