Queries of Report editor
From MedITEX - Wiki
(Difference between revisions)
| Line 1: | Line 1: | ||
| − | <p>To open the Report editor, go to Report -> Report editor in the menu bar.</p> | + | <p>To open the Report editor, go to <strong>Report -> Report editor in the menu bar</strong>.</p> |
| − | <p>For better understanding, we divide the window into "1. Selection" and "2. Queries".</p> | + | <p>For better understanding, we divide the window into <strong>"1. Selection"</strong> and <strong>"2. Queries"</strong>.</p> |
<table border="0"> | <table border="0"> | ||
<tbody> | <tbody> | ||
| Line 14: | Line 14: | ||
<td><img src="/images/Tables1RE.png" alt="" width="327" height="473" /></td> | <td><img src="/images/Tables1RE.png" alt="" width="327" height="473" /></td> | ||
<td> | <td> | ||
| − | <p>On the left, all the tables and fields are placed which you can use for your query:</p> | + | <p><strong>On the left, all the tables and fields are placed which you can use for your query:</strong></p> |
<ul> | <ul> | ||
<li>Patients</li> | <li>Patients</li> | ||
| Line 63: | Line 63: | ||
<td><img src="/images/Person1RE.png" alt="" width="400" /></td> | <td><img src="/images/Person1RE.png" alt="" width="400" /></td> | ||
<td> | <td> | ||
| − | <p><span class="short_text" lang="en"><span class="hps">In the right pane the fields will appear for each chosen group:</span></span></p> | + | <p><strong><span class="short_text" lang="en"><span class="hps">In the right pane the fields will appear for each chosen group:</span></span></strong></p> |
<p><span class="short_text" lang="en"><span class="hps">there you can select which fields should appear in the result.</span></span></p> | <p><span class="short_text" lang="en"><span class="hps">there you can select which fields should appear in the result.</span></span></p> | ||
<p><span class="short_text" lang="en"><span class="hps"><br /></span></span></p> | <p><span class="short_text" lang="en"><span class="hps"><br /></span></span></p> | ||
Revision as of 12:34, 3 December 2012
To open the Report editor, go to Report -> Report editor in the menu bar.
For better understanding, we divide the window into "1. Selection" and "2. Queries".
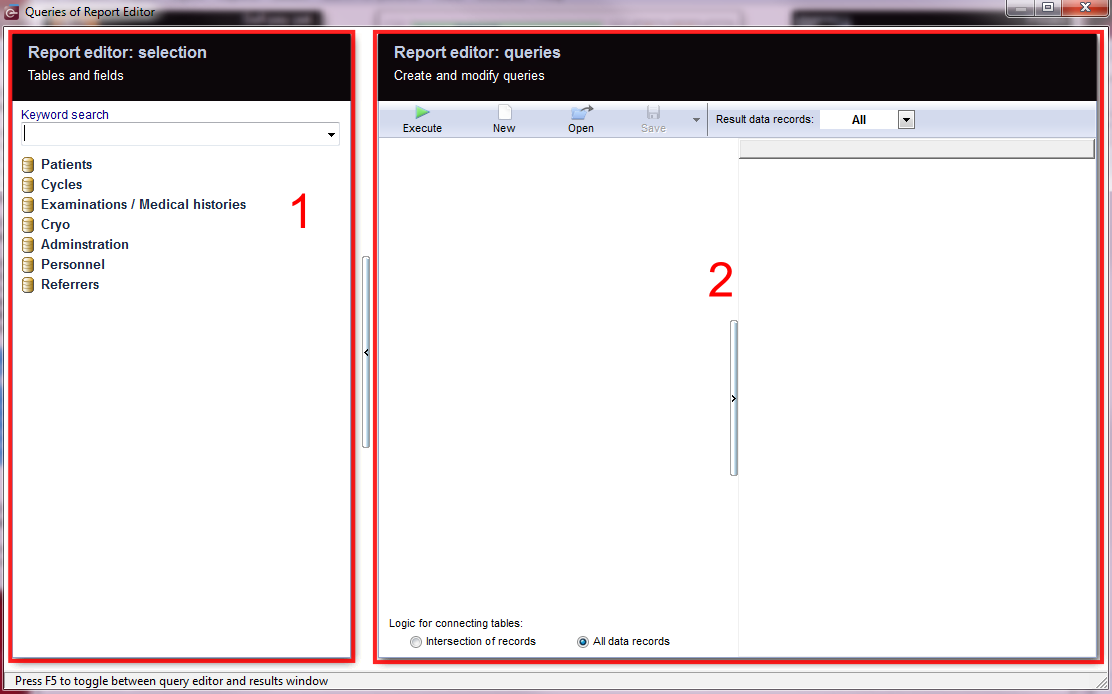 |
1. Selection - Tabels and fields
| <img src="/images/Tables1RE.png" alt="" width="327" height="473" /> |
On the left, all the tables and fields are placed which you can use for your query:
Pull subgroups from the left in the middle pane to build a query.
|
2. Queries - Create and modify queries
Menu bar
| <img style="display: block; margin-left: auto; margin-right: auto;" src="/images/ExecuteRE.png" alt="" width="89" height="38" /> | |
| <img style="display: block; margin-left: auto; margin-right: auto;" src="/images/NewRE.png" alt="" width="88" height="36" /> | |
| <img style="display: block; margin-left: auto; margin-right: auto;" src="/images/OpenRE.png" alt="" width="92" height="37" /> | |
| <img style="display: block; margin-left: auto; margin-right: auto;" src="/images/SaveRE.png" alt="" width="89" height="83" /> | |
| <img style="display: block; margin-left: auto; margin-right: auto;" src="/images/ResultRE.png" alt="" width="208" height="91" /> |
| <img src="/images/Person1RE.png" alt="" width="400" /> |
In the right pane the fields will appear for each chosen group: there you can select which fields should appear in the result. |
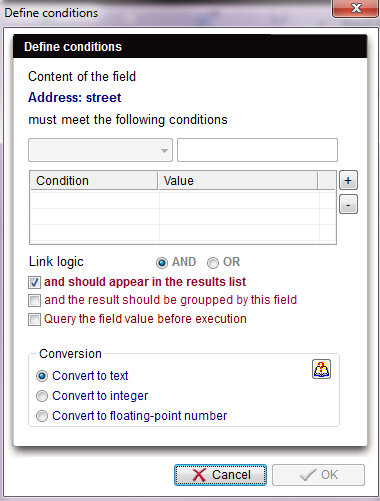
| <img style="display: block; margin-left: auto; margin-right: auto;" src="/images/Street.png" alt="" width="146" height="53" /> | |
|
To define conditions on a certain field, double click it's label. |
|
 |