MedITEX Accounting - menu bar
From MedITEX - Wiki
| Line 121: | Line 121: | ||
</tbody> | </tbody> | ||
</table> | </table> | ||
| − | + | <h4></h4> | |
| − | + | ||
| − | + | ||
| − | <h4> | + | |
| − | + | ||
| − | + | ||
| − | + | ||
| − | + | ||
| − | + | ||
| − | + | ||
| − | + | ||
| − | + | ||
| − | + | ||
| − | + | ||
| − | + | ||
| − | + | ||
| − | + | ||
| − | + | ||
| − | + | ||
| − | + | ||
| − | + | ||
| − | + | ||
| − | + | ||
| − | + | ||
| − | + | ||
| − | + | ||
| − | + | ||
| − | + | ||
| − | + | ||
| − | + | ||
| − | + | ||
| − | + | ||
| − | + | ||
| − | + | ||
| − | + | ||
| − | + | ||
| − | + | ||
| − | + | ||
| − | + | ||
| − | + | ||
| − | + | ||
| − | + | ||
| − | + | ||
| − | + | ||
| − | + | ||
| − | + | ||
| − | + | ||
| − | + | ||
| − | + | ||
| − | + | ||
| − | + | ||
| − | + | ||
| − | + | ||
| − | + | ||
| − | + | ||
| − | + | ||
| − | + | ||
| − | + | ||
| − | + | ||
| − | + | ||
| − | + | ||
| − | + | ||
| − | + | ||
| − | + | ||
| − | + | ||
| − | + | ||
| − | + | ||
| − | + | ||
| − | + | ||
| − | + | ||
| − | + | ||
| − | + | ||
| − | + | ||
| − | + | ||
| − | + | ||
| − | + | ||
| − | + | ||
| − | + | ||
| − | + | ||
<table style="float: right;" border="0"> | <table style="float: right;" border="0"> | ||
<tbody> | <tbody> | ||
Revision as of 10:30, 26 August 2013
| <img src="/images/MenubarAcc.png" alt="" width="765" height="149" /> |
Contents |
Search for patients
| <img src="/images/PatientSearchAcc.png" alt="" width="300" height="35" /> |
In this section, it is possible to search for existing patients. It is possible to search for patients using name, date of birth, patientID or phone number . It is also possible to type a part of name or patient ID in order to find all the patients with similar names.
To select a patient from the list, double-click his or her name. The window will refresh, displaying the selected patient.
| <img src="/images/SearchAcc.png" alt="" width="600" height="284" /> |
Buttons
Buttons with a blue dotted frame have special functionalities. Click on it to have more information.
| <a href="/index.php?title=MedITEX_Accounting_-_menu_bar#Go_to_partner"><img style="display: block; margin-left: auto; margin-right: auto; border: 2px dotted blue;" src="/images/GoToPartnerAcc.png" alt="" width="91" height="35" /></a> | <a href="/index.php?title=MedITEX_Accounting_-_menu_bar#Go_to_partner">Go to partner</a> |
| <a href="/index.php?title=MedITEX_Accounting_-_menu_bar#New_invoice_.2F_items"><img style="display: block; margin-left: auto; margin-right: auto; border: 2px dotted blue;" src="/images/NewInvoiceItemsAcc.png" alt="" width="111" height="38" /></a> | <a href="/index.php?title=MedITEX_Accounting_-_menu_bar#New_invoice_.2F_items">New invoice / items</a> |
| <a href="/index.php?title=MedITEX_Accounting_-_menu_bar#New_booking"><img style="display: block; margin-left: auto; margin-right: auto; border: 2px dotted blue;" src="/images/NewBookingAcc.png" alt="" width="82" height="37" /></a> | <a href="/index.php?title=MedITEX_Accounting_-_menu_bar#New_booking">New booking</a> |
| <a href="/index.php?title=MedITEX_Accounting_-_menu_bar#MedITEX_IVF"><img style="display: block; margin-left: auto; margin-right: auto; border: 2px dotted blue;" src="/images/GoToMedITEXIVFAcc.png" alt="" width="80" height="38" /></a> | <a href="/index.php?title=MedITEX_Accounting_-_menu_bar#MedITEX_IVF">MedITEX IVF</a> |
| <a href="/index.php?title=MedITEX_Accounting_-_menu_bar#Print"><img style="display: block; margin-left: auto; margin-right: auto; border: 2px dotted blue;" src="/images/PrintAcc.png" alt="" width="74" height="36" /></a> | <a href="/index.php?title=MedITEX_Accounting_-_menu_bar#Print">Print</a> |
| <a href="/index.php?title=MedITEX_Accounting_-_menu_bar#Export"><img style="display: block; margin-left: auto; margin-right: auto; border: 2px dotted blue;" src="/images/ExportAcc.png" alt="" /></a> | <a href="/index.php?title=MedITEX_Accounting_-_menu_bar#Export">Export</a> |
| <a href="/index.php?title=Welcome_to_MedITEX_Accounting"><img style="display: block; margin-left: auto; margin-right: auto; border: 2px dotted blue;" src="/images/SettingsAcc.png" alt="" width="59" height="38" /></a> | <a href="/index.php?title=Welcome_to_MedITEX_Accounting">Settings</a> |
Go to partner
The accounting module switches to the partner of the current person and shows his/her accounting items and invoices.
New invoice / items
New booking
To enter a new booking you need to follow the following steps:
- Enter the Transaction: Pay invoice, pay invoice with current account balance, issue a credit note or Prepayment. You can only edit the other fields if this field is filled.
- The name of the patient will be filled automatically with the actual person. To change that, delete the name with the Red Cross button on the right and search another patient. In the little grey field on the right side you can see a short summary of the most important data of the patient.
- Enter the date of the booking. The current date appears automatically.
- Contribute the amount of the booking and choose a payment method: Bank transfer, cash or direct debit.
- The name of the logged in employee appears in the field staff. If you want to change the name of the staff, choose another one from the list.
- If it is necessary add a note.
- As last step you have to select an invoice from the list.
| Bild |
MedITEX IVF
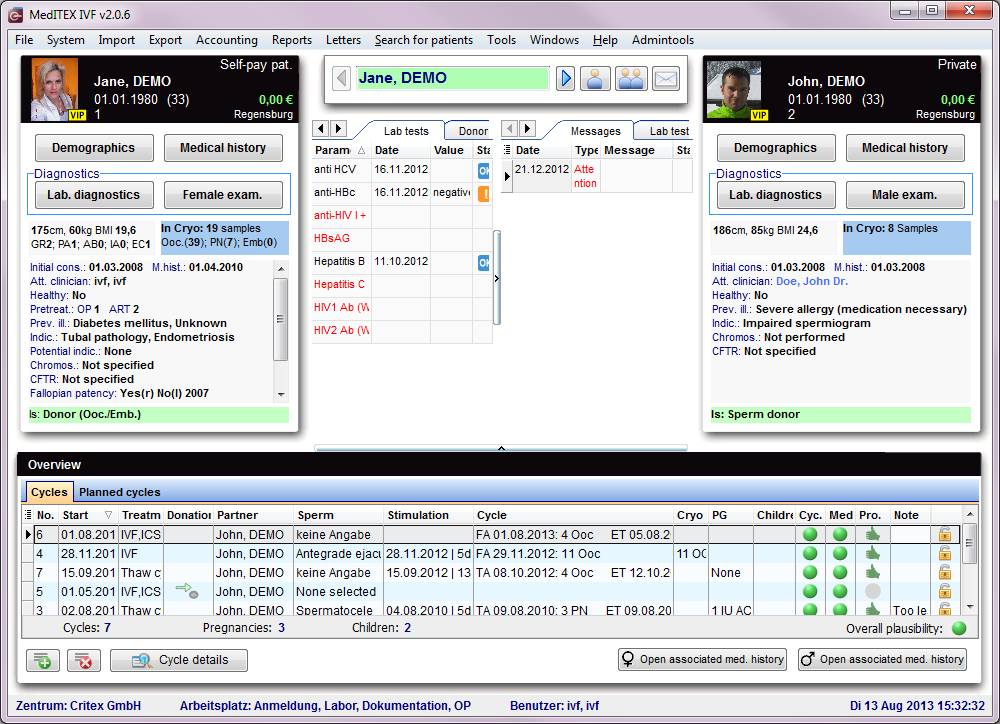
If you click the button MedITEX IVF the program MedITEX IVF will be opened at the overview window of the current patient / couple.
The user will be the same as the logged in user in MedITEX Accounting. You do not have to enter your password again.
 |
With the print button you can print each range of the accounting module. Open the wished area with a click on the associated link in the sidebar and click subsequently the print button. A print preview window will be open where you can change the print settings.
Export
Settings
| <a href="/index.php?title=Welcome_to_MedITEX_Accounting"><img style="display: block; margin-left: auto; margin-right: auto; border: 2px dotted blue;" src="/images/SettingsAcc.png" alt="" width="59" height="38" /></a> | <a href="/index.php?title=Welcome_to_MedITEX_Accounting">Click here</a> to go directly to the settings page. |
| <a href="/index.php?title=MedITEX_Accounting_manual">Back to the MedITEX Accounting manual </a> | <a href="#top">Back to top</a> |