Lab diagnostics male
From MedITEX - Wiki
(Difference between revisions)
| Line 1: | Line 1: | ||
| + | <p>In the section <strong>“Lab Diagnostics”</strong>, you can enter all patient-related lab results. These include hormones, clinical chemistry and serology, genetics, microbiology and semen analysis.</p> | ||
<table border="0"> | <table border="0"> | ||
<tbody> | <tbody> | ||
<tr> | <tr> | ||
| − | <td>[[Image: | + | <td>[[Image:LabMan.png|none|740px|thumb|left|link=http://wiki.meditex-software.com/images/LabMan.png| ]]</td> |
</tr> | </tr> | ||
</tbody> | </tbody> | ||
| Line 8: | Line 9: | ||
<p style="text-align: justify;"><strong>The Lab diagnostics page is divided in two main parts:</strong></p> | <p style="text-align: justify;"><strong>The Lab diagnostics page is divided in two main parts:</strong></p> | ||
<ul> | <ul> | ||
| − | <li> The upper contains | + | <li> The upper contains some anthropometric data. </li> |
| − | <li>The lower section contains a list of all Lab exames performed and | + | <li>The lower section contains a list of all Lab exames performed and a section containing a list of all the spermiogram performed.</li> |
</ul> | </ul> | ||
| − | <p style="text-align: justify;"><em> | + | <p style="text-align: justify;"><em></em></p> |
<h2 style="text-align: justify;">Buttons</h2> | <h2 style="text-align: justify;">Buttons</h2> | ||
<table border="0"> | <table border="0"> | ||
Revision as of 13:34, 10 December 2012
In the section “Lab Diagnostics”, you can enter all patient-related lab results. These include hormones, clinical chemistry and serology, genetics, microbiology and semen analysis.
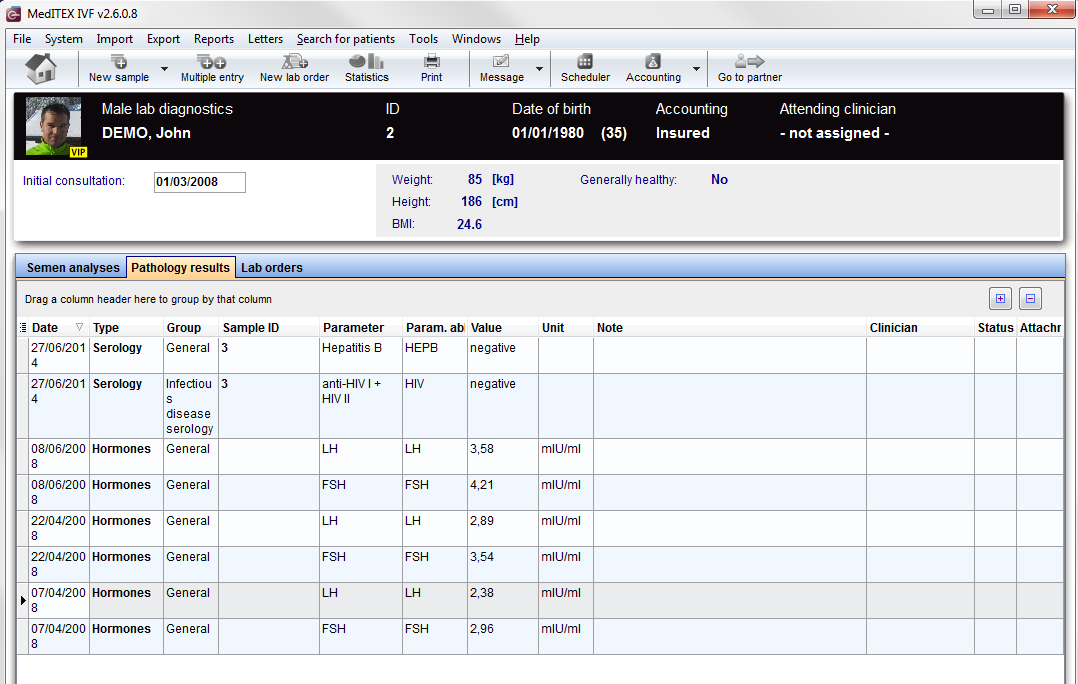 |
The Lab diagnostics page is divided in two main parts:
- The upper contains some anthropometric data.
- The lower section contains a list of all Lab exames performed and a section containing a list of all the spermiogram performed.
Buttons
| <a href="/index.php?title=Starting_mask"><img style="display: block; margin-left: auto; margin-right: auto;" src="/images/homeico.jpg" alt="" width="70" height="37" /></a> | "Home" button: Click on this icon to go to the starting window. |
| <a href="/index.php?title=Documenting_a_new_sample#Documenting_a_new_.22single.22_sample"><img style="display: block; margin-left: auto; margin-right: auto;" src="/images/newsampico.jpg" alt="" width="92" height="35" /></a> | New sample: Click on this icon to document a new sample. |
| <a href="/index.php?title=Documenting_a_new_sample#Documenting_a_new_.22multiple.22_entry.C2.A0"><img style="display: block; margin-left: auto; margin-right: auto;" src="/images/multentrico.jpg" alt="" width="79" height="35" /></a> | Multiple entry: Click on this icon to document many new samples at a time. |
| <img style="display: block; margin-left: auto; margin-right: auto;" src="/images/LabOrder.png" alt="" /> | Lab order: |
| <a href="/index.php?title=Creating_graphical_representation_of_lab_values"><img style="display: block; margin-left: auto; margin-right: auto;" src="/images/statico.jpg" alt="" width="60" height="35" /></a> | Statistics: Click on this icon to create a graphical representation of lab values. |
| <img style="display: block; margin-left: auto; margin-right: auto;" src="/images/print.jpg" alt="" width="70" height="35" /> | Print: Click on this icon to print the list of lab samples. |
| <img style="display: block; margin-left: auto; margin-right: auto;" src="/images/NewMessage.png" alt="" width="106" height="39" /> | New message: |
| <img style="display: block; margin-left: auto; margin-right: auto;" src="/images/gotoparico.jpg" alt="" width="80" height="35" /> | Go to partner: Click here to go to the partner's Lab diagnostics. |
| <img style="display: block; margin-left: auto; margin-right: auto;" src="/images/PM.png" alt="" width="65" height="27" /> |
With these two buttons you can decide how much rows you see in the list. (Expand all rows, Collapse all rows) |
Clickable areas
Some clickable areas have special functionalities. Click on it to have more information.
| <img src="/images/Initial.png" alt="" width="240" height="33" /> | Here you can add the date of initial consultation. |
| <img src="/images/AreaNon.png" alt="" width="360" height="74" /> | It is no clickable area. You can see informations about the physique of the patient. |
| <img src="/images/PreviousPreg.png" alt="" width="240" height="22" /> |
Only for women: Previous pregnancies: Click on this link to open a window showing more info related to previous pregnancies' outcome. |
| <a href="/index.php?title=MedITEX_IVF_manual">Back to the MedITEX IVF menu </a> | <a href="#top">Back to top</a> |