How to transfer ultrasound images via DICOM?
From MedITEX - Wiki
| Line 1: | Line 1: | ||
| − | <p>Before transferring images, | + | <p>Before transferring images, it is necessary to define a DICOM identifier for treatments. The configuration has to be done in <strong>MedITEX Scheduler</strong>. After that the ultrasound images will be stored in <strong>MedITEX IVF.</strong></p> |
| − | <p>On the top menu, go to <strong>System -> Settings -> Treatments</strong>.</p> | + | <p> </p> |
| + | <h2>Configuration</h2> | ||
| + | <p>On the top menu in MedITEX Scheduler, go to <strong>System -> Settings -> Treatments</strong>.</p> | ||
<table style="margin-left: auto; margin-right: auto;" border="0"> | <table style="margin-left: auto; margin-right: auto;" border="0"> | ||
<tbody> | <tbody> | ||
| Line 24: | Line 26: | ||
</table> | </table> | ||
<p> </p> | <p> </p> | ||
| − | <p>When starting an examination on the ultrasound device, search for the patient in the work-list.</p> | + | <h2>Usage</h2> |
| − | <p>Switch the search mode of the ultrasound device to “Worklist”.</p> | + | <p>1. When starting an examination on the ultrasound device, search for the patient in the work-list.</p> |
| − | <p>All patients with treatments containing a <strong>DICOM identifier</strong> will be listed.</p> | + | <p>2. Switch the search mode of the ultrasound device to “Worklist”.</p> |
| − | <p>Select the patient and begin work as usual.</p> | + | <p>3. All patients with treatments containing a <strong>DICOM identifier</strong> will be listed.</p> |
| + | <p>4. Select the patient and begin work as usual.</p> | ||
<p>After the examination is finished, the ultrasound images will be transferred automatically to <strong>MedITEX IVF</strong> and will be available in the <strong>Overview </strong>tab for the cycle, if it exists. If no cycle exists on the examination date, images will be saved in the <strong>Female examination </strong>section of <strong>MedITEX IVF</strong>.</p> | <p>After the examination is finished, the ultrasound images will be transferred automatically to <strong>MedITEX IVF</strong> and will be available in the <strong>Overview </strong>tab for the cycle, if it exists. If no cycle exists on the examination date, images will be saved in the <strong>Female examination </strong>section of <strong>MedITEX IVF</strong>.</p> | ||
<table style="float: right;" border="0"> | <table style="float: right;" border="0"> | ||
Revision as of 13:02, 13 January 2014
Before transferring images, it is necessary to define a DICOM identifier for treatments. The configuration has to be done in MedITEX Scheduler. After that the ultrasound images will be stored in MedITEX IVF.
Configuration
On the top menu in MedITEX Scheduler, go to System -> Settings -> Treatments.
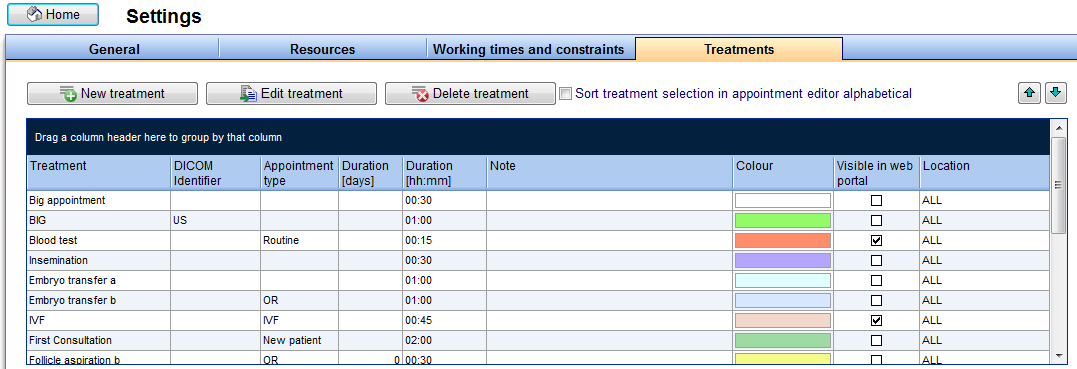 |
Open an existing treatment or create a new treatment.
New treatments can be created with the New treatment button or existing ones can be edited by the double-clicking from the list of treatments.
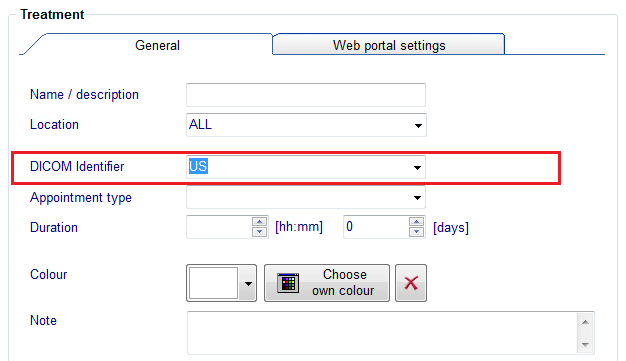
On this new window, give this treatment a DICOM Identifier.
 |
Usage
1. When starting an examination on the ultrasound device, search for the patient in the work-list.
2. Switch the search mode of the ultrasound device to “Worklist”.
3. All patients with treatments containing a DICOM identifier will be listed.
4. Select the patient and begin work as usual.
After the examination is finished, the ultrasound images will be transferred automatically to MedITEX IVF and will be available in the Overview tab for the cycle, if it exists. If no cycle exists on the examination date, images will be saved in the Female examination section of MedITEX IVF.
| <a href="/index.php?title=DICOM_interface">Back to DICOM interface </a> | <a href="#top">Back to top</a> |