How to set rights with user groups?
From MedITEX - Wiki
(Difference between revisions)
| Line 14: | Line 14: | ||
</ul> | </ul> | ||
<p> </p> | <p> </p> | ||
| − | |||
<p> </p> | <p> </p> | ||
| + | <p><strong>Example:</strong></p> | ||
<ol> | <ol> | ||
<li>Press the <img src="/images/Plus.png" alt="" width="23" height="23" /> button at the top.</li> | <li>Press the <img src="/images/Plus.png" alt="" width="23" height="23" /> button at the top.</li> | ||
Revision as of 15:19, 22 May 2013
To assign rights to multiple users by categorizing them into groups, open the tab Administration of user groups.
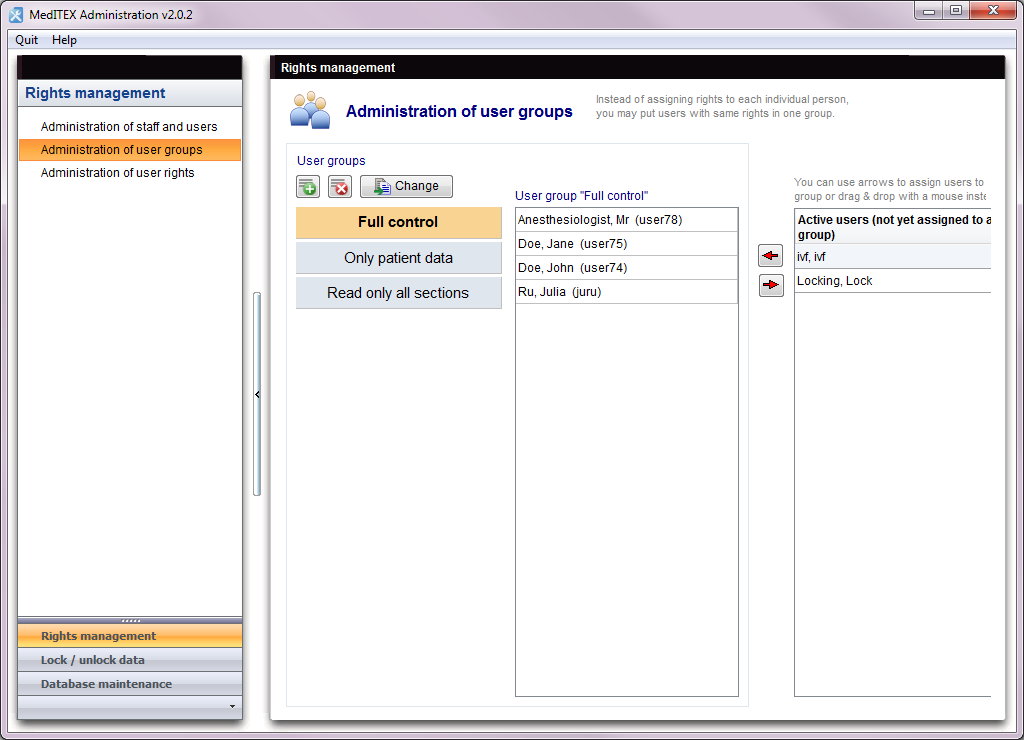 |
In this window you can see three user groups.
- You can simply add a new one with the <img src="/images/Plus.png" alt="" width="23" height="23" /> button at the top.
- Enter a new name and click OK.
- If you click at the tab Administration of user rights, you can find your new group and fill it with users and give them rights.
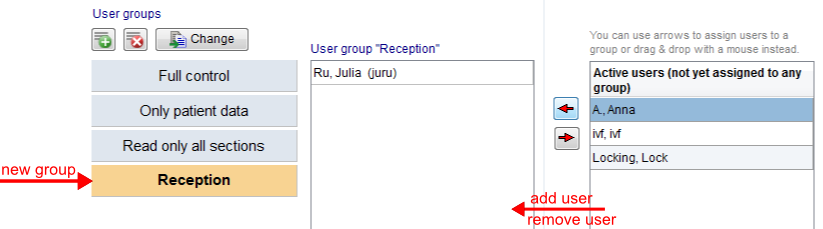
Example:
- Press the <img src="/images/Plus.png" alt="" width="23" height="23" /> button at the top.
- Enter a new group name "Reception" in the input window and click OK.
 |
3. Select the group and add / remove user.
 |
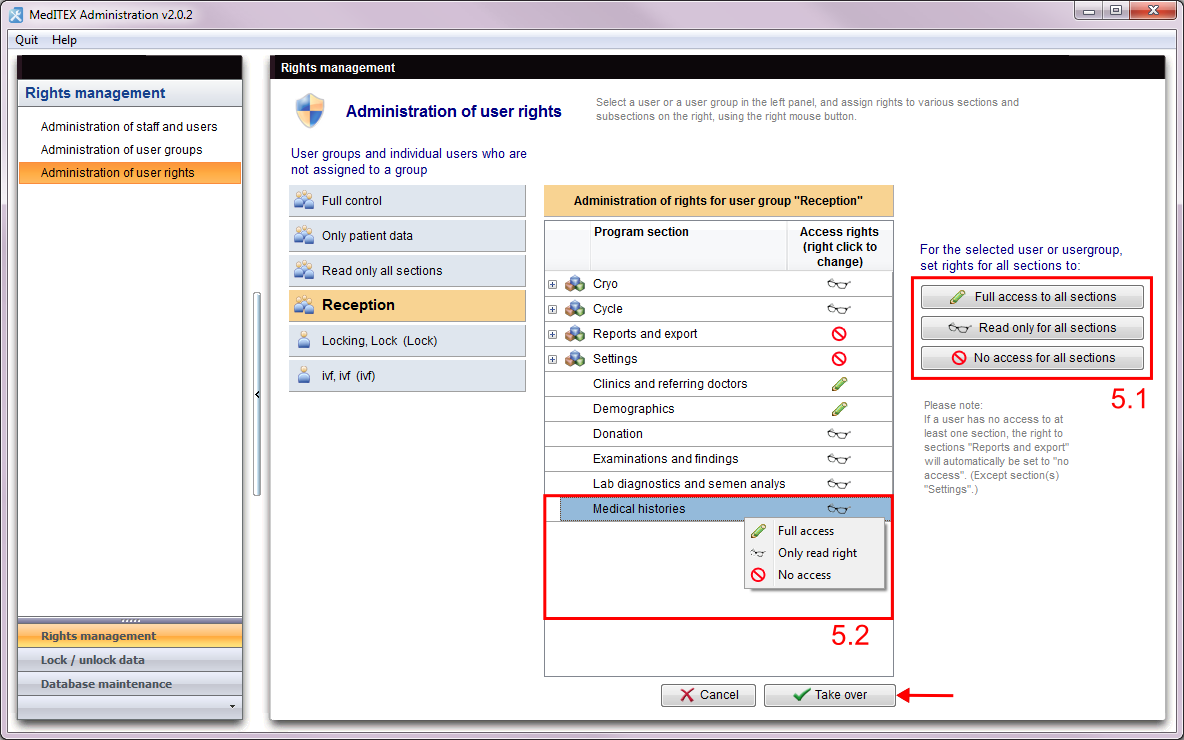
4. Go to the tab Administration of user rights. Here you can see all available groups and their defined rights.
5. Choose the group Reception. Now you can set rights for this group. There are two ways:
5.1 Set full access / read only / no access for all sections or
5.2 set access in detail with a right click at the different sections.
 |
| <a href="/index.php?title=MedITEX_Administration_how_to">Back to How to</a> | <a href="#top">Back to top</a> |