How to set rights with user groups?
From MedITEX - Wiki
(Difference between revisions)
| Line 1: | Line 1: | ||
| + | <p>To assign rights to multiple users by categorizing them into groups, open the tab <strong>Administration of user groups</strong>.</p> | ||
<table style="margin-left: auto; margin-right: auto;" border="0" width="111" height="24"> | <table style="margin-left: auto; margin-right: auto;" border="0" width="111" height="24"> | ||
<tbody> | <tbody> | ||
<tr> | <tr> | ||
| − | <td>[[Image:Administration1.png|none|740px|thumb|left|link=http://wiki.meditex-software.com/images/Administration1.png|Administration of user groups.]]</td> | + | <td>[[Image:Administration1.png|none|740px|thumb|left|link=http://wiki.meditex-software.com/images/Administration1.png|Administration of user groups.]]</td> |
</tr> | </tr> | ||
</tbody> | </tbody> | ||
</table> | </table> | ||
| − | <p> | + | <p>In this window you can see three user groups.</p> |
| + | <ul> | ||
| + | <li>You can simply add a new one with the <img src="/images/Plus.png" alt="" width="23" height="23" /> button at the top.</li> | ||
| + | <li>Enter a new name and click OK. </li> | ||
| + | <li>If you click at the tab <strong>Administration of user rights</strong>, you can find your <strong>new group</strong> and <strong>fill it with users</strong> and <strong>give them rights</strong>.</li> | ||
| + | </ul> | ||
| + | <p> </p> | ||
| + | <p><strong>Example:</strong></p> | ||
| + | <p>1. Press the <img src="/images/Plus.png" alt="" width="23" height="23" /> button at the top.</p> | ||
| + | <p>2. Enter a new group name "Reception" in the input window and click OK.</p> | ||
| + | <table style="margin-left: auto; margin-right: auto;" border="0" width="111" height="24"> | ||
| + | <tbody> | ||
| + | <tr> | ||
| + | <td>[[Image:Administration2.png|none|740px|thumb|left|link=http://wiki.meditex-software.com/images/Administration2.png|]]</td> | ||
| + | </tr> | ||
| + | </tbody> | ||
| + | </table> | ||
| + | <p>3. Select the group and add / remove user.</p> | ||
| + | <table style="margin-left: auto; margin-right: auto;" border="0" width="111" height="24"> | ||
| + | <tbody> | ||
| + | <tr> | ||
| + | <td>[[Image:Administration3.png|none|740px|thumb|left|link=http://wiki.meditex-software.com/images/Administration3.png|]]</td> | ||
| + | </tr> | ||
| + | </tbody> | ||
| + | </table> | ||
| + | <p> </p> | ||
| + | <p> </p> | ||
| + | <p> </p> | ||
| + | <p> </p> | ||
<p> </p> | <p> </p> | ||
<p> </p> | <p> </p> | ||
Revision as of 15:03, 22 May 2013
To assign rights to multiple users by categorizing them into groups, open the tab Administration of user groups.
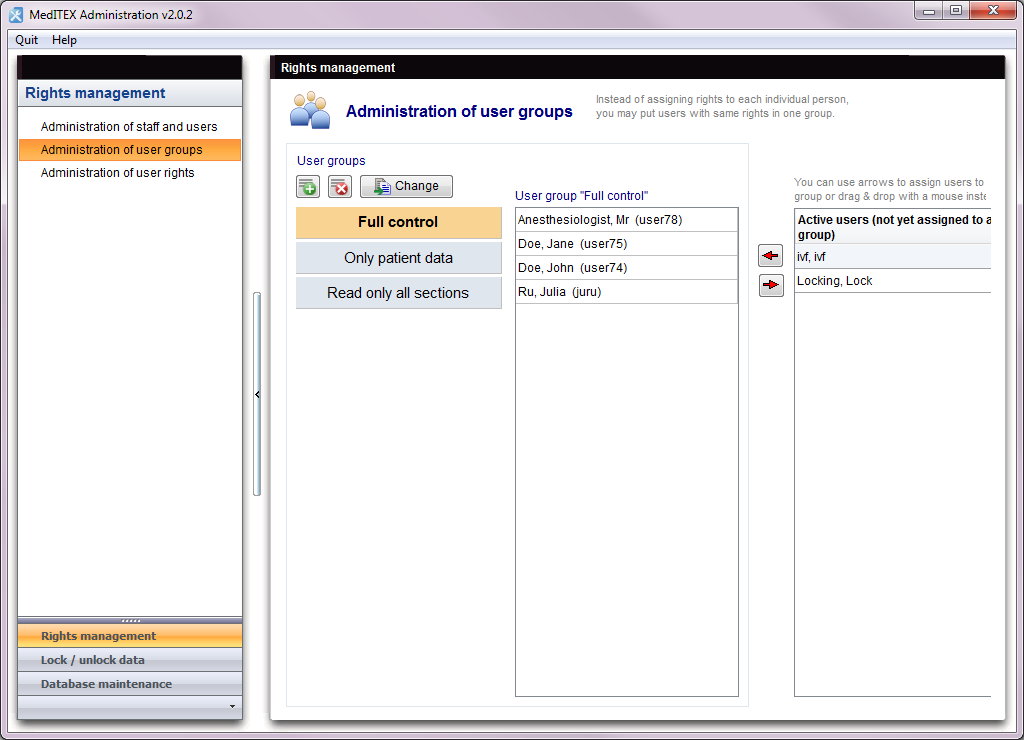 |
In this window you can see three user groups.
- You can simply add a new one with the <img src="/images/Plus.png" alt="" width="23" height="23" /> button at the top.
- Enter a new name and click OK.
- If you click at the tab Administration of user rights, you can find your new group and fill it with users and give them rights.
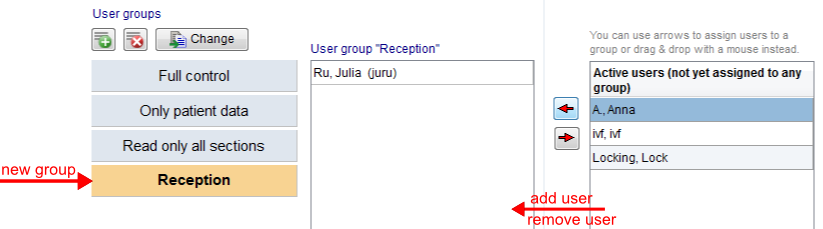
Example:
1. Press the <img src="/images/Plus.png" alt="" width="23" height="23" /> button at the top.
2. Enter a new group name "Reception" in the input window and click OK.
 |
3. Select the group and add / remove user.
 |
| <a href="/index.php?title=MedITEX_Administration_how_to">Back to How to</a> | <a href="#top">Back to top</a> |