How to set rights of users?
From MedITEX - Wiki
(Difference between revisions)
| Line 10: | Line 10: | ||
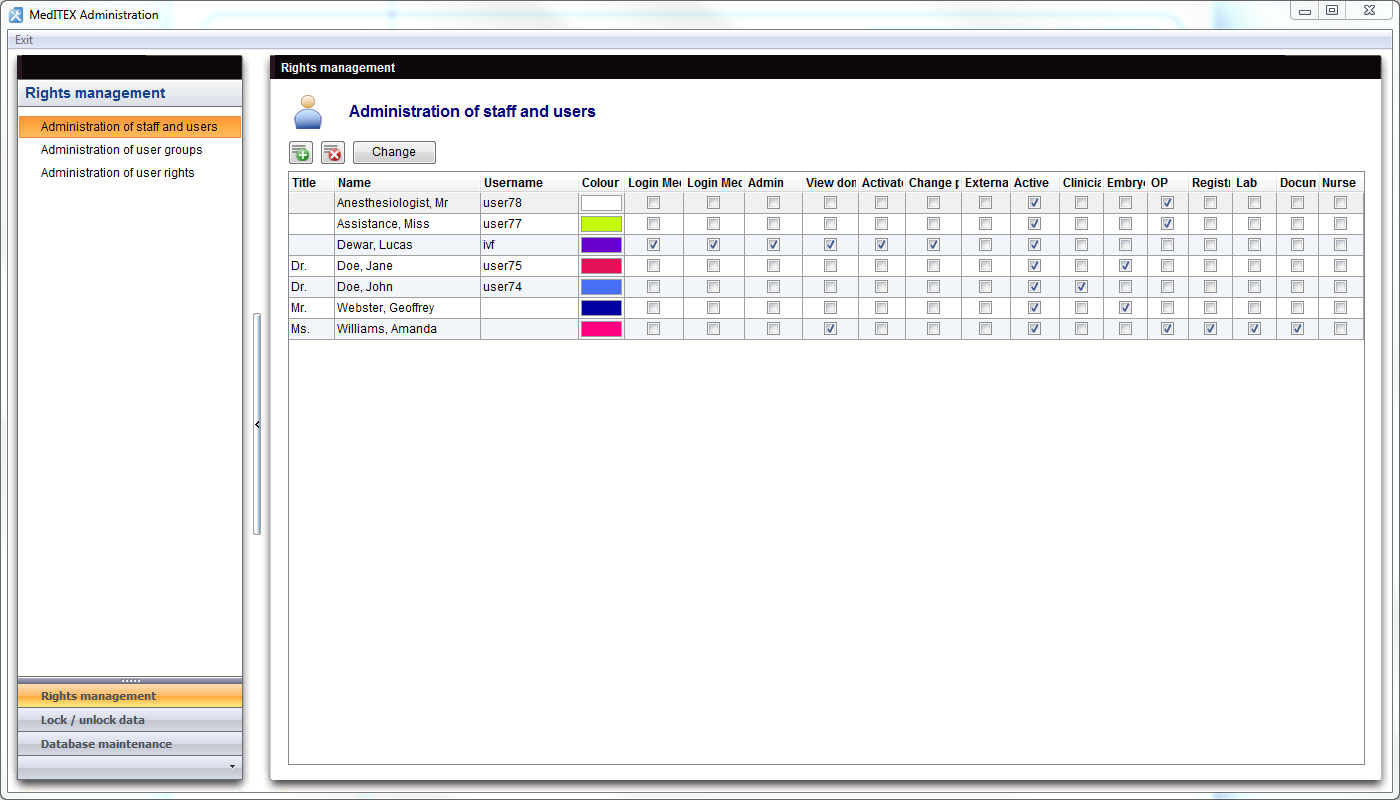
<p>To set rights of users, open the tab <strong>Administration of staff and users</strong>.</p> | <p>To set rights of users, open the tab <strong>Administration of staff and users</strong>.</p> | ||
<ol> | <ol> | ||
| − | <li>Click the <img src="/images/Plus.png" alt="" width="23" height="23" /> button for adding a new person or click the <img src="/images/ChangeButton.png" alt="" /> button for changing settings, at the top of the right window.</li> | + | <li>Click the <img src="/images/Plus.png" alt="" width="23" height="23" /> button<strong> for adding a new person</strong> or click the <img src="/images/ChangeButton.png" alt="" /> button for <strong>changing settings</strong>, at the top of the right window.</li> |
| − | <li>The editing window will be opened.</li> | + | <li>The <strong>editing window</strong> will be opened.</li> |
| − | <li>At the Rights area at the bottom of the window you can select the wished areas.</li> | + | <li>At the <strong>Rights area</strong> at the bottom of the window you can select the wished areas.</li> |
</ol> | </ol> | ||
<p> </p> | <p> </p> | ||
Latest revision as of 12:56, 19 June 2013
 |
To set rights of users, open the tab Administration of staff and users.
- Click the <img src="/images/Plus.png" alt="" width="23" height="23" /> button for adding a new person or click the <img src="/images/ChangeButton.png" alt="" /> button for changing settings, at the top of the right window.
- The editing window will be opened.
- At the Rights area at the bottom of the window you can select the wished areas.
| <img style="display: block; margin-left: auto; margin-right: auto;" src="/images/NewPersonRights.png" alt="" width="540" height="682" /> |
Choose the rights of the user:
|
| <a href="/index.php?title=MedITEX_Administration_how_to">Back to How to</a> | <a href="#top">Back to top</a> |