How to make a patient become a recipient or a surrogate mother?
From MedITEX - Wiki
(Difference between revisions)
| (2 intermediate revisions by one user not shown) | |||
| Line 1: | Line 1: | ||
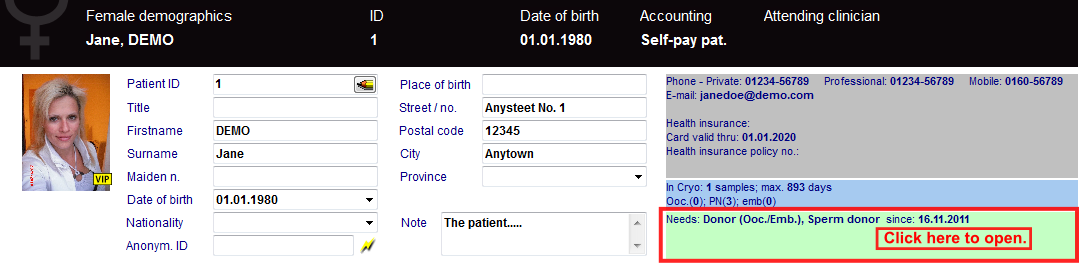
| − | a | + | <p>Click on <strong>Demographics </strong>(female) then, double-click the green area on the right.</p> |
| + | <table style="margin-left: auto; margin-right: auto;" border="0"> | ||
| + | <tbody> | ||
| + | <tr> | ||
| + | <td>[[Image:DemographicsDonorRed.png|none|740px|thumb|left|link=http://wiki.meditex-software.com/images/DemographicsDonorRed.png|]]</td> | ||
| + | </tr> | ||
| + | </tbody> | ||
| + | </table> | ||
| + | <p> </p> | ||
| + | <p>On the opened window <strong>Person and donor information</strong>, you need to check that the <strong><span style="text-decoration: underline;">Person needs:</span> Donor (Ooc./Emb.)</strong>, <strong>Surrogate mother</strong> or <strong>Sperm donor</strong>. You can check all three options if necessary.</p> | ||
| + | <table style="margin-left: auto; margin-right: auto;" border="0"> | ||
| + | <tbody> | ||
| + | <tr> | ||
| + | <td><img src="/images/PandDInfo11NeedRed.png" alt="" width="612" height="184" /></td> | ||
| + | </tr> | ||
| + | </tbody> | ||
| + | </table> | ||
| + | <table style="float: right;" border="0"> | ||
| + | <tbody> | ||
| + | <tr> | ||
| + | <td style="text-align: right;"><a href="/index.php?title=MedITEX_IVF_how_to">Back to the How to</a></td> | ||
| + | <td style="text-align: right;"><a href="#top">Back to top</a></td> | ||
| + | </tr> | ||
| + | </tbody> | ||
| + | </table> | ||
Latest revision as of 10:27, 29 November 2012
Click on Demographics (female) then, double-click the green area on the right.
 |
On the opened window Person and donor information, you need to check that the Person needs: Donor (Ooc./Emb.), Surrogate mother or Sperm donor. You can check all three options if necessary.
| <img src="/images/PandDInfo11NeedRed.png" alt="" width="612" height="184" /> |
| <a href="/index.php?title=MedITEX_IVF_how_to">Back to the How to</a> | <a href="#top">Back to top</a> |