How to edit the patient data?
From MedITEX - Wiki
(Difference between revisions)
| Line 1: | Line 1: | ||
| − | <p><span id="result_box" lang="en"><span class="hps">In order to ed</span>it <span class="hps">patient data</ | + | <p><strong><span id="result_box" lang="en"><span class="hps">In order to ed</span>it <span class="hps">patient data</span>, <span class="hps">f</span><span class="hps">ollow these steps:</span></span></strong></p> |
<p>From the menu bar, open an empty patient mask.</p> | <p>From the menu bar, open an empty patient mask.</p> | ||
<table style="margin-left: auto; margin-right: auto;" border="0"> | <table style="margin-left: auto; margin-right: auto;" border="0"> | ||
Revision as of 16:08, 28 November 2012
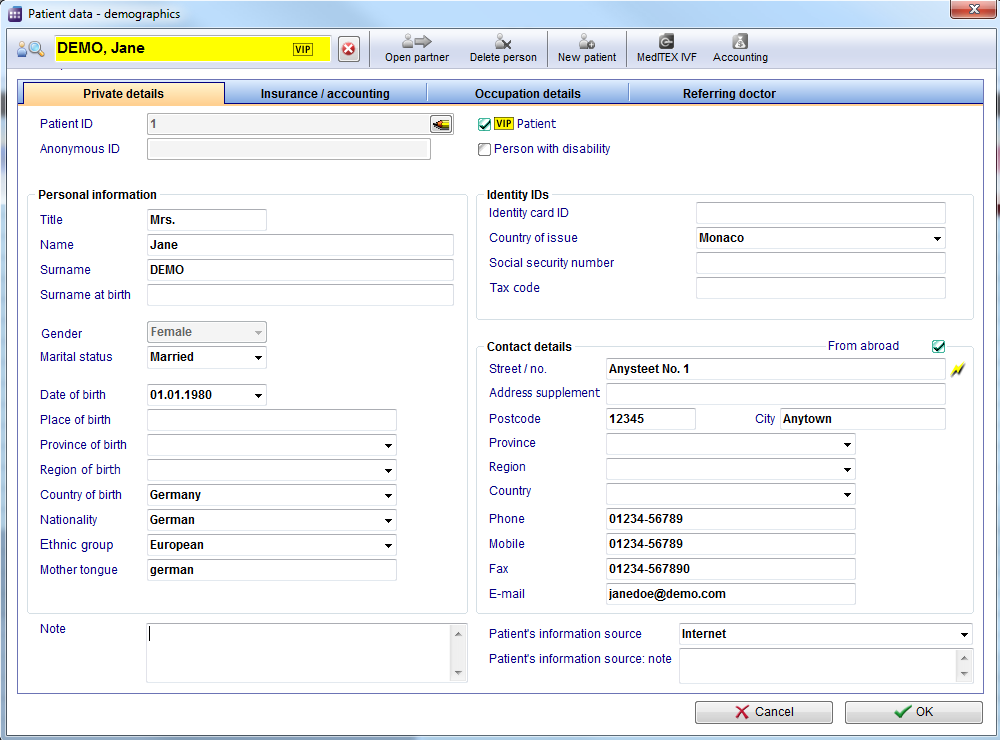
In order to edit patient data, follow these steps:
From the menu bar, open an empty patient mask.
| <img src="/images/Patients1Red.png" alt="" width="485" height="147" /> |
To edit information about an existing patient, use the search box to find the desired patient.
You can immediately begin with the editing of data.
 |
The second way to edit patient data:
Open the appointment editor and click on the little loupe. The patient editor will be opened.
Click OK to save changes.
| <img src="/images/Patient.png" alt="" width="239" height="108" /> |
| <a href="/index.php?title=MedITEX_Scheduler_how_to...">Back to How to...</a> | <a href="#top">Back to top</a> |