How to create and use text blocks?
From MedITEX - Wiki
(Difference between revisions)
| Line 41: | Line 41: | ||
</tbody> | </tbody> | ||
</table> | </table> | ||
| + | <p> </p> | ||
| + | <h2>Create new text block</h2> | ||
Revision as of 15:11, 18 September 2014
Text blocks give you the possibility to define, save and use predefined texts in all note fields in MedITEX IVF and MedITEX Scheduler.
Right-click in a note field opens a drop-down menu which contains two options related to text blocks:
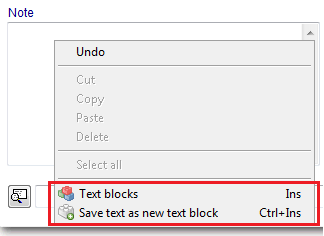 |
To insert an existing text block or to create a new one, click on Text blocks option. The following window will open:
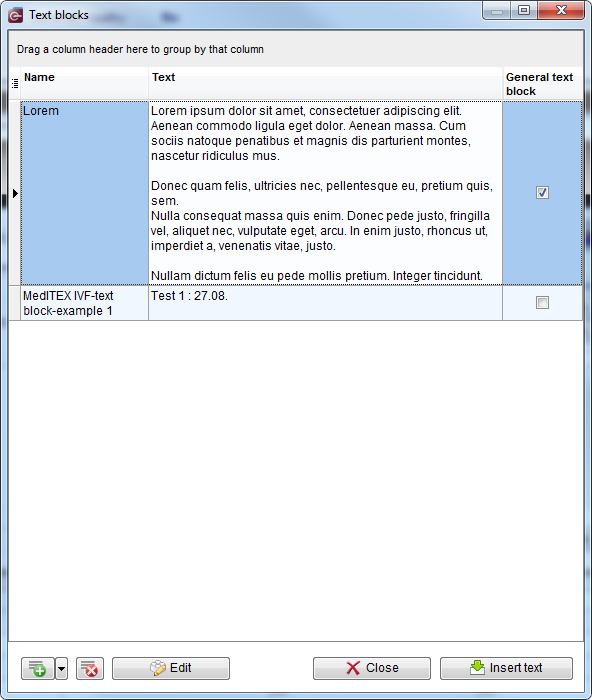 |
Buttons
| <img style="display: block; margin-left: auto; margin-right: auto;" src="/images/TBButtonNew.png" alt="" width="55" height="31" /> | Create new text block |
| <img style="display: block; margin-left: auto; margin-right: auto;" src="/images/TBButtonDelete.png" alt="" width="36" height="31" /> | Delete selected text block |
| <img style="display: block; margin-left: auto; margin-right: auto;" src="/images/TBButtonEdit.png" alt="" width="126" height="31" /> | Edit selected text block |
| <img style="display: block; margin-left: auto; margin-right: auto;" src="/images/TBButtonClose.png" alt="" width="126" height="31" /> | Close the window |
| <img style="display: block; margin-left: auto; margin-right: auto;" src="/images/TBButtonInsert.png" alt="" width="141" height="31" /> | Insert selected text block |