How to create a day info?
From MedITEX - Wiki
(Difference between revisions)
| (One intermediate revision by one user not shown) | |||
| Line 44: | Line 44: | ||
<tbody> | <tbody> | ||
<tr> | <tr> | ||
| − | <td style="text-align: right;"><a href="/index.php?title=MedITEX_Scheduler_how_to | + | <td style="text-align: right;"><a href="/index.php?title=MedITEX_Scheduler_how_to">Back to How to</a></td> |
<td style="text-align: right;"><a href="#top">Back to top</a></td> | <td style="text-align: right;"><a href="#top">Back to top</a></td> | ||
</tr> | </tr> | ||
Latest revision as of 16:25, 12 February 2013
To add new information (important messages, etc.) to a particular date, select the button Day info , located on the top left corner of the main window at the Supporting links area.
 |
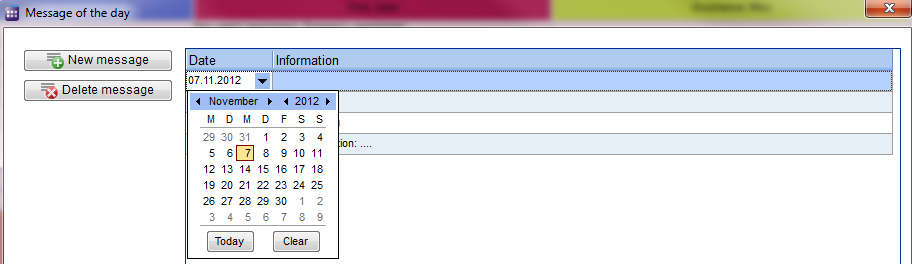
- Once the new window is opened click on New message. A blank line is added in the information window.
- Choose a date and then fill the text box with the appropriate information.
 |
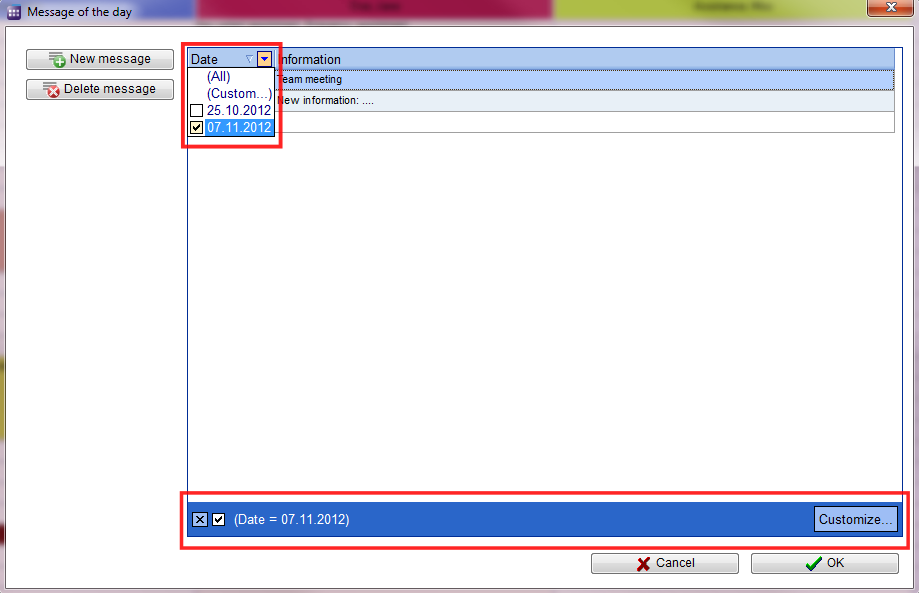
- If you wish, you can set filters on date and / or at the information.
- Clicking on the arrow next to the column header, you can filter the table content by the information contained in that row.
 |
- Once saved, the message appears on the fixed day in the main window.
 |
| <a href="/index.php?title=MedITEX_Scheduler_how_to">Back to How to</a> | <a href="#top">Back to top</a> |