How to add material articles / batches?
From MedITEX - Wiki
(Difference between revisions)
| Line 1: | Line 1: | ||
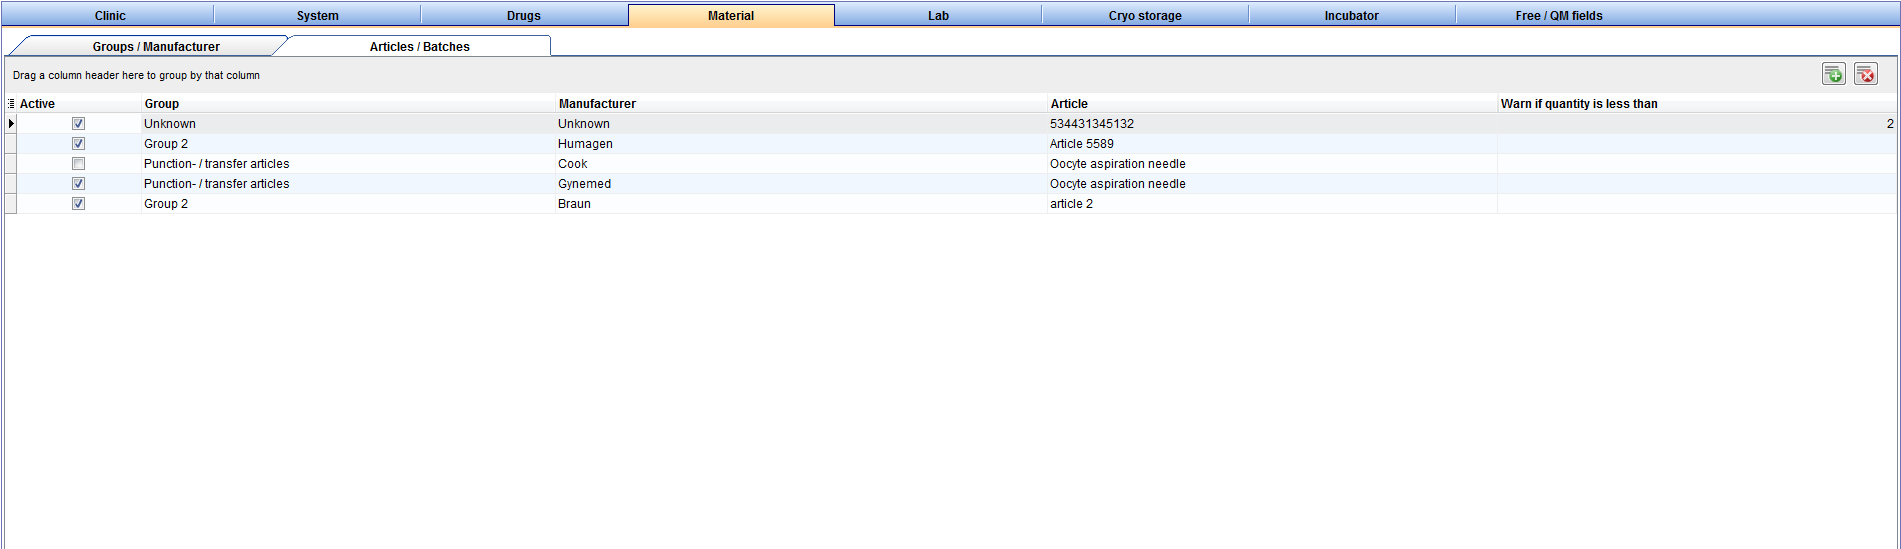
| − | + | <p>At this tab you can add the needed materials to the list and make them available for the creation of QM fields.</p> | |
| + | <table border="0"> | ||
| + | <tbody> | ||
| + | <tr> | ||
| + | <td>[[Image:Material.png|none|740px|thumb|left|link=http://wiki.meditex-software.com/images/Material.png| ]]</td> | ||
| + | </tr> | ||
| + | </tbody> | ||
| + | </table> | ||
| + | <table border="0"> | ||
| + | <tbody> | ||
| + | <tr> | ||
| + | <td><img style="display: block; margin-left: auto; margin-right: auto;" src="/images/Plus.png" alt="" width="34" height="28" /></td> | ||
| + | <td>Press this button on the top right to add a new article.</td> | ||
| + | </tr> | ||
| + | <tr> | ||
| + | <td><img style="display: block; margin-left: auto; margin-right: auto;" src="/images/DeleteX.png" alt="" width="26" height="24" /></td> | ||
| + | <td>Delete it with this button.</td> | ||
| + | </tr> | ||
| + | </tbody> | ||
| + | </table> | ||
| + | <table border="0" width="463" height="341"> | ||
| + | <tbody> | ||
| + | <tr> | ||
| + | <td><img src="/images/Material8.png" alt="" width="474" height="245" /></td> | ||
| + | </tr> | ||
| + | <tr> | ||
| + | <td> | ||
| + | <p>In this new window you can choose the material group and the manufacturer. If the necessary information is not available in the pull-down menu, you have the option to quickly create a new manufacturer or group in this window. To do this, press the flash button.</p> | ||
| + | <p>Now you can enter the article name and check "Article can be used".</p> | ||
| + | </td> | ||
| + | </tr> | ||
| + | </tbody> | ||
| + | </table> | ||
| + | <p> </p> | ||
| + | <table border="0"> | ||
| + | <tbody> | ||
| + | <tr> | ||
| + | <td><img src="/images/Material9.png" alt="" width="639" height="373" /></td> | ||
| + | </tr> | ||
| + | <tr> | ||
| + | <td> | ||
| + | <p>As soon as you confirm by clicking<strong> “OK” </strong>this new window will open in which you can add a corresponding batch</p> | ||
| + | </td> | ||
| + | </tr> | ||
| + | </tbody> | ||
| + | </table> | ||
| + | <p> </p> | ||
| + | <p> </p> | ||
| + | <table border="0"> | ||
| + | <tbody> | ||
| + | <tr> | ||
| + | <td><img src="/images/Material90.png" alt="" width="765" height="176" /></td> | ||
| + | </tr> | ||
| + | </tbody> | ||
| + | </table> | ||
| + | <p> </p> | ||
| + | <p> </p> | ||
| + | <table style="float: right;" border="0"> | ||
| + | <tbody> | ||
| + | <tr> | ||
| + | <td style="text-align: right;"><a href="/index.php?title=MedITEX_IVF_how_to">Back to How to</a></td> | ||
| + | <td style="text-align: right;"><a href="#top">Back to top</a></td> | ||
| + | </tr> | ||
| + | </tbody> | ||
| + | </table> | ||
| + | <p><span class="mw-headline"><br /></span></p> | ||
Revision as of 18:05, 4 December 2012
At this tab you can add the needed materials to the list and make them available for the creation of QM fields.
 |
| <img style="display: block; margin-left: auto; margin-right: auto;" src="/images/Plus.png" alt="" width="34" height="28" /> | Press this button on the top right to add a new article. |
| <img style="display: block; margin-left: auto; margin-right: auto;" src="/images/DeleteX.png" alt="" width="26" height="24" /> | Delete it with this button. |
| <img src="/images/Material8.png" alt="" width="474" height="245" /> |
|
In this new window you can choose the material group and the manufacturer. If the necessary information is not available in the pull-down menu, you have the option to quickly create a new manufacturer or group in this window. To do this, press the flash button. Now you can enter the article name and check "Article can be used". |
| <img src="/images/Material9.png" alt="" width="639" height="373" /> |
|
As soon as you confirm by clicking “OK” this new window will open in which you can add a corresponding batch |
| <img src="/images/Material90.png" alt="" width="765" height="176" /> |
| <a href="/index.php?title=MedITEX_IVF_how_to">Back to How to</a> | <a href="#top">Back to top</a> |