How to add a new canister to the cryo storage?
From MedITEX - Wiki
(Difference between revisions)
| (10 intermediate revisions by 3 users not shown) | |||
| Line 1: | Line 1: | ||
| − | <table border="0"> | + | <p>On the top menu, go to <strong>System -> Configuration /administration -> Settings -> Cryo storage</strong>.</p> |
| + | <table style="margin-left: auto; margin-right: auto;" border="0"> | ||
<tbody> | <tbody> | ||
<tr> | <tr> | ||
| Line 6: | Line 7: | ||
</tbody> | </tbody> | ||
</table> | </table> | ||
| − | <table border="0"> | + | <p><br /><br /></p> |
| + | <table style="margin-left: auto; margin-right: auto;" border="0"> | ||
<tbody> | <tbody> | ||
<tr> | <tr> | ||
| − | + | <td>[[Image:CryoStoreDim.png|none|740px|thumb|left|link=http://wiki.meditex-software.com/images/CryoStoreDim.png|]]</td> | |
| − | + | ||
| − | + | ||
| − | + | ||
| − | + | ||
| − | + | ||
| − | + | ||
| − | + | ||
| − | + | ||
| − | + | ||
| − | + | ||
| − | + | ||
| − | + | ||
| − | <td>[[Image: | + | |
</tr> | </tr> | ||
</tbody> | </tbody> | ||
</table> | </table> | ||
<ul> | <ul> | ||
| − | < | + | <br /> |
</ul> | </ul> | ||
<ul> | <ul> | ||
| − | <li> | + | <li>Choose a name for the new unit in the field <strong>Description</strong>.</li> |
</ul> | </ul> | ||
<ul> | <ul> | ||
| − | <li>Enter the names of a maximum of three storage levels in the columns. Always define the storage levels from the left to the right side – if necessary, leave the right column empty but not the left.</li> | + | <li>Check <strong>Ooc./emb.</strong>, <strong>Sperm </strong>or both in the panel <strong>Type</strong>, depending on what types of samples will be stored in the unit.</li> |
| + | </ul> | ||
| + | <ul> | ||
| + | <li>Enter the names of a maximum of three <strong>storage levels</strong> (The term “storage level” defines a certain level within the hierarchically structured storage system of a unit) in the columns. Always define the storage levels from the left to the right side – if necessary, leave the right column empty but not the left.</li> | ||
</ul> | </ul> | ||
<ul> | <ul> | ||
<li>Enter all elements of the corresponding storage level in the pre-defined columns.</li> | <li>Enter all elements of the corresponding storage level in the pre-defined columns.</li> | ||
</ul> | </ul> | ||
| − | < | + | <table style="margin-left: auto; margin-right: auto;" border="0"> |
| + | <tbody> | ||
| + | <tr> | ||
| + | <td><img style="display: block; margin-left: auto; margin-right: auto;" src="/images/SaveChanges.png" alt="" width="162" height="29" /></td> | ||
| + | <td> Save your changes.</td> | ||
| + | </tr> | ||
| + | </tbody> | ||
| + | </table> | ||
<table style="float: right;" border="0"> | <table style="float: right;" border="0"> | ||
<tbody> | <tbody> | ||
Latest revision as of 09:43, 17 January 2020
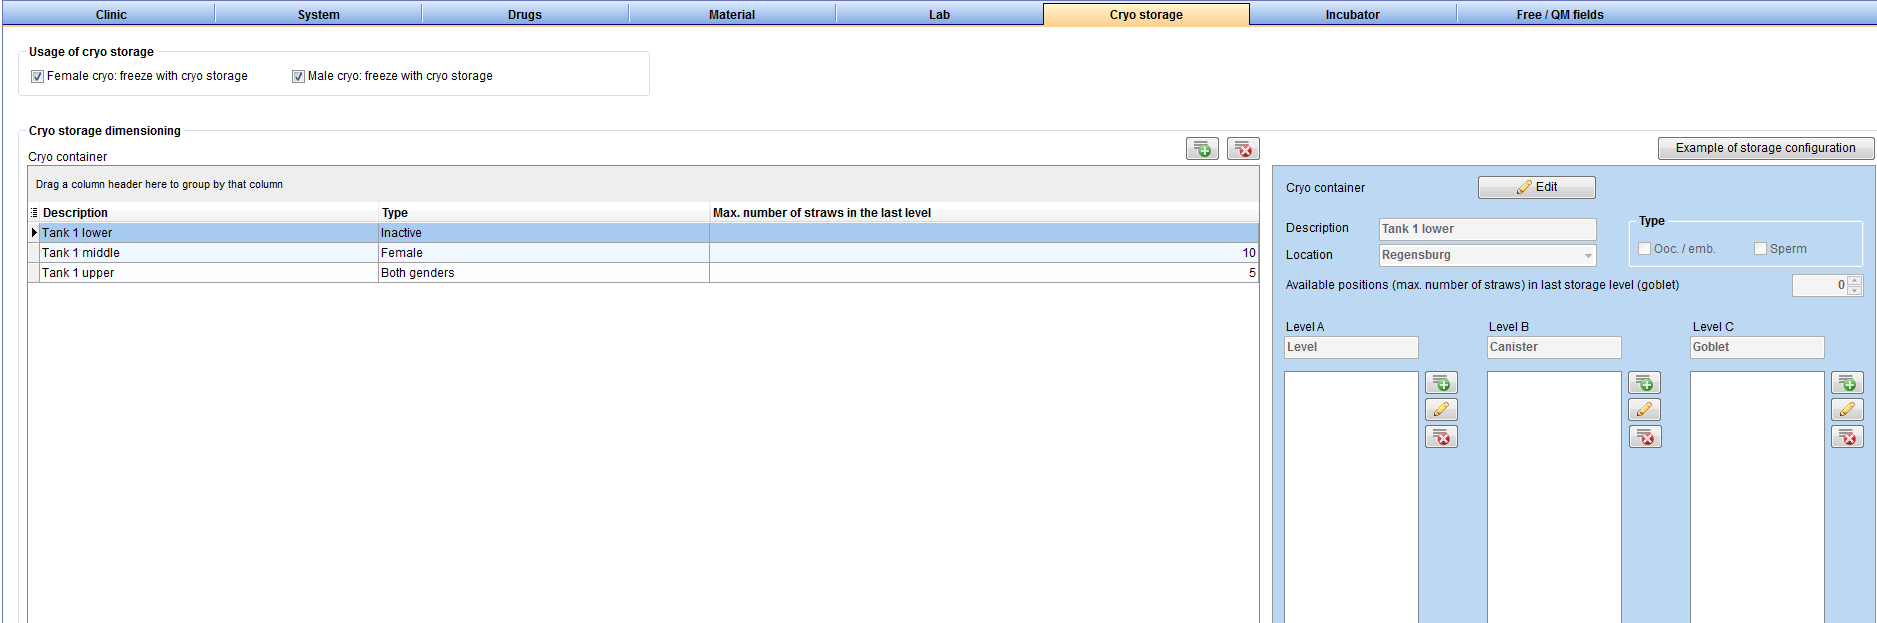
On the top menu, go to System -> Configuration /administration -> Settings -> Cryo storage.
 |
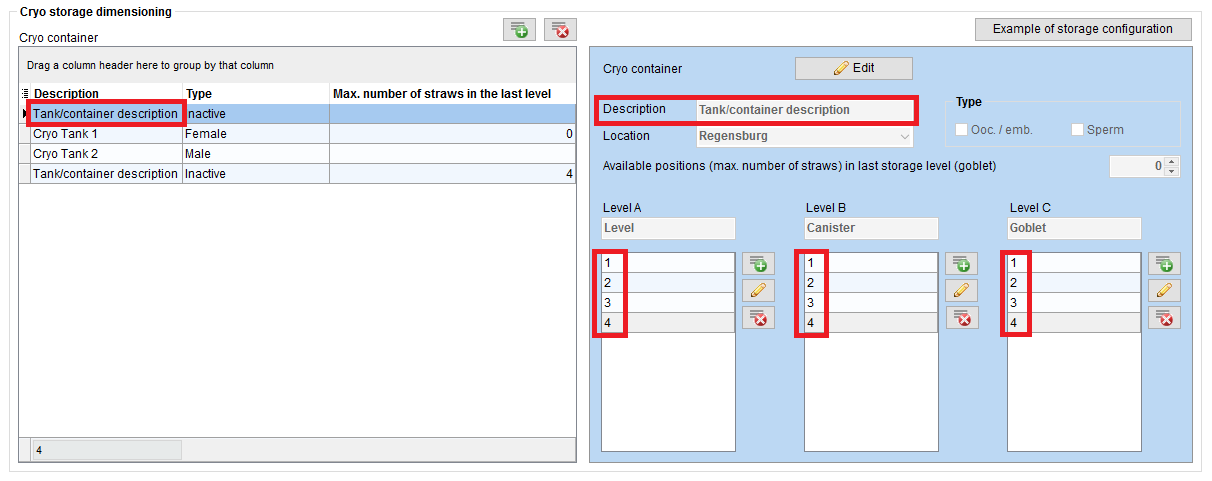 |
- Choose a name for the new unit in the field Description.
- Check Ooc./emb., Sperm or both in the panel Type, depending on what types of samples will be stored in the unit.
- Enter the names of a maximum of three storage levels (The term “storage level” defines a certain level within the hierarchically structured storage system of a unit) in the columns. Always define the storage levels from the left to the right side – if necessary, leave the right column empty but not the left.
- Enter all elements of the corresponding storage level in the pre-defined columns.
| <img style="display: block; margin-left: auto; margin-right: auto;" src="/images/SaveChanges.png" alt="" width="162" height="29" /> | Save your changes. |
| <a href="/index.php?title=MedITEX_IVF_how_to">Back to How to</a> | <a href="#top">Back to top</a> |