How to add, edit or delete notes?
From MedITEX - Wiki
(Difference between revisions)
| (4 intermediate revisions by 2 users not shown) | |||
| Line 1: | Line 1: | ||
| − | + | <p style="text-align: justify;">To add a note to an appointment, you must open the appointment editor.</p> | |
| + | <table style="margin-left: auto; margin-right: auto;" border="0"> | ||
| + | <tbody> | ||
| + | <tr> | ||
| + | <td>[[Image:patientNoteRed.png|none|740px|thumb|left|link=http://wiki.meditex-software.com/images/patientNoteRed.png| ]]</td> | ||
| + | </tr> | ||
| + | </tbody> | ||
| + | </table> | ||
| + | <p style="text-align: justify;"> </p> | ||
| + | <p style="text-align: justify;">The note can be written in the note area on the bottom of the window. <span id="result_box" class="short_text" lang="en"><span class="hps"> </span></span></p> | ||
| + | <p style="text-align: justify;"><span id="result_box" class="short_text" lang="en"><span class="hps">To</span> <span class="hps">use a predefined</span> <span class="hps">note,</span> <span class="hps">click</span> <span class="hps">on the + button</span><span>. </span></span>A new window will be opened.</p> | ||
| + | <table style="margin-left: auto; margin-right: auto;" border="0"> | ||
| + | <tbody> | ||
| + | <tr> | ||
| + | <td> | ||
| + | <p style="text-align: center;">[[Image:notesarea.png|none|740px|thumb|left|link=http://wiki.meditex-software.com/images/notesarea.png|]]</p> | ||
| + | </td> | ||
| + | </tr> | ||
| + | </tbody> | ||
| + | </table> | ||
| + | <p style="text-align: justify;"> </p> | ||
| + | <p style="text-align: justify;"><span id="result_box" lang="en"><span class="hps">On this</span> <span class="hps">window you can see</span> <span class="hps">all predefined</span> <span class="hps">notes</span><span>. N</span><span class="hps"> </span></span>otes can be added, deleted or edited. Or you can select an existing one and use it for the the patient selected previously.</p> | ||
| + | <p style="text-align: justify;"><span id="result_box" lang="en"><span class="hps">If you choose to create a new template for a note, a new window will open allowing you to do such creation.</span><span> </span></span></p> | ||
| + | <table style="margin-left: auto; margin-right: auto;" border="0"> | ||
| + | <tbody> | ||
| + | <tr> | ||
| + | <td><img src="/images/newnote.png" alt="" width="531" height="439" /></td> | ||
| + | </tr> | ||
| + | </tbody> | ||
| + | </table> | ||
| + | <p> </p> | ||
| + | <table style="float: right;" border="0"> | ||
| + | <tbody> | ||
| + | <tr> | ||
| + | <td style="text-align: right;"><a href="/index.php?title=MedITEX_Scheduler_how_to">Back to How to</a></td> | ||
| + | <td style="text-align: right;"><a href="#top">Back to top</a></td> | ||
| + | </tr> | ||
| + | </tbody> | ||
| + | </table> | ||
| + | <p><span class="mw-headline"><br /></span></p> | ||
Latest revision as of 16:29, 12 February 2013
To add a note to an appointment, you must open the appointment editor.
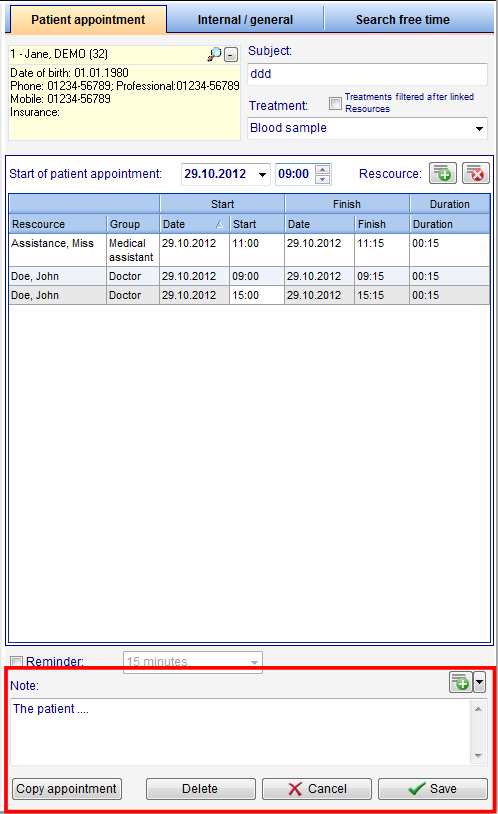 |
The note can be written in the note area on the bottom of the window.
To use a predefined note, click on the + button. A new window will be opened.
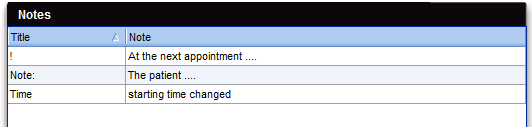 |
On this window you can see all predefined notes. N otes can be added, deleted or edited. Or you can select an existing one and use it for the the patient selected previously.
If you choose to create a new template for a note, a new window will open allowing you to do such creation.
| <img src="/images/newnote.png" alt="" width="531" height="439" /> |
| <a href="/index.php?title=MedITEX_Scheduler_how_to">Back to How to</a> | <a href="#top">Back to top</a> |