HL7 Exporter
From MedITEX - Wiki
| Line 12: | Line 12: | ||
<p> </p> | <p> </p> | ||
<h2>Configuration</h2> | <h2>Configuration</h2> | ||
| + | <p>Clicking on <strong>Configuration</strong> at the top of the window, the following window will open:</p> | ||
| + | <p>This window is separated into four tabs: <strong>Settings</strong>, <strong>HL7/Export</strong>, <strong>Databiding</strong> and <strong>MSH</strong>.</p> | ||
| + | <p> </p> | ||
| + | <h3>Settings</h3> | ||
| + | <table style="margin-left: auto; margin-right: auto;" border="0"> | ||
| + | <tbody> | ||
| + | <tr> | ||
| + | <td><img style="display: block; margin-left: auto; margin-right: auto;" src="/images/HL7Exporter2.png" alt="" /></td> | ||
| + | </tr> | ||
| + | <tr> | ||
| + | <td> | ||
| + | <p><strong>Centre</strong>: name of your clinic.</p> | ||
| + | <p><strong>Centre code</strong>: identification number given to your clinic.</p> | ||
| + | <p><strong>HL7 messages</strong>: choose if the exported data will be saved on this computer or sent via TCP-IP.</p> | ||
| + | <p><strong>SQL Statement for data collection</strong>: editor to create the <strong>Select</strong> statement which will be linked to the <strong>HL7</strong> message creator. The SQL statement <strong>must</strong> export parameter <strong>PKEY</strong> and can – in addition – export <strong>PKEY2</strong> if nescessary. You can delete the</p> | ||
| + | <p><strong>Automatic JL7 export</strong>: activate this option to automatically export data. After any <strong>insert</strong>, <strong>update</strong> or <strong>delete</strong> of patient information, <strong>HL7 Exporter</strong> will automatically generate the data file. Turn-off this option by clicking on the <strong>Deactivate </strong>button.</p> | ||
| + | <p><strong>Password</strong>: in order to open this configuration window, you need to enter this password. To change it, click on the <strong>Edit </strong>button (paper/pencil).<strong><br /></strong></p> | ||
| + | </td> | ||
| + | </tr> | ||
| + | </tbody> | ||
| + | </table> | ||
| + | <p> </p> | ||
<h2>Protocol</h2> | <h2>Protocol</h2> | ||
<h2>Editor</h2> | <h2>Editor</h2> | ||
| Line 22: | Line 44: | ||
</tr> | </tr> | ||
<tr> | <tr> | ||
| − | <td | + | <td></td> |
<td> </td> | <td> </td> | ||
</tr> | </tr> | ||
Revision as of 15:06, 15 May 2013
MedITEX HL7 Exporter helps you on exporting data from your datebase. This page is intended to help you with configuration and usability of this tool.
Contents |
Main window
This is HL7 Exporter main window. Here you can see all patients currently in your database, view protocols and export data.
| <img style="display: block; margin-left: auto; margin-right: auto;" src="/images/HL7Exporter1.png" alt="" width="600" height="394" /> |
Configuration
Clicking on Configuration at the top of the window, the following window will open:
This window is separated into four tabs: Settings, HL7/Export, Databiding and MSH.
Settings
| <img style="display: block; margin-left: auto; margin-right: auto;" src="/images/HL7Exporter2.png" alt="" /> |
|
Centre: name of your clinic. Centre code: identification number given to your clinic. HL7 messages: choose if the exported data will be saved on this computer or sent via TCP-IP. SQL Statement for data collection: editor to create the Select statement which will be linked to the HL7 message creator. The SQL statement must export parameter PKEY and can – in addition – export PKEY2 if nescessary. You can delete the Automatic JL7 export: activate this option to automatically export data. After any insert, update or delete of patient information, HL7 Exporter will automatically generate the data file. Turn-off this option by clicking on the Deactivate button. Password: in order to open this configuration window, you need to enter this password. To change it, click on the Edit button (paper/pencil). |
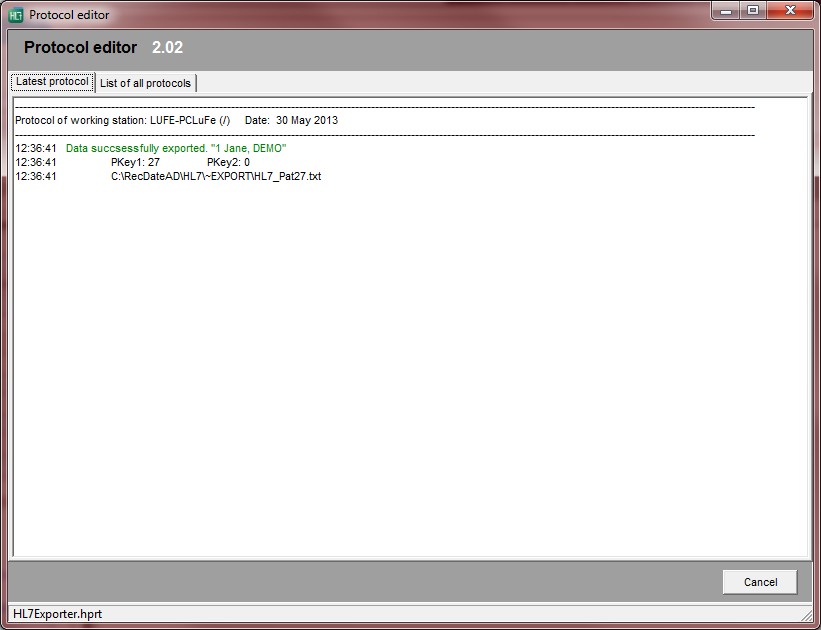
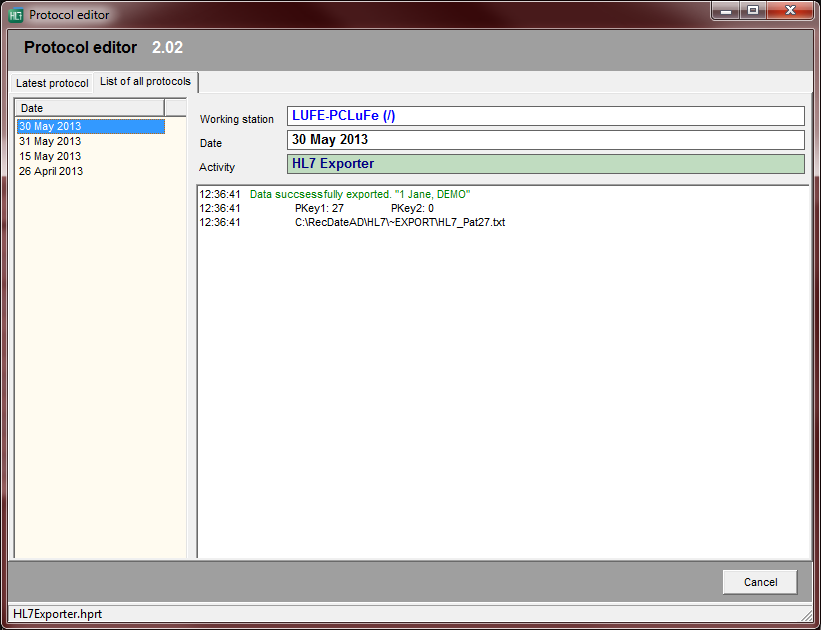
Protocol
Editor
| <img style="display: block; margin-left: auto; margin-right: auto;" src="/images/HL7Exporter4.png" alt="" /> | |
| <img style="display: block; margin-left: auto; margin-right: auto;" src="/images/HL7Exporter5.png" alt="" /> | |
| <img style="display: block; margin-left: auto; margin-right: auto;" src="/images/HL7Exporter6.png" alt="" /> | |
| <img style="display: block; margin-left: auto; margin-right: auto;" src="/images/HL7Exporter7.png" alt="" /> | |
 |
|
 |
|
| <img style="display: block; margin-left: auto; margin-right: auto;" src="/images/HL7Exporter10.png" alt="" width="402" height="449" /> | |
| <img style="display: block; margin-left: auto; margin-right: auto;" src="/images/HL7Exporter11.png" alt="" width="695" height="563" /> | |
| <img style="display: block; margin-left: auto; margin-right: auto;" src="/images/HL7Exporter12.png" alt="" width="695" height="563" /> | |
| <img style="display: block; margin-left: auto; margin-right: auto;" src="/images/HL7Exporter13.png" alt="" width="695" height="563" /> | |
| <img style="display: block; margin-left: auto; margin-right: auto;" src="/images/HL7Exporter14.png" alt="" width="695" height="563" /> | |
| <img style="display: block; margin-left: auto; margin-right: auto;" src="/images/HL7Exporter15.png" alt="" width="695" height="563" /> | |
| <img style="display: block; margin-left: auto; margin-right: auto;" src="/images/HL7Exporter16.png" alt="" width="695" height="563" /> | |
| <img style="display: block; margin-left: auto; margin-right: auto;" src="/images/HL7Exporter17.png" alt="" width="695" height="563" /> | |
| <img style="display: block; margin-left: auto; margin-right: auto;" src="/images/HL7Exporter18.png" alt="" width="695" height="563" /> |