Come aggiungere un nuovo appuntamento paziente?
From MedITEX - Wiki
| Line 27: | Line 27: | ||
</tr> | </tr> | ||
<tr> | <tr> | ||
| − | <td style="text-align: left;"> | + | <td style="text-align: left;">Per <strong>cambiare la risorsa</strong>, fare click sulla cella contenente il suo nome e selezionarne un'altra.</td> |
| − | <td><img style="display: block; margin-left: auto; margin-right: auto;" src="/images/ | + | <td><img style="display: block; margin-left: auto; margin-right: auto;" src="/images/fig43_ita.png" alt="" width="211" height="192" /></td> |
</tr> | </tr> | ||
</tbody> | </tbody> | ||
</table> | </table> | ||
| − | <p> | + | <p>Per <strong>creare un appuntamento per un dato paziente</strong>, cercate il paziente e l'appuntamento verrà automaticamente completato con i dati del paziente nel riquadro giallo sulla sinistra dell'editor appuntamenti. <strong>Se il paziente non è ancora nel database</strong>, è possibile riempire il campo <strong>Oggetto</strong> dell'editor appuntamenti. E' necessario usare almeno una di queste due opzioni per poter salvare l'appuntamento.</p> |
| − | + | ||
<table style="margin-left: auto; margin-right: auto;" border="0" width="128" height="44"> | <table style="margin-left: auto; margin-right: auto;" border="0" width="128" height="44"> | ||
<tbody> | <tbody> | ||
<tr> | <tr> | ||
| − | <td>[[Image: | + | <td>[[Image:fig44_ita.png|none|740px|thumb|left|link=http://wiki.meditex-software.com/images/fig44_ita.png|]]</td> |
</tr> | </tr> | ||
<tr> | <tr> | ||
| − | <td>[[Image: | + | <td>[[Image:fig45_ita.png|none|740px|thumb|left|link=http://wiki.meditex-software.com/images/fig45_ita.png|]]</td> |
</tr> | </tr> | ||
</tbody> | </tbody> | ||
Revision as of 19:23, 4 February 2013
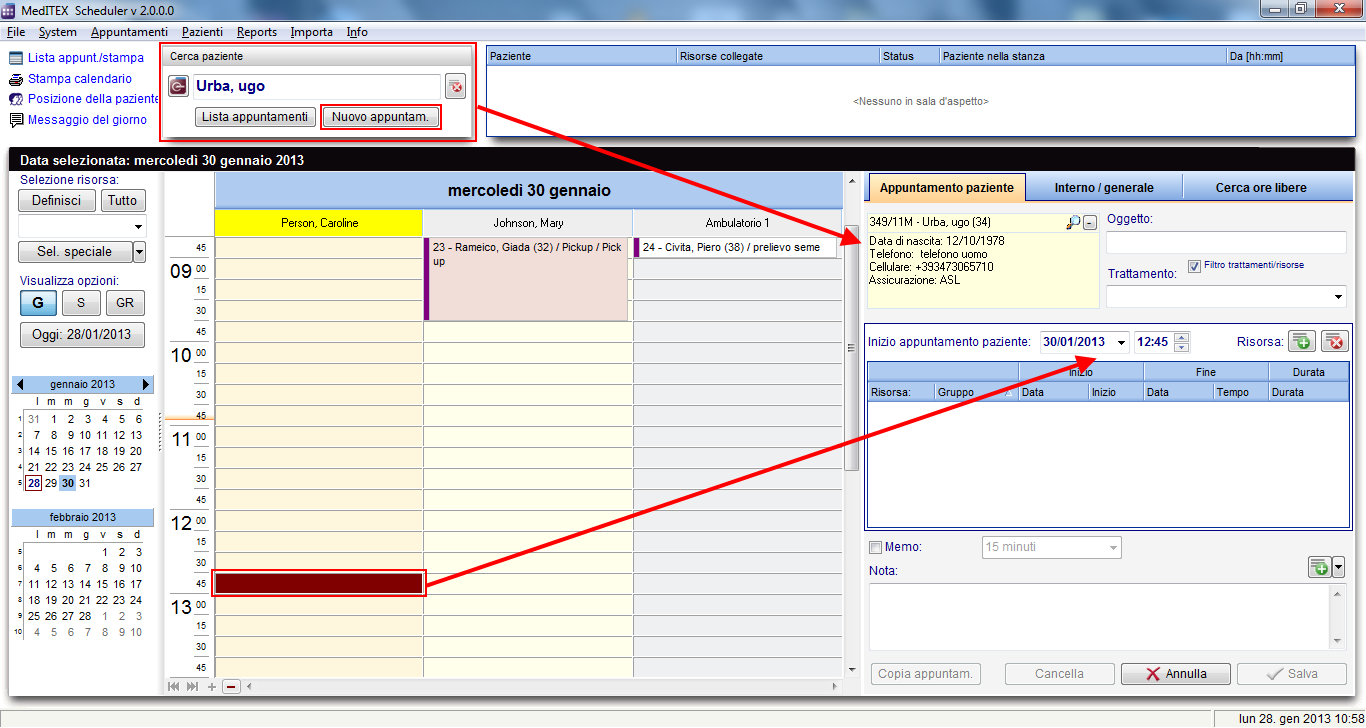 |
| Per generare un nuovo appuntamento è possibile premere il tasto Nuovo appuntamento oppure fare doppio click su un campo del calendario di una certa risorsa; l'editor appuntamenti apparirà sul lato destro dello schermo. |
|
Se scegliete di creare un appuntamento facendo doppio click su di una risorsa, questa risorsa sarà automaticamente inserita nella lista delle risorse dell'editor appuntamenti. Se scegliete di premere il tasto Nuovo appuntamento, la lista delle risorse sarà vuota. |
<img src="/images/fig41_ita.png" alt="" width="485" height="110" /> |
|
E' possibile aggiungere ulteriori risorse a questo appuntamento premendo il tasto verde "+". La risorsa evidenziata nel calendario sarà aggiunta alla lista. |
<img src="/images/fig42_ita.png" alt="" width="496" height="157" /> |
| Per cambiare la risorsa, fare click sulla cella contenente il suo nome e selezionarne un'altra. | <img style="display: block; margin-left: auto; margin-right: auto;" src="/images/fig43_ita.png" alt="" width="211" height="192" /> |
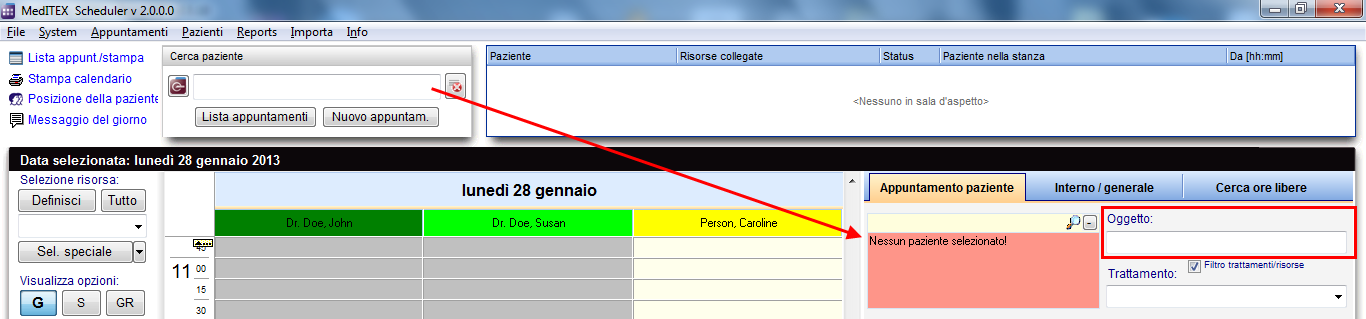
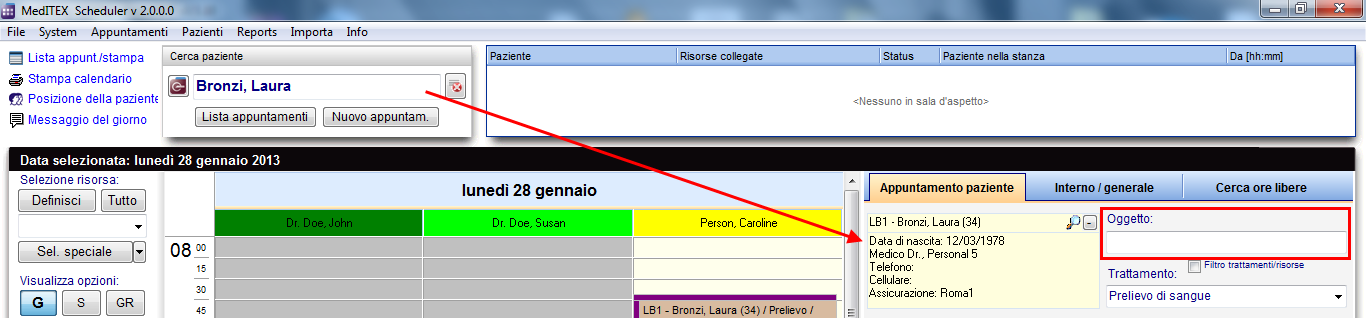
Per creare un appuntamento per un dato paziente, cercate il paziente e l'appuntamento verrà automaticamente completato con i dati del paziente nel riquadro giallo sulla sinistra dell'editor appuntamenti. Se il paziente non è ancora nel database, è possibile riempire il campo Oggetto dell'editor appuntamenti. E' necessario usare almeno una di queste due opzioni per poter salvare l'appuntamento.
 |
 |
The patient data can be accessed in the menu item Patients, or by clicking on the magnifier symbol in the appointment editor. In this form you can also input the complete data of a new patient.
 |
After saving, the appointment will be displayed in the scheduler in all entered resources with the patient’s id, name and age and/or the subject.
| <a href="/index.php?title=MedITEX_Scheduler_come...">Torna a MedITEX Scheduler come...</a> | <a href="#top">Torna in alto</a> |