Come aggiungere articoli/lotti di materiale?
From MedITEX - Wiki
| Line 1: | Line 1: | ||
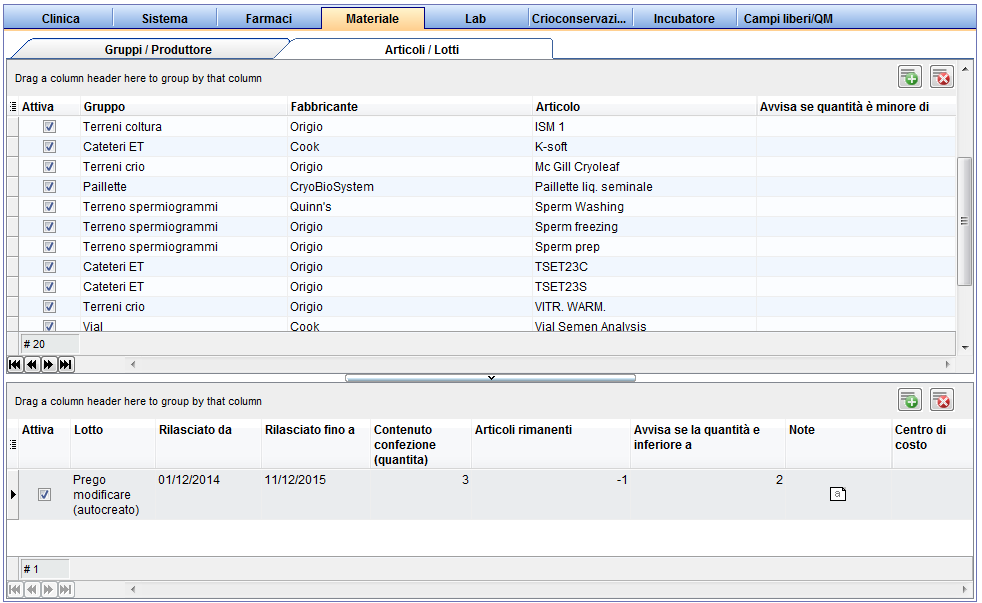
| − | <p> | + | <p>Per modificare le <strong>Impostazioni </strong>di <strong>Articoli / Lotti</strong> cliccare su on the menu item <strong>Sistema -> Configurazione/Amministrazione -> Impostazioni -> Materiale -> Articoli / Lotti</strong></p> |
| − | <p> | + | <p>In questa sezione sarà possibile inserire gli articoli e relativi lotti accessibili puoi dai <strong>Campi QM</strong>.</p> |
| − | <table | + | <table border="0"> |
<tbody> | <tbody> | ||
<tr> | <tr> | ||
| − | <td>[[Image: | + | <td>[[Image:Impostazioni_48_IT.png|none|740px|thumb|left|link=http://wiki.meditex-software.com/images/Impostazioni_48_IT.png| Articoli / Lotti]]</td> |
</tr> | </tr> | ||
</tbody> | </tbody> | ||
</table> | </table> | ||
| + | <p> </p> | ||
<table border="0"> | <table border="0"> | ||
<tbody> | <tbody> | ||
<tr> | <tr> | ||
| − | <td><img | + | <td><img src="/images/Plus.png" alt="" /></td> |
| − | <td> | + | <td>Premere questo pulsante nell'angolo in alto a destra della pagina, per inserire un<strong> nuovo articolo</strong>, e successivamente sul pulsante in basso a destra per inserire un <strong>nuovo lotto</strong> per quel materiale.</td> |
</tr> | </tr> | ||
<tr> | <tr> | ||
| − | <td><img | + | <td><img src="/images/DeleteX.png" alt="" width="26" height="24" /></td> |
<td> | <td> | ||
| − | <p> | + | <p>Eliminare elementi con questo pulsante.</p> |
| − | <p> | + | <p>L'eliminazione di un lotto o articolo è possibile solamente se non è stato assegnato a nessun <strong>Campo QM</strong>. Per nascondere l'articolo senza eliminarlo deselezionare l'opzione <strong>Attivo</strong>.</p> |
| − | + | ||
</td> | </td> | ||
</tr> | </tr> | ||
</tbody> | </tbody> | ||
</table> | </table> | ||
| + | <p> </p> | ||
<table style="margin-left: auto; margin-right: auto;" border="0" width="463" height="341"> | <table style="margin-left: auto; margin-right: auto;" border="0" width="463" height="341"> | ||
<tbody> | <tbody> | ||
Revision as of 10:29, 3 May 2016
Per modificare le Impostazioni di Articoli / Lotti cliccare su on the menu item Sistema -> Configurazione/Amministrazione -> Impostazioni -> Materiale -> Articoli / Lotti
In questa sezione sarà possibile inserire gli articoli e relativi lotti accessibili puoi dai Campi QM.
 |
| <img src="/images/Plus.png" alt="" /> | Premere questo pulsante nell'angolo in alto a destra della pagina, per inserire un nuovo articolo, e successivamente sul pulsante in basso a destra per inserire un nuovo lotto per quel materiale. |
| <img src="/images/DeleteX.png" alt="" width="26" height="24" /> |
Eliminare elementi con questo pulsante. L'eliminazione di un lotto o articolo è possibile solamente se non è stato assegnato a nessun Campo QM. Per nascondere l'articolo senza eliminarlo deselezionare l'opzione Attivo. |
| <img style="display: block; margin-left: auto; margin-right: auto;" src="/images/Material8.png" alt="" /> |
|
In this new window, you can choose the material group and the manufacturer. If the necessary information is not available in the drop-down menu, you have the option to quickly create a new manufacturer or group in this window. To do this, press the lightning button. Now you can enter the article name and check Article can be used. After creating you have to define the specific batch you are using at the moment. |
| <img style="display: block; margin-left: auto; margin-right: auto;" src="/images/Material9.png" alt="" /> |
|
Enter the description for the batch and the period of use. You can also add a note. Please remember to check the box Batch can be used. Otherwise, the material will not appear in the list for the creation of QM fields. Confirm the entry by clicking OK and the new material and its corresponding batch will appear in the overview list. |
| <img style="display: block; margin-left: auto; margin-right: auto;" src="/images/Material90.png" alt="" width="765" height="176" /> |
If you are using more them one batches of one article at the same time you can define them by clicking on the green + button in the right middle section.
After you have defined the material you then have to go to the "Free/QM fields" section and define the new QM fields where you want to document your material during a cycle.
| <a href="/index.php?title=MedITEX_IVF_how_to">Back to How to</a> | <a href="#top">Back to top</a> |