How To Configure Octax
From MedITEX - Wiki
MedITEX ./. OCTAX (for OCTAX Version 2.x)
Interface Configuration
Windows Registry configuration
There are two way to change the registry information for Octax ./. Meditex
Option A)
|
Move to: HKEY_LOCAL_MACHINE\SOFTWARE\OCTAX\EyeWare\RecDateAD |
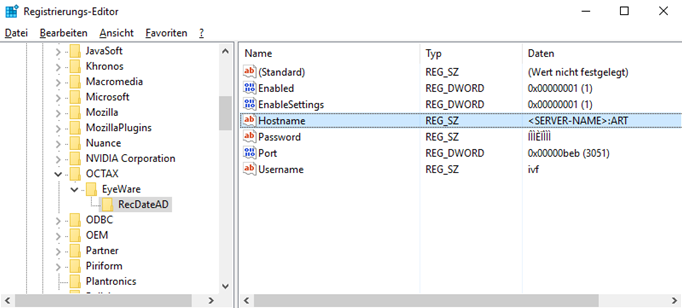 |
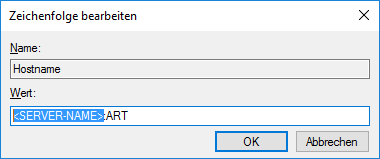
| Double click on Hostname and change the entry to the MedITEX DB Server |
 |
Option B)
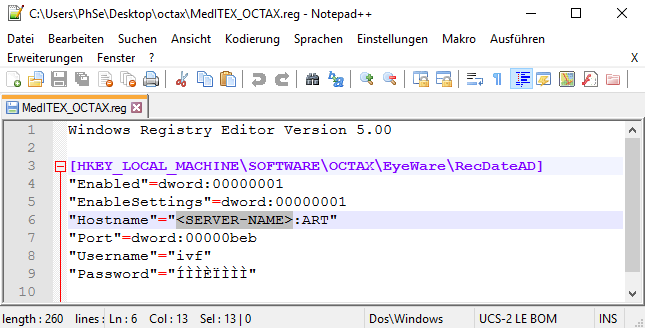
| Download the registration File here, unzip it and open it in an texteditor of your choice. Now change the line "Hostname" to the MedITEX DB Server |
 |
|
After editing the file, simply execute it to make changes to your registry. |
How to Export
| Select one or more images for export. Then click the export button. |
|
|
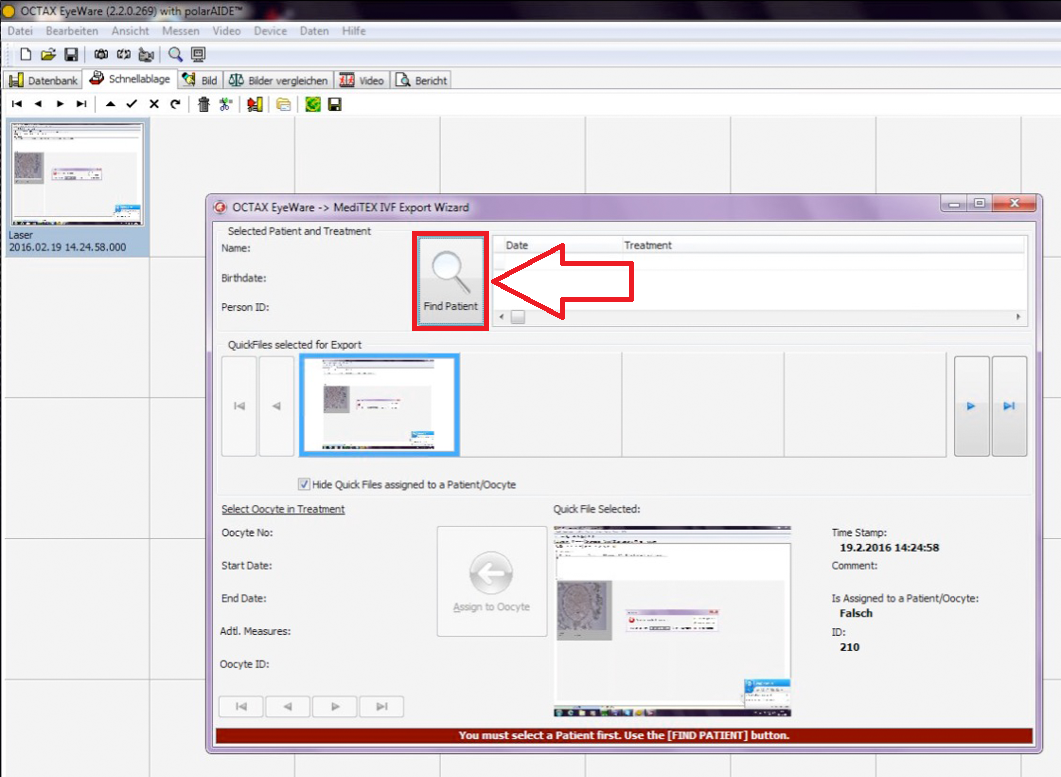
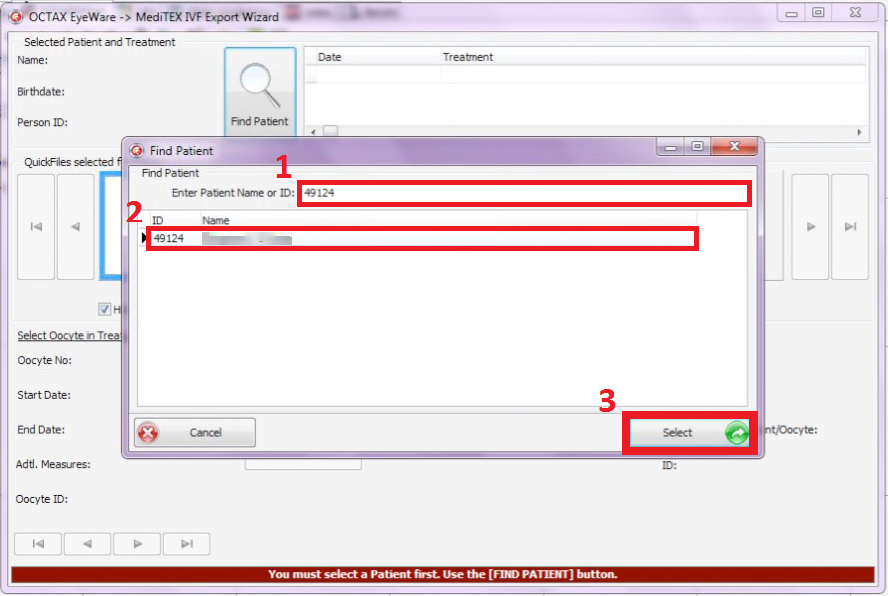
| After clicking the export button a new window "MedITEX IVF Export Wizard" should open. Click the "Find Patient" button. |
 |
|
1. Type in a Patient ID or the name of the patient. 2. If there are mutiple entrys chose the patient you want to export the images. 3. Click the "Select" button to proceed. |
 |
|
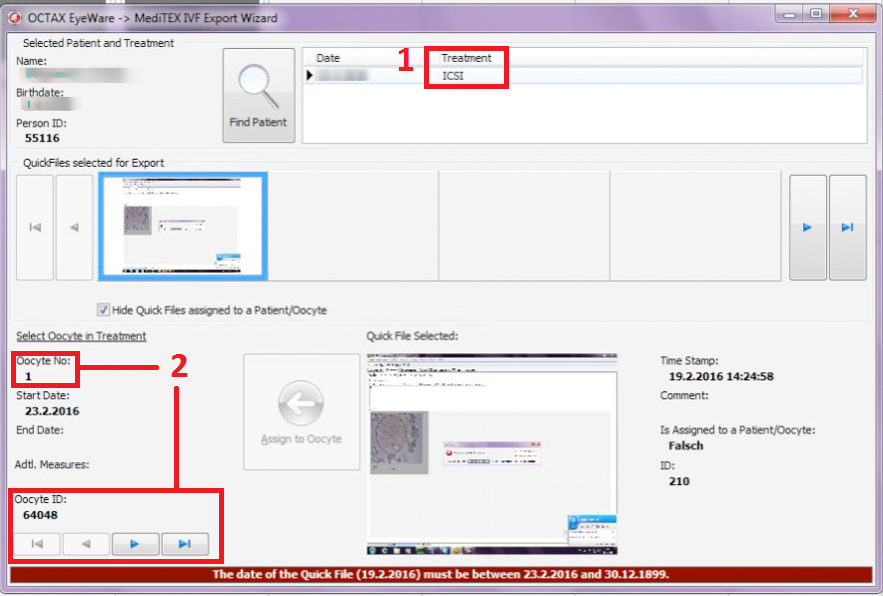
1. Select a Treatment 2. Select a Oocyte |
 |
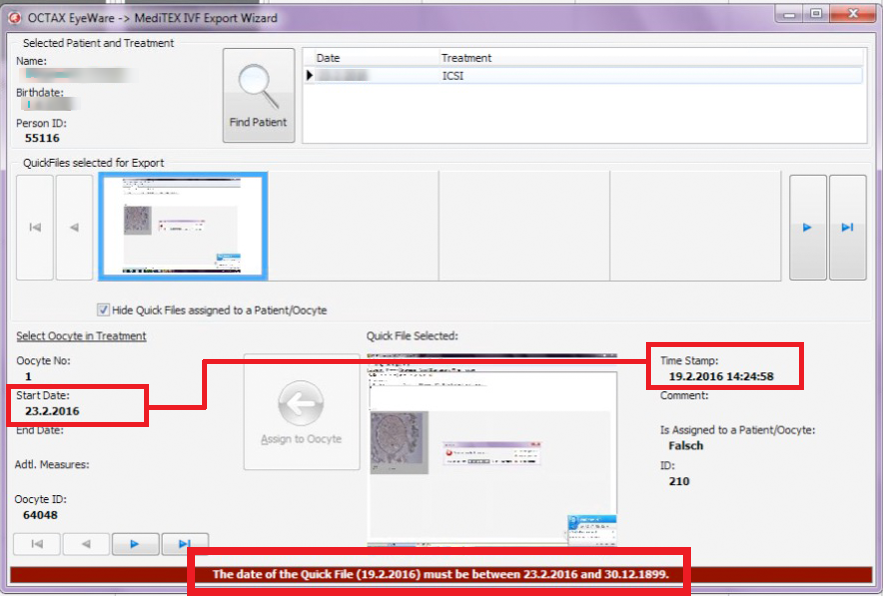
| ATTENTION: Image Time Stamp must fit to Oocyte day date! |
 |
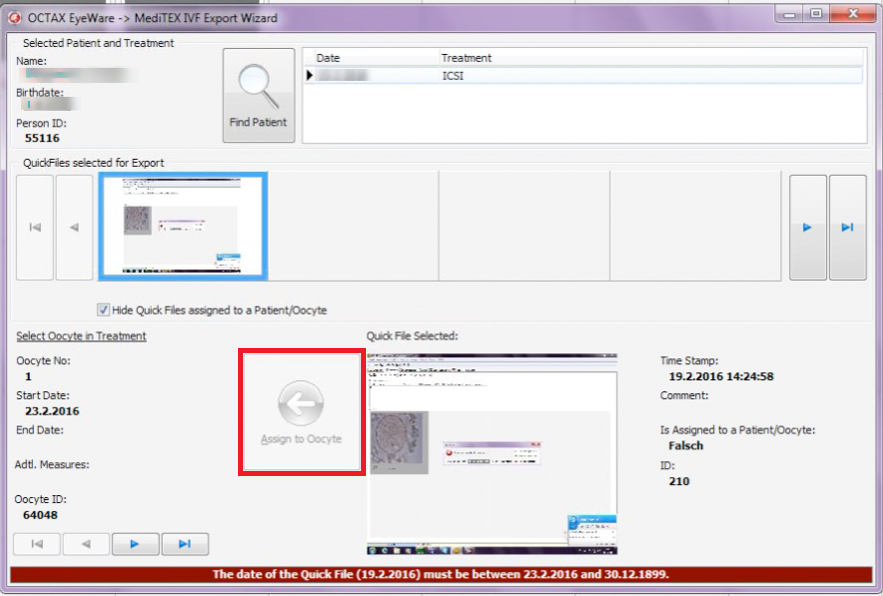
| Assing photo to oocyte by clicking the "Assing to Oocyte" button. |
 |
