How to use MedITEX DICOM Application
From MedITEX - Wiki
MedITEX DICOM Server (MDS) has 2 main tasks:
- Communication with ultrasound devices to retrieve DICOM measurements ("ultrasound" or "structured report") and provide worklists.
- Processing the DICOM measurements, extracting header information and perform a database insert or update for the associated patient.
MedITEX DICOM Server can be run as a service (hidden) or as a normal application with a user interface.
This is a description of its general workflow:
- A DCM message comes in:
- In case of a worklist request, MDS sends back the daily task list.
- In case of any measurement, MDS saves a DCM file in a so called SPOOL folder.
- DCM files are scanned, analyzed and processed (one after the other).
- Each single step is recorded in a protocol file:
- Communications in a monthly created log file.
- DCM processing in a protocol keeping the last 50 records.
- If a DCM file is successfully processed it will be saved in a so called ARCHIVE folder, in case of errors it will be saved in a FAILED folder where it can be used later for manual re-work.
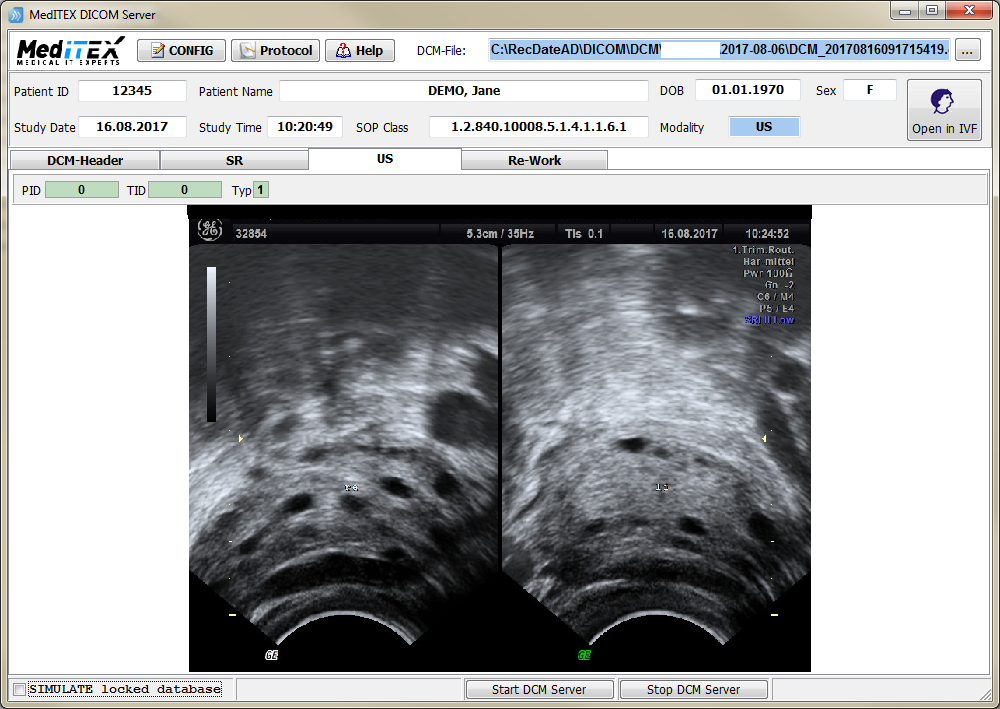
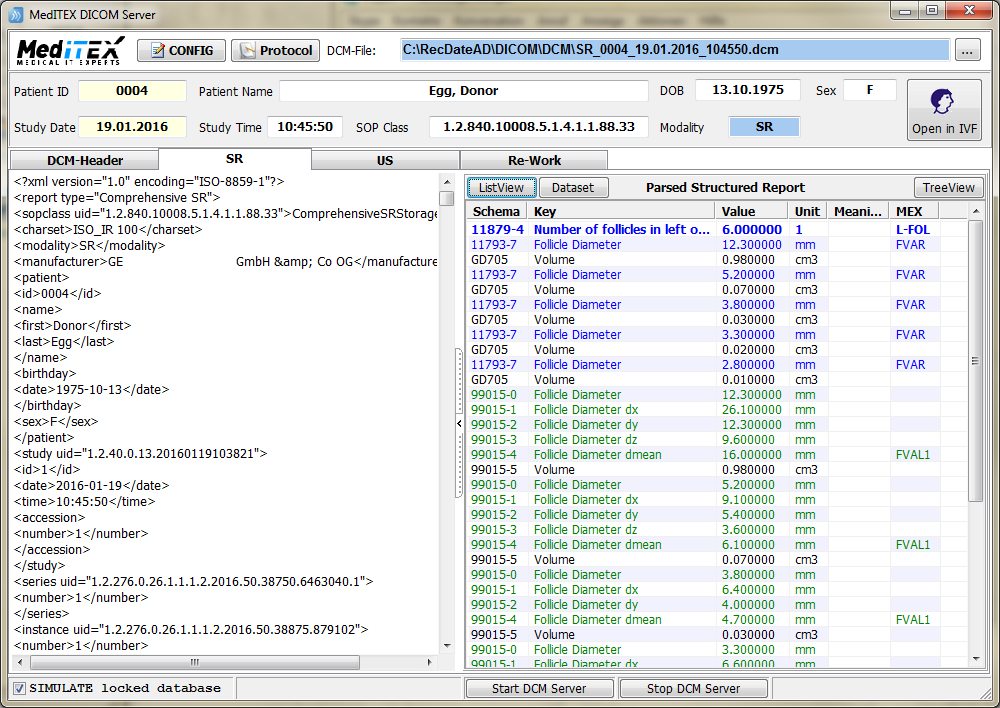
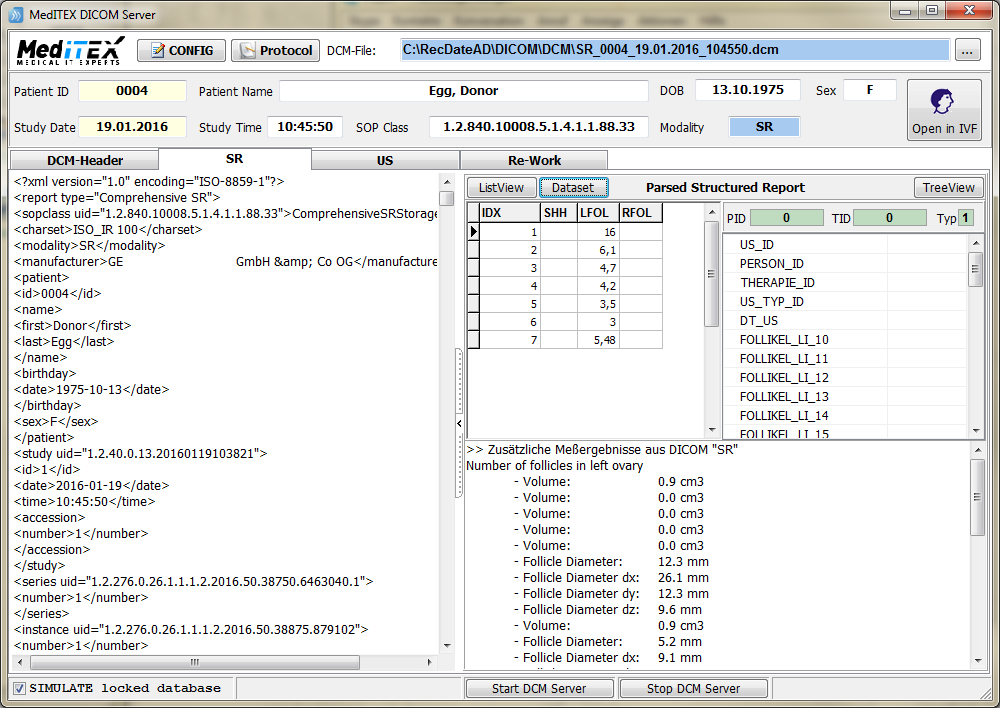
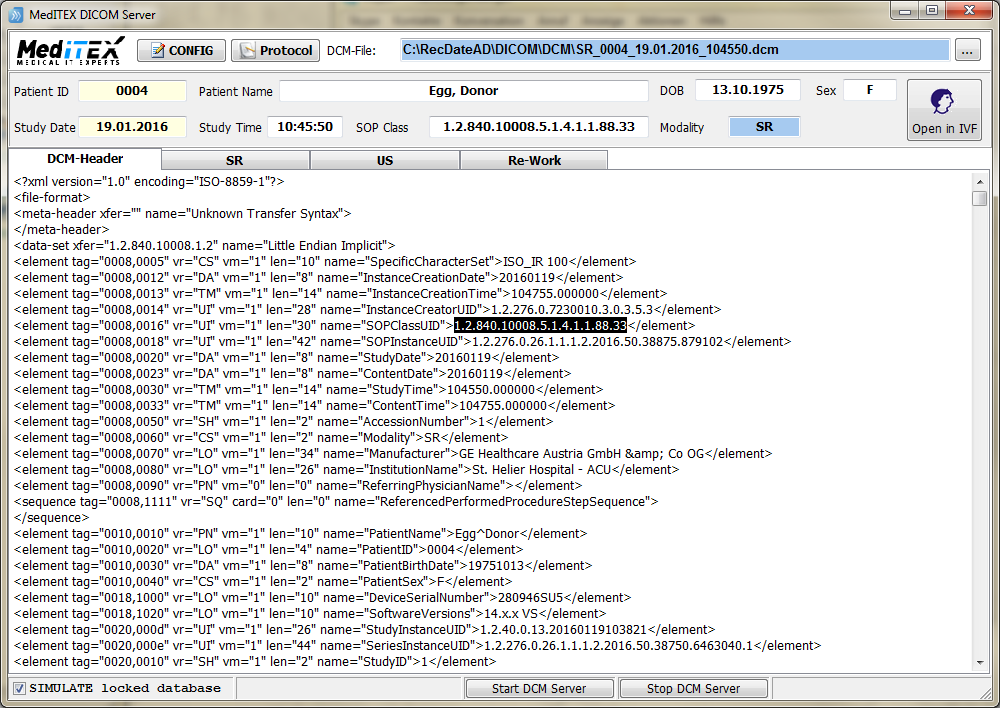
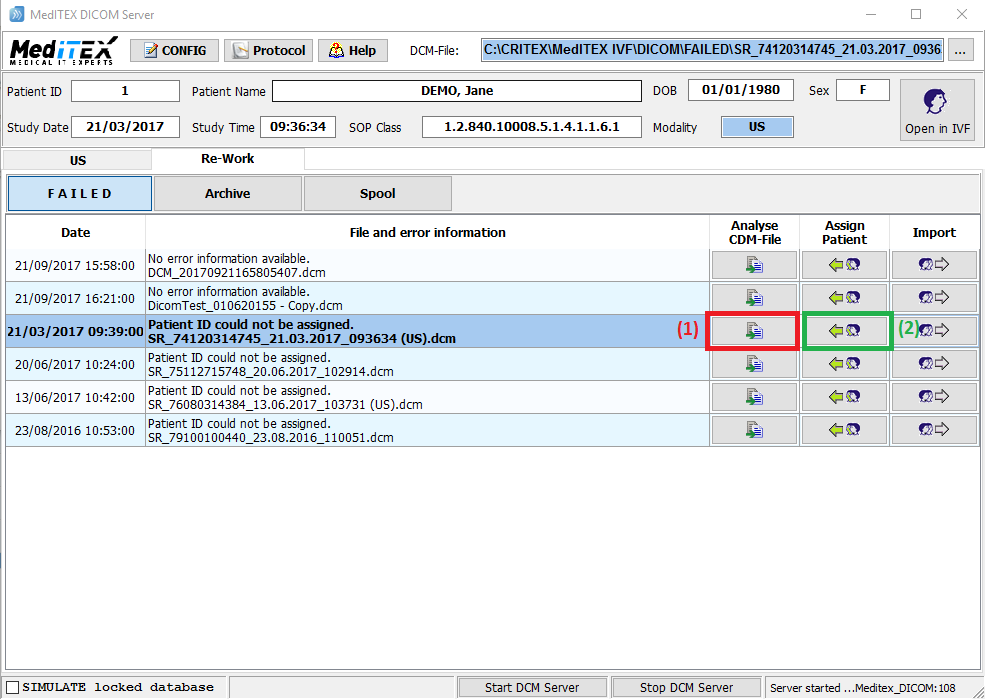
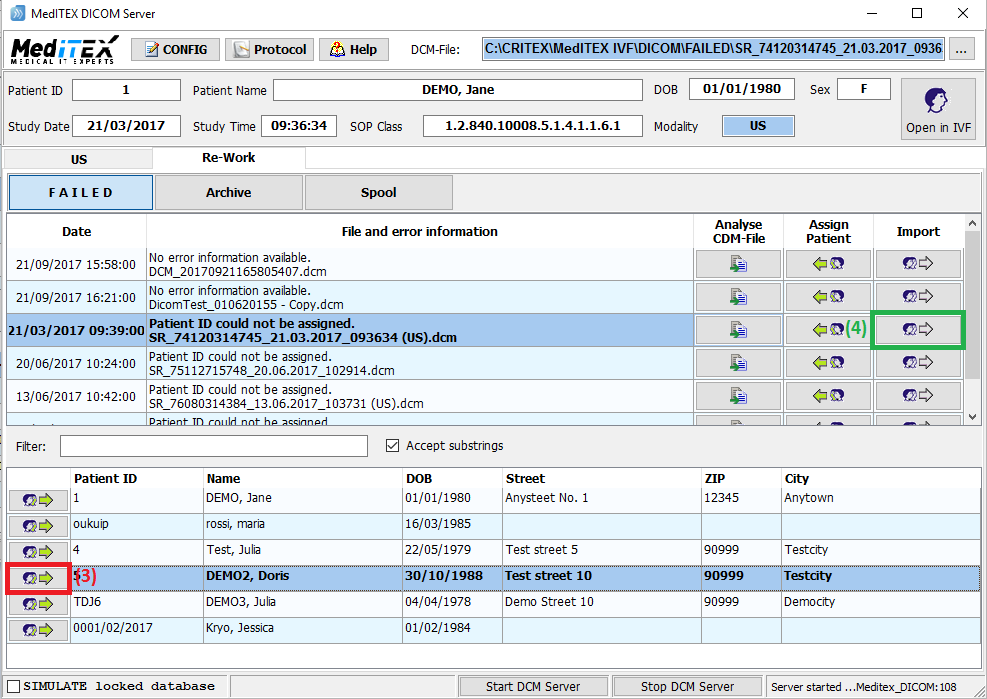
The following screenshots describe each form of the MedITEX DICOM Server Application:
Patient ID, Patient Name, DOB (Date of Birth), Sex, Study Date / Time and SOP Class are extracted from the DCM header (no manual interaction is possible here).
The SOP Class defines the Modality that informs the MDS Application which kind of information is in the DCM file and how it should be processed.
Drag any DCM file from explorer and drop it into the MDS form or click on the upper right button to open a file dialog.
The DCM file is immediately analyzed and processed if possible.
The above screenshots show a typical US (ultrasound image), a typical SR (structured report) and how the relevant follicle measurement is extracted and prepared for database insert or update.
The 3rd picture shows (for the sake of completeness) typical header information. If no header can be extracted or the internal SOPClassUID is not mapped to a modality, the whole DCM file cannot be processed and is immediately moved into the FAILED folder.
The normal situation where you can interact with the MDS application is called RE-WORK.
Here you can manually work on a DCM file, associate the correct patient and run the import again.
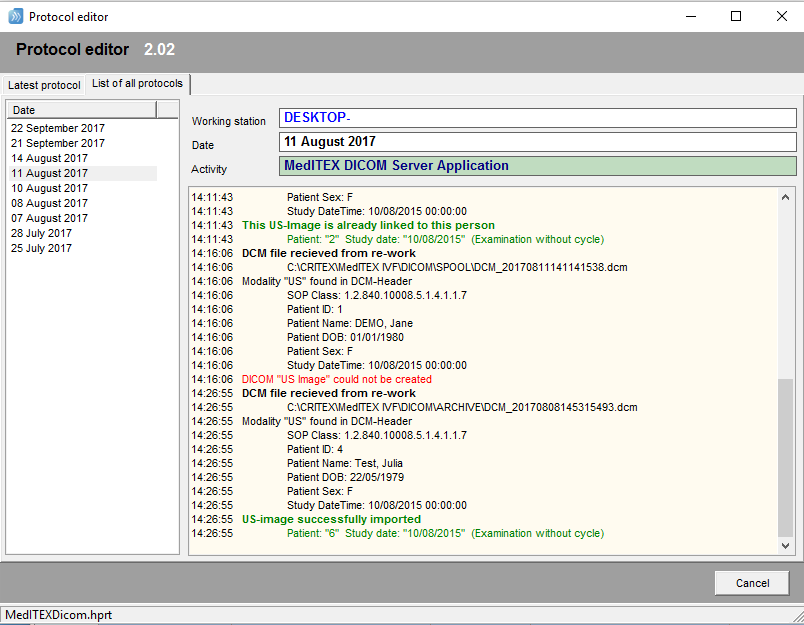
Last not least a screenshot of a typical protocol. Two records are displayed: one successfully imported ultrasound image, and one failed because of unmapped patient ID.
