Come utilizzare MedITEX DICOM
From MedITEX - Wiki
Contents |
MedITEX DICOM
MedITEX DICOM Server (MDS) ha due task principali:
- Comunica con ecografi per ricavare misure DICOM ("Ecografie" o "Report Strutturati") e inviare la worklist giornaliera.
- Processa le misure DICOM, estraendo le inormazioni presenti nell'intestazione e inserire o modificare record associati al paziente.
MedITEX DICOM Server può essere aperto come servizio in background (nascosto) o come una normale applicazione utilizzando l'interfaccia utente.
Descrizione del workflow generale:
- Un messaggio DICOM viene inviato al server:
- Se si tratta di una richiesta di worklist, MDS restituisce la lista dlle ecografie giornaliere.
- Se si tratti di una qualsiasi misurazione DICOM (immagini ecografiche, conta follicoli...), MDS salva un file DCM in una cartella chiamata SPOOL.
- I file DCM sono scannerizzati, analizzati e processati (uno dopo l'altro).
- Ogni step è documentato in un file di log:
- Le comunicazioni in un file mensile.
- I DCM file processati, in un file che contiene gli ultimi 50 record.
- Se il file DCM è processato correttamente sarà salvato nella cartella ARCHIVE, se invece si sono presentati degli errori il DCM file sarà salvato in una cartella FAILED dove potrà essere utilizzato sucessivamente per il re-work manuale.
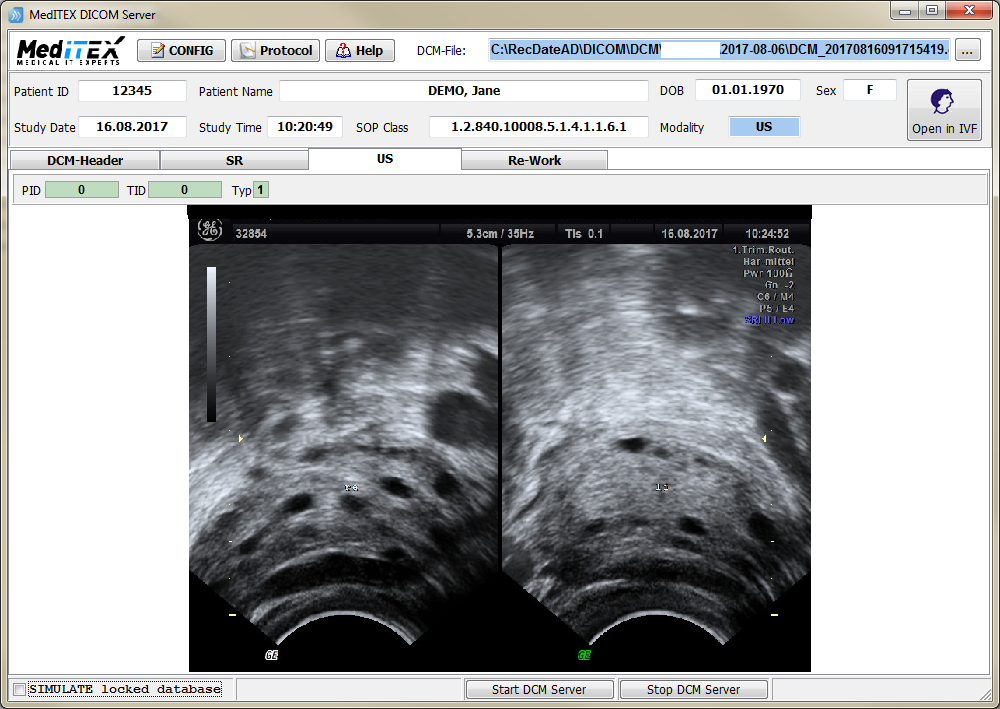
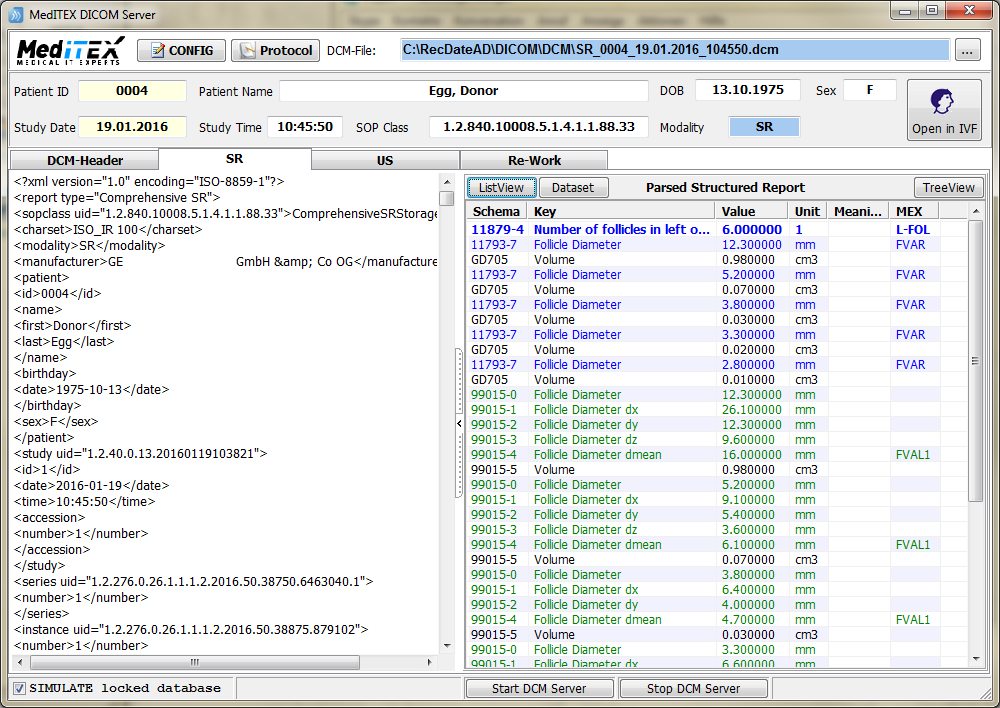
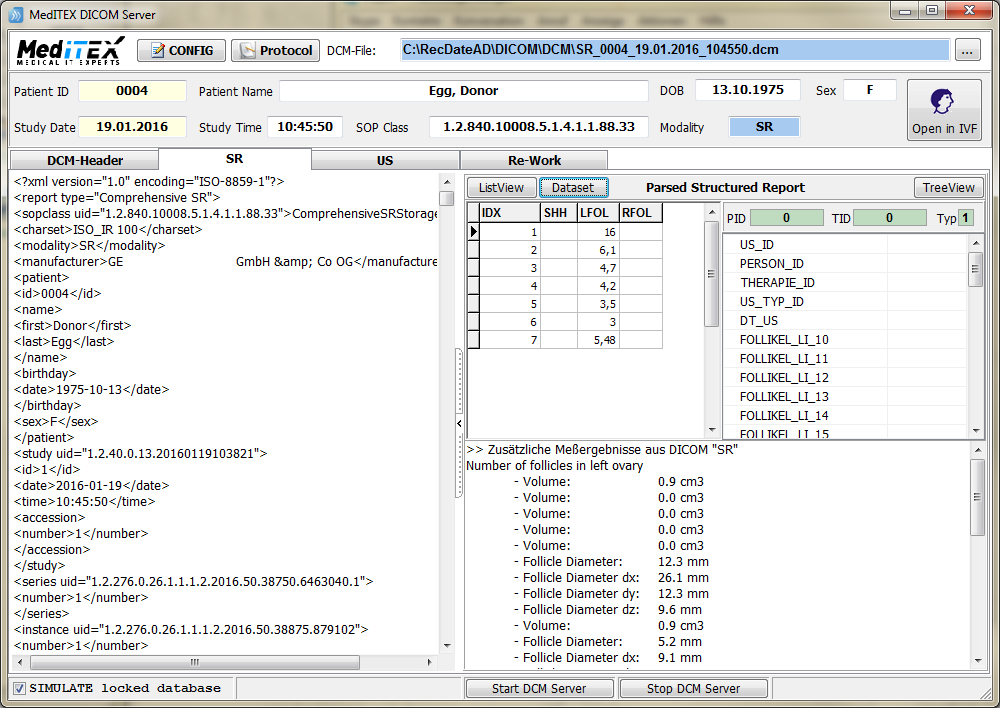
Le immagini riportate qui sotto mostrano una tipica immagine ecografica (US), report strutturato (SR) e come le diverse misure folicolari sono estratte e preparate per l'inserimento o l'aggiornamento nel Database di MedITEX.
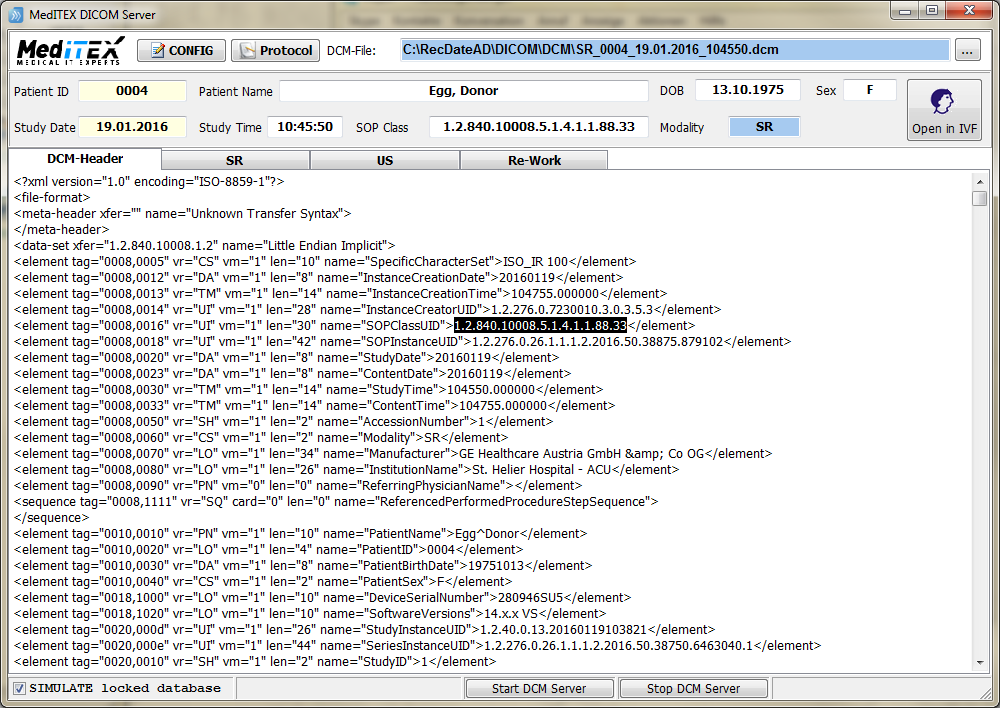
ID Paziente, Nome, DDN (Data di nascita), Sesso, Data e ora US e classe SOP sono estratte dall'intestazione del file DCM (nessuna interazione manuale è permessa in questa fase).
La classe SOP definisce la modalità che informa l'applicazione MDS su quali informazioni sono inserite nel file DCM e come processarlo.
- Trascinare qualsiasi file nella finestra del MDS o cliccare il pulsante in alto a destra per aprire la finestra di ricerca.
- Il file DCM verrà immediatamente analizzato e processato se possibile.
The following screenshot shows a typical header information. If no header can be extracted or the internal SOPClassUID is not mapped to a modality, the whole DCM file cannot be processed and is immediately moved into the FAILED folder.
The normal situation where it is possible to interact with the MDS application is called RE-WORK.
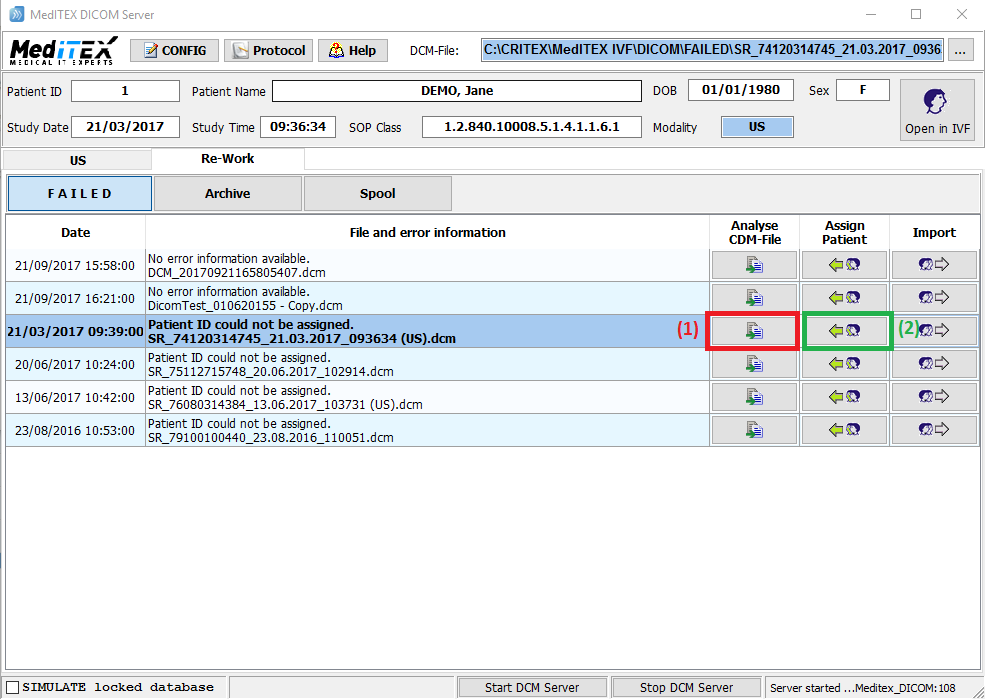
Here you can manually work on a DCM file, associate the correct patient and run the import again.
- Click on Analyse CDM-File (1) and the patient records of the selected DCM file will be displayed.
- When clicking on Assign Patient (2) then, a list of all your patients will open.
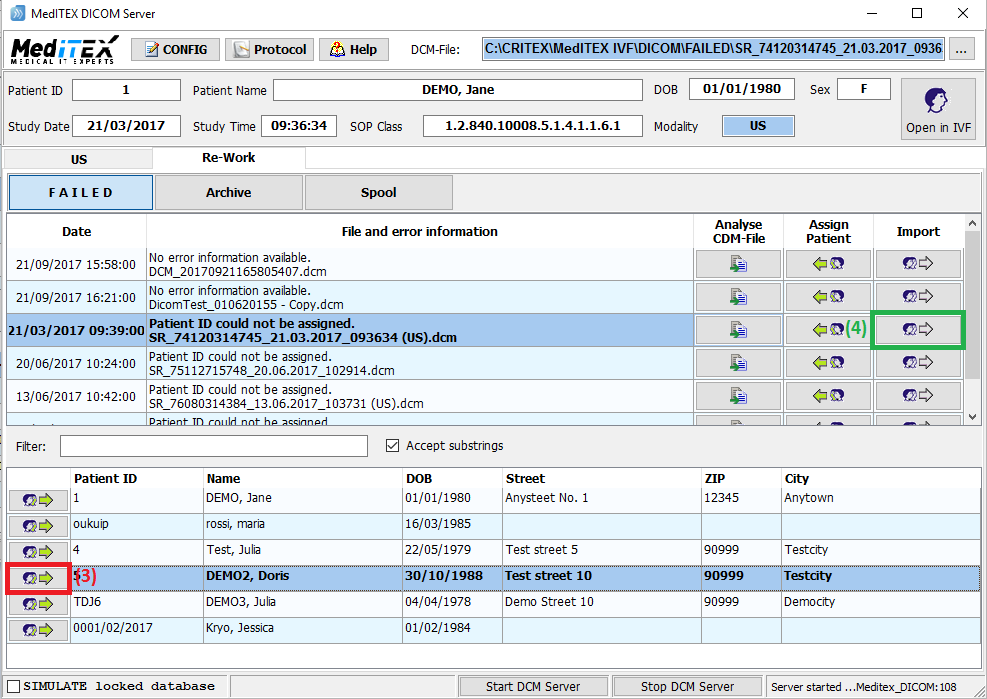
- Choose from this list the patient to whom the DCM file should be assigned and click on Assign Patient (3) symbol next to the patient ID.
- Once the new patient is assigned to the DCM file, click on Import (4) and the file will be processed.
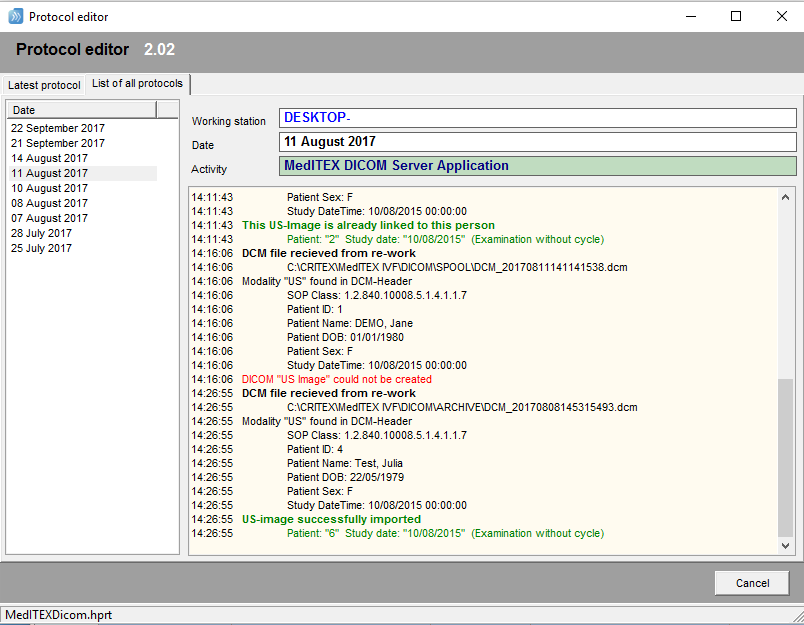
This is an example of a typical protocol displaying one successfully imported ultrasound image and another failed one.
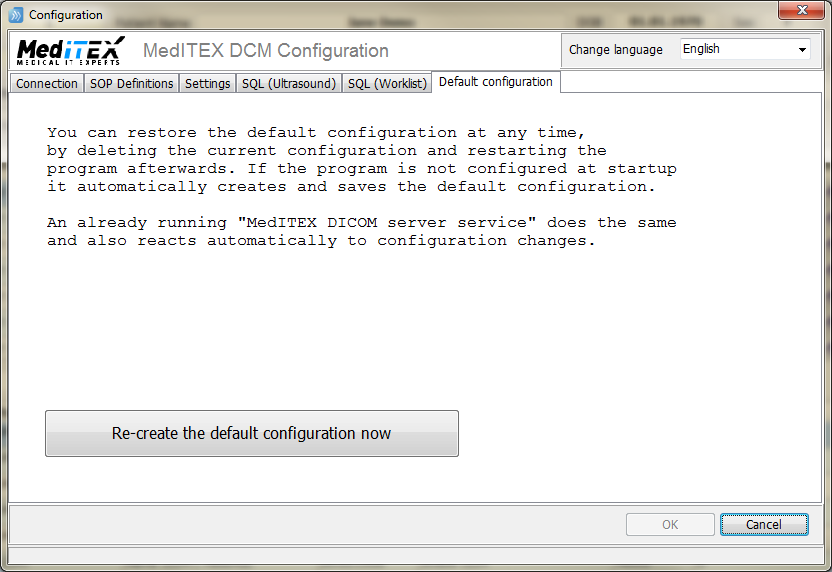
MedITEX DICOM Server Configuration
DICOM Server
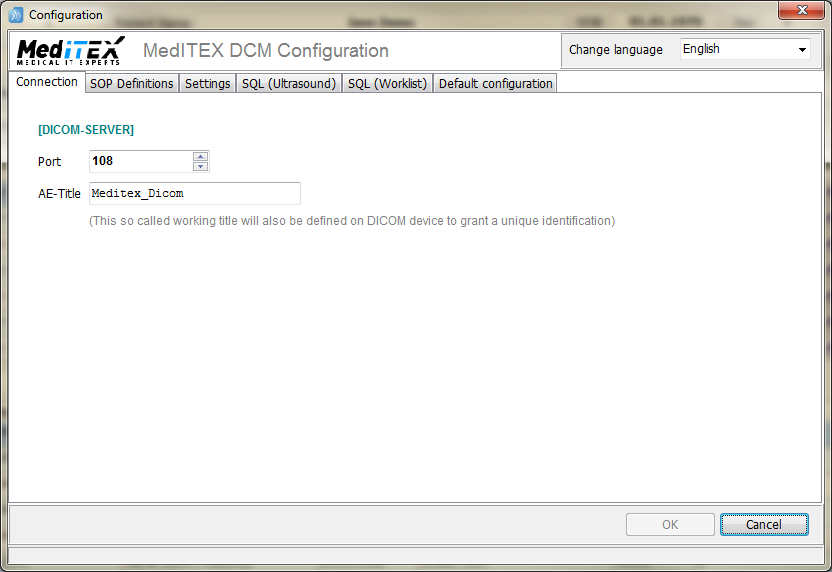
The communication between ultrasound devices and MDS is done via TCP/IP.
The IP address is the address of computer where the MDS is running. The default port is 108 but any other port can be assigned if the port 108 is in use.
The so called AE-Title only matters if different database applications in your network provide different worklists. In case of many ultrasound devices in combination with MDS (and no other application that listens on the defined port), the AE-Title is just helpful to have.
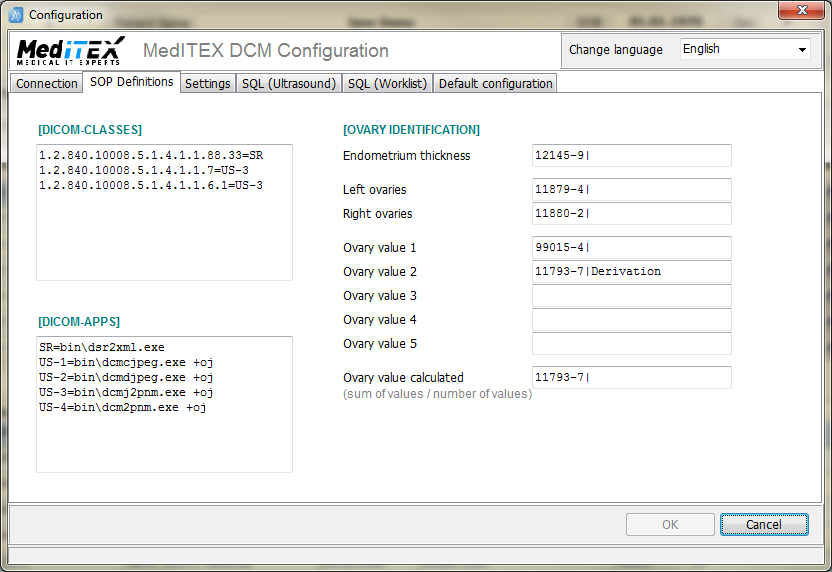
The list of DICOM-CLASSES (see: DCM file header -> SOPClassUID) defines the modality and therefore the general further processing.
Each modality association in the classes list (SR, US-1, US-2, etc.) must – as a next step – have a DICOM-APP assigned, which will finally extract reports (SR) or images (US) from the DCM file.
Ovary identification
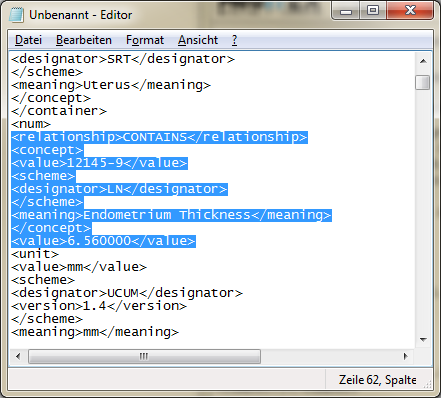 |
To retrieve the follicle measurement from the SR files, the IDs of the fields where the relevant information is located have to be defined (as displayed above).
These IDs can be found in the XML file (decoded from DCM SR) as "concept <value> | concept <meaning>".
If the value and the meaning (can be empty) match, the "CONTAINS <value>" will be read as ovary measurement value.
Settings
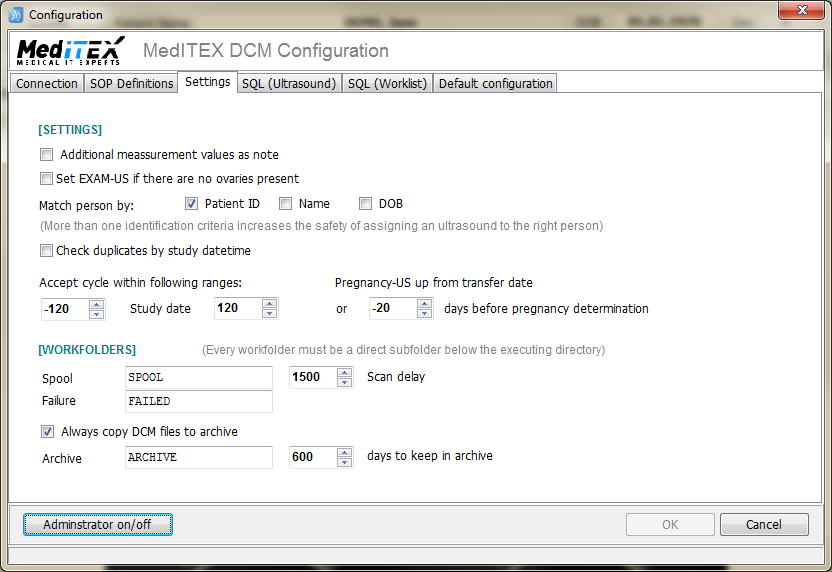
- MedITEX DICOM Server normally imports ultrasound images (US) and follicle measurements (SR) from a DCM file.
- Every other information in an SR file that does not belong to follicle measurement can be additionally imported, for this purpose, the checkbox "Additional measurement values as note" must be ticked.
- Follicle measurements normally belong to a cycle. Tick checkbox "Set EXAM-US" to import further measurements which will then be treated as examination ultrasound.
- Match person by: Patient ID (default) – Name – DOB. More than one identification criteria increase the safety of assigning the ultrasound to the right person.
An extracted ultrasound picture (US) has no file name. Subsequently, a file name must be created, what is done by using the current timestamp (for example: DCM_20170801162035401.jpg = year + month + day + hour + minute + second + millisecond). When using the study date time (year to second) instead, the database can be checked and duplicates can be avoided (if each new ultrasound image gets its own study time and this depends of how the ultrasound device was set up and whether the daily workflow allows a quick adjustment of the study time or not).
- It is possible to define how a target cycle should be found in the database by searching the newest cycle of a patient using study date time and subtracting or adding days (within range-from to range-to). Normally the transfer date is used to decide whether an ultrasound should be treated as pregnancy ultrasound or not. If the cycle has no transfer (IUI for example) a date range can be defined before pregnancy and the same logic will be used: study time is compared to this range.
Workfolders
- Three folders are automatically created:
| SPOOL Folder | Every incoming DCM message is saved as a file to this folder. |
| FAILED Folder | Every DMC file that cannot be processed is moved into this folder. |
| ARCHIVE Folder | Backup of successfully processed DCM files. |
- Scan delay: If MDS gets aware of changes in the SPOOL folder, it will wait for n milliseconds (1500 is a recommended value) before the files are scanned and processed.
- Days to keep in archive: DCM backups in the ARCHIVE folder that are older than the defined days will be automatically deleted.
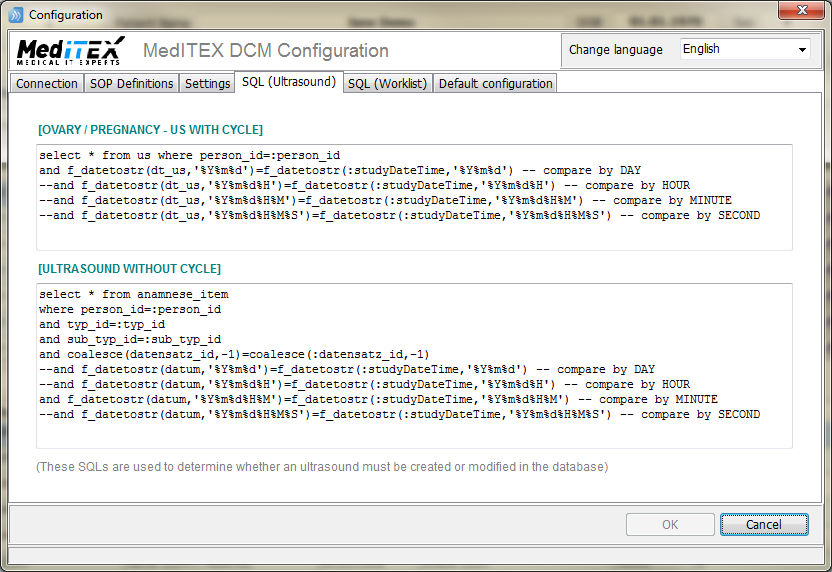
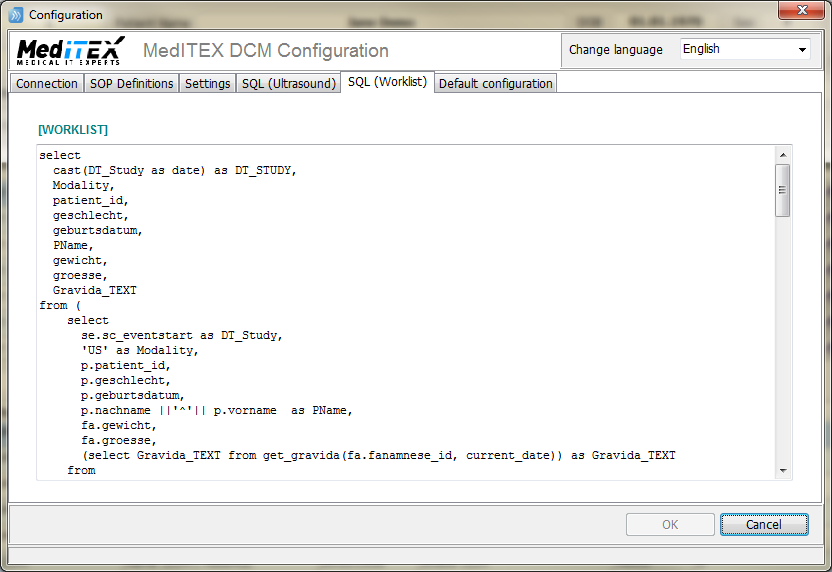
Ovary / Pregnancy - US with cycle / US withou cycle - Worklist
The first two SQL select statements are used to locate ultrasound or examination records in MedITEX IVF database.
The decision whether a record must be inserted or can be updated depends on the result of these select statements.
The worklist select statement is called every time an ultrasound device asks for the daily worklist.
Please do not edit these statements and contact support in case of need.
| Back to MedITEX DICOM | Back to top |
