How to use material QM fields?
From MedITEX - Wiki
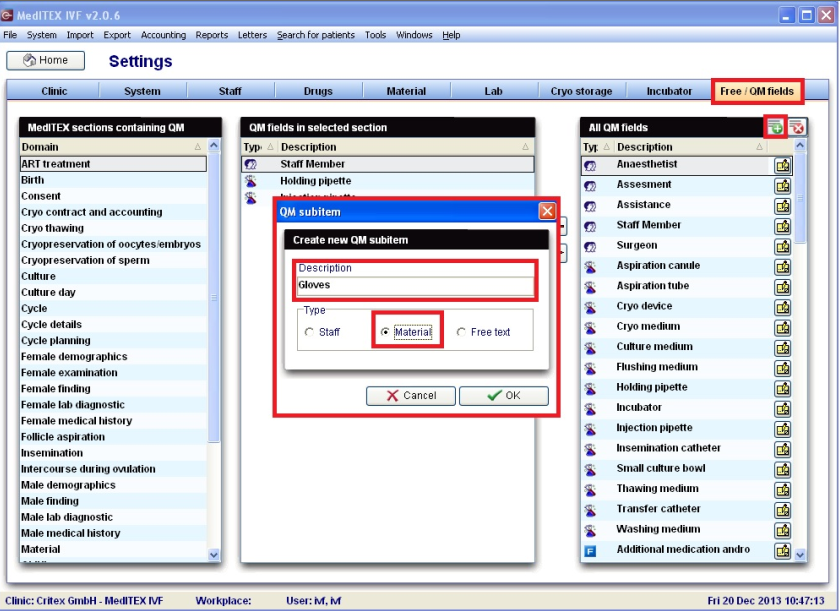
After you have defined the material you then have to go to the “Free / QM fields” section and define the new QM fields where you want to document your material during a cycle.
In this example, a created QM field for “Gloves” are set as type “Material”.
| For adding a new QM field you have to click the green + button in the right upper corner. |
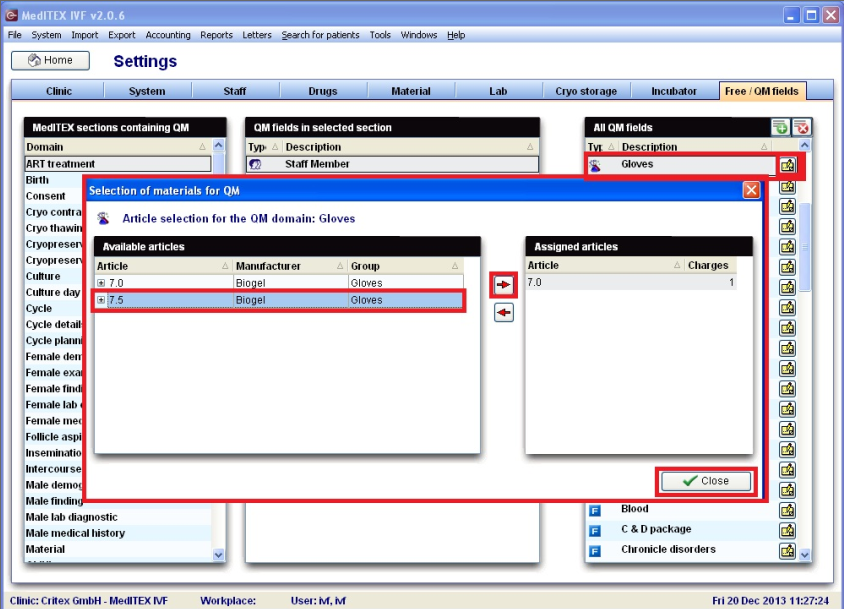
Next step is to take over the materials for the QM field.
Therefore you select in the right table named “All QM fields” the designated field and click on the yellow button and then you can assign the article you want to document in this QM field by selecting it in the right table and then clicking the right arrow.
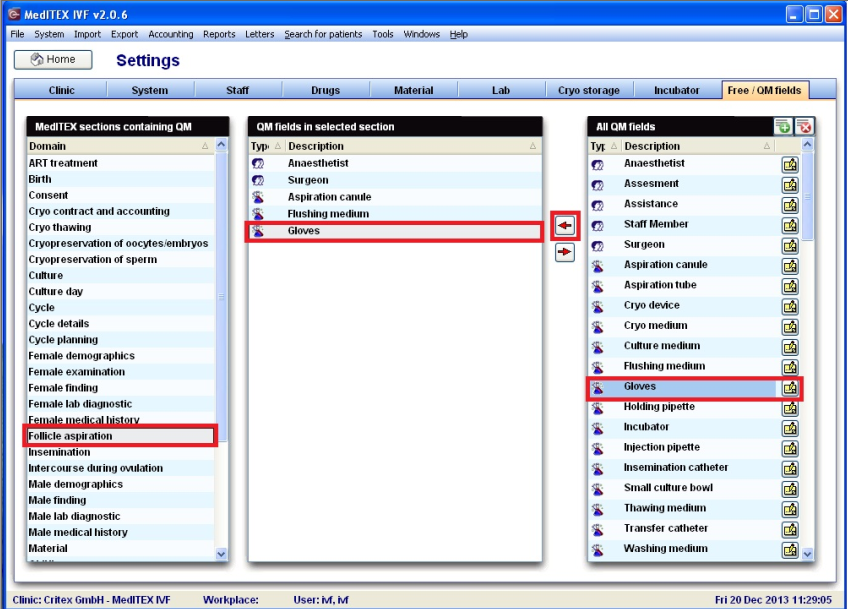
Then you have to assign the QM field to the specific section in the program. Here you see the example for the “Gloves” which should be documented in my example in the “Follicle Aspiration”.
In the right table you select the designated QM field in the left table you select the section in the program you want to document this QM field and by clicking the left arrow you assign the QM field to the section.
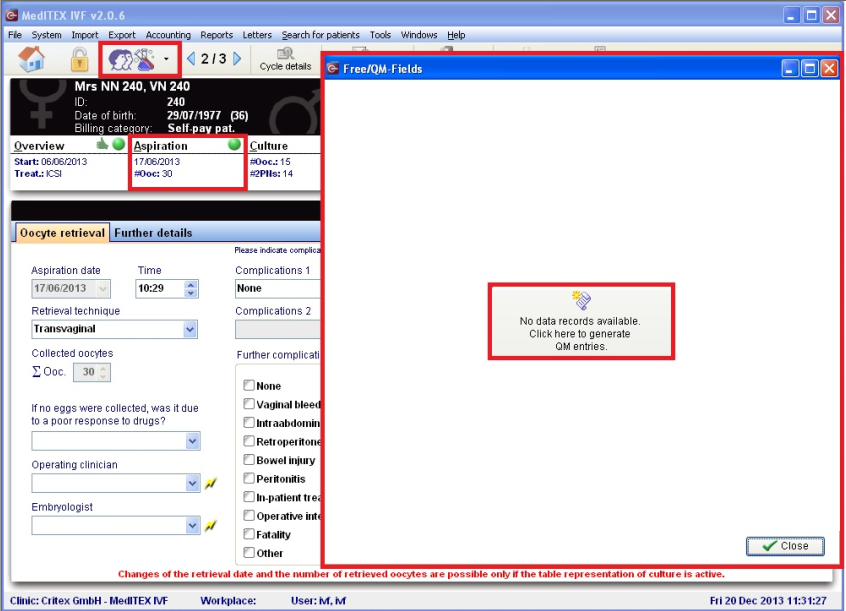
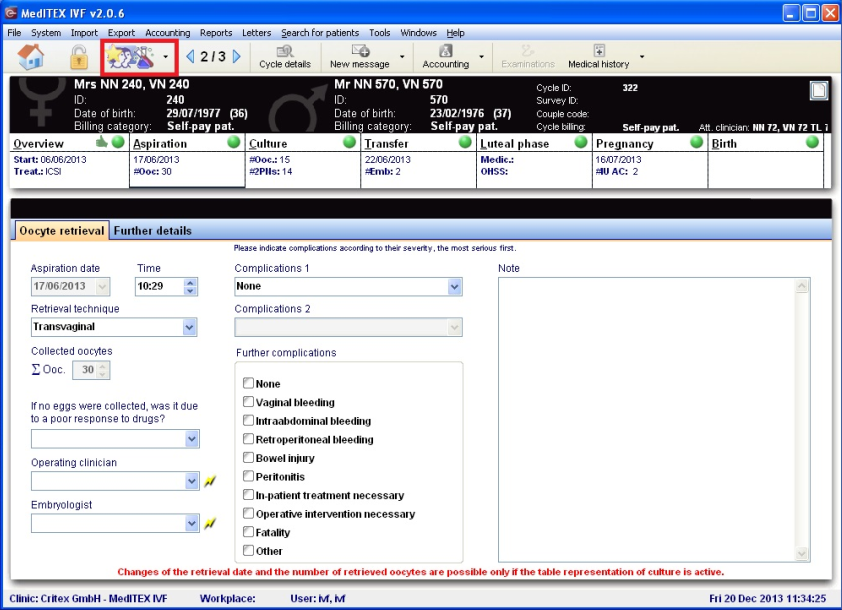
In order to document the material you have to click on the QM button in the section for example here shown in the “Aspiration” section.
Then you have to activate the QM section by clicking the button in the middle of the window.
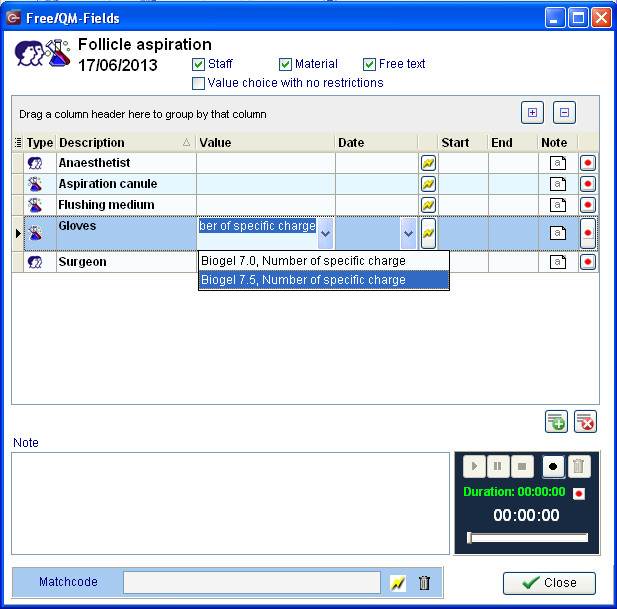
Then you can choose the material you have used during the treatment.
| In every section if QM fields have been documented the style of the QM button changes to the following: |
| Back to How to | Back to top |
