How to create a new cryo contract?
From MedITEX - Wiki
| Line 1: | Line 1: | ||
| − | <p>A new cryo contract is created from the <strong>patient’s demographic view</strong>. In order to create it, <strong>click on the arrow next to | + | <p>A new cryo contract is created from the <strong>patient’s demographic view</strong>. In order to create it, <strong>click on the arrow next to New entry button</strong>. From the menu, <strong>select Cryo contract</strong>.</p> |
<table style="margin-left: auto; margin-right: auto;" border="0"> | <table style="margin-left: auto; margin-right: auto;" border="0"> | ||
<tbody> | <tbody> | ||
| Line 17: | Line 17: | ||
</table> | </table> | ||
<p> </p> | <p> </p> | ||
| − | <p><strong>Select the document</strong> that is going to be used as the contract from the bottom of this screen, or click on <strong> | + | <p><strong>Select the document</strong> that is going to be used as the contract from the bottom of this screen, or click on <strong>Create contract document</strong> to auto generate the contract with the data entered.</p> |
| − | <p>Click <strong> | + | <p>Click <strong>OK</strong> to save.</p> |
<p> </p> | <p> </p> | ||
<p><strong>Explanation of the fields/icons:</strong></p> | <p><strong>Explanation of the fields/icons:</strong></p> | ||
Revision as of 13:45, 17 January 2013
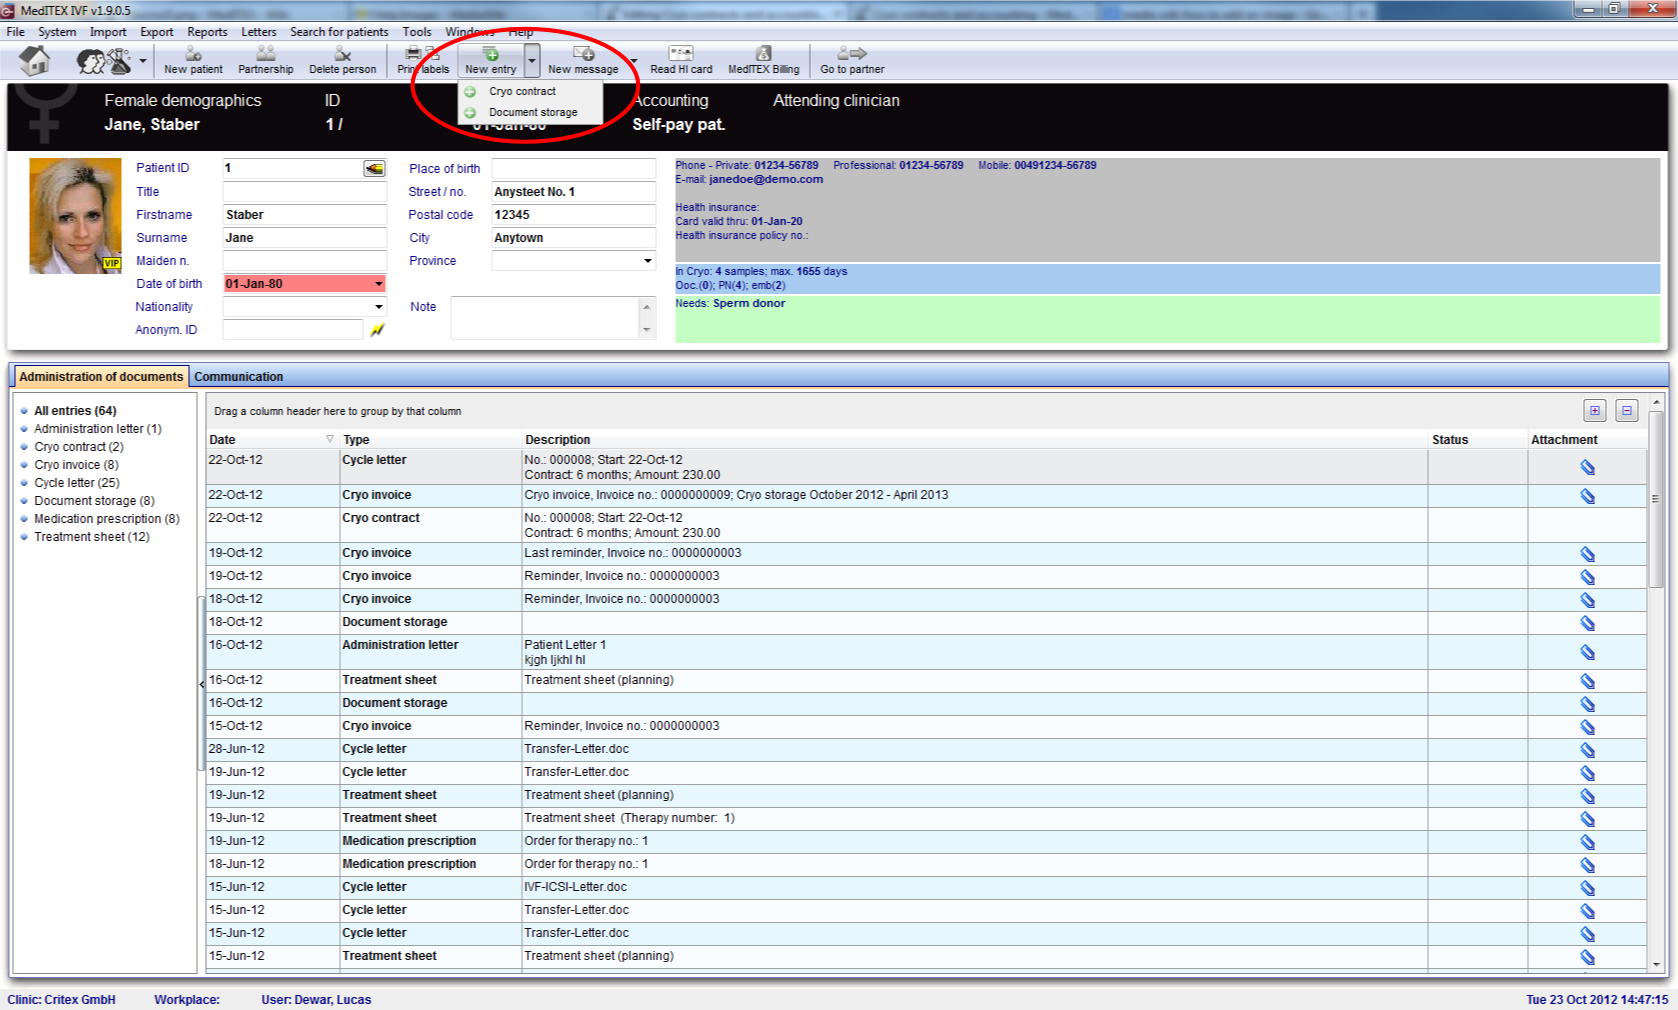
A new cryo contract is created from the patient’s demographic view. In order to create it, click on the arrow next to New entry button. From the menu, select Cryo contract.
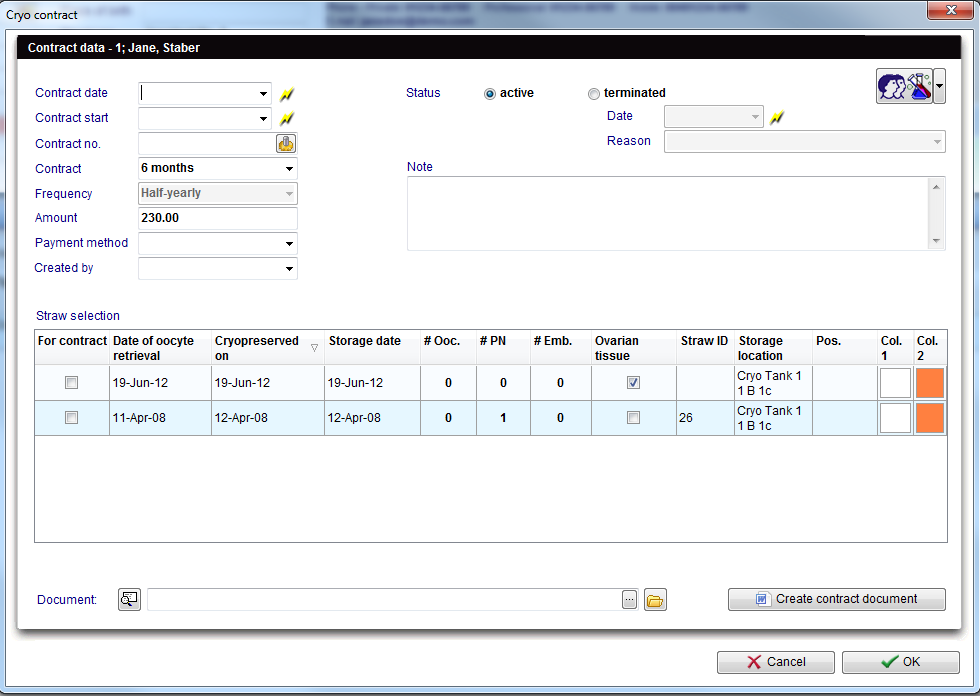
From this new window, fill all the information and select the straws that are going to be assigned to this contract.
Select the document that is going to be used as the contract from the bottom of this screen, or click on Create contract document to auto generate the contract with the data entered.
Click OK to save.
Explanation of the fields/icons:
- Contract date: date of creation of the contract.
- Contract start: date when the contract start being valid.
- Contract no.: number of the contract. It can be auto generated pressing the button <img src="/images/strawID.jpg" alt="File:strawID.jpg" width="21" height="19" />.
- Contract: coverage (in months) of the contract.
- Frequency: how often the contract has to be update.
- Amount: cost of the contract.
- Payment method: method for paying the invoice generated after the contract.
- Created by: person that created the contract.
- Status: current situation of the contract. This can be active or terminated. Active contracts are still valid and in case a contract has expired, all straws are thawed or for some other reason the contract is not necessary, a contract can have its status terminated.
- Date: date when the contract was terminated. This field is only activated when terminated status is checked.
- Reason: reason for terminating the contract. This field is only activated when terminated status is checked.
- Note: blank space left for unusual situations where it is necessary to have information documented.
- Straw selection: list of straws cryopreserved for the selected patient.
- Document: selection of file to be used as a template for the contract.
| <a href="/index.php?title=MedITEX_IVF_how_to">Back to How to </a> | <a href="#top">Back to top</a> |

