First Steps Before Using MedITEX
From MedITEX - Wiki
| Line 9: | Line 9: | ||
<h2>Technical Requirements</h2> | <h2>Technical Requirements</h2> | ||
<p> </p> | <p> </p> | ||
| − | <p>[[Image: | + | <p>[[Image:Tech1.png|none|740px|thumb|left|link=http://wiki.meditex-software.com/images/Tech1.png]]</p> |
<p> </p> | <p> </p> | ||
<table style="float: right;" border="0"> | <table style="float: right;" border="0"> | ||
Revision as of 16:44, 29 October 2013
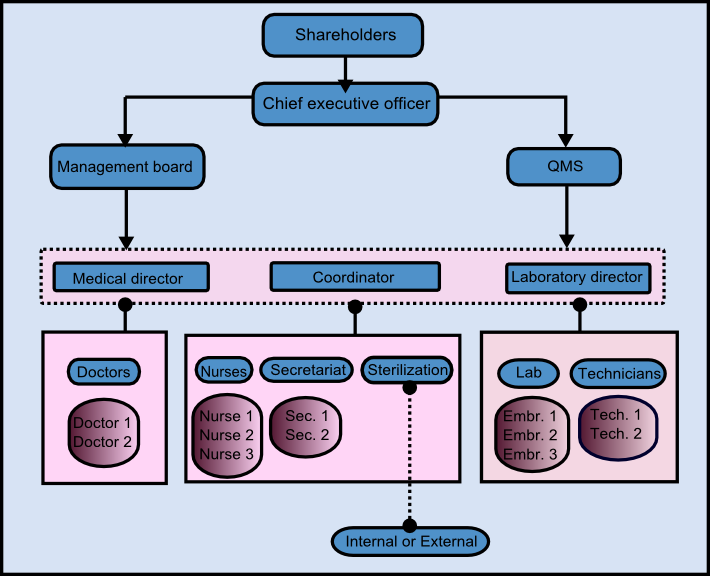
Personnel Organization
In an IVF clinic you have different groups of personnel like doctors, physicians, embryologists, nurses, secretaries... All of them are dealing with information and documents, but each group will need to work with a different access to MedITEX software solutions because of various levels of responsibilities.
To ensure that these different levels of permissions will not be exceeded, each user needs unique login data and special defined rights.
The secretaries for example, speak with the patient the first time by registration or a telephone call. They document the privat informations about the patient. Later the doctor adds the results of the examination. The laboratory staff has no possibilities to change clinical information, just to complete the missing data.
The hospital workflow differs in each clinic. It is important to know about these internal processes and their command structure before using MedITEX, so assigning rights is getting much more easier.
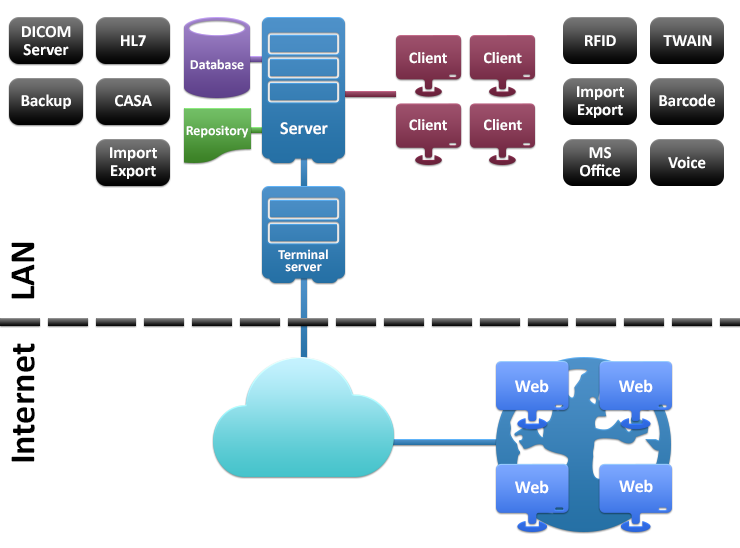
Technical Requirements
|
<a style="font-size: small;" href="/index.php?title=Main_Page">Back to MedITEX products</a> |
<a href="#top">Back to top</a> |

