MedITEX IVF Settings
From MedITEX - Wiki
| Line 352: | Line 352: | ||
<tr> | <tr> | ||
<td><img style="display: block; margin-left: auto; margin-right: auto;" src="/images/Plus.png" alt="" width="34" height="28" /></td> | <td><img style="display: block; margin-left: auto; margin-right: auto;" src="/images/Plus.png" alt="" width="34" height="28" /></td> | ||
| − | <td>Press this button to add a new | + | <td> |
| + | <p>Press this button to add a new unit.</p> | ||
| + | <p>More information about adding a new unit read <a href="/index.php?title=How_to_add_a_new_canister_to_the_cryo_storage%3F">here</a>.</p> | ||
| + | </td> | ||
</tr> | </tr> | ||
<tr> | <tr> | ||
<td><img style="display: block; margin-left: auto; margin-right: auto;" src="/images/DeleteX.png" alt="" width="26" height="24" /></td> | <td><img style="display: block; margin-left: auto; margin-right: auto;" src="/images/DeleteX.png" alt="" width="26" height="24" /></td> | ||
| − | <td>Select the | + | <td>Select the unit you wish to delete and click this button.<br /></td> |
</tr> | </tr> | ||
<tr> | <tr> | ||
| Line 369: | Line 372: | ||
<tr> | <tr> | ||
<td><img src="/images/CryoFreeze.png" alt="" width="467" height="59" /></td> | <td><img src="/images/CryoFreeze.png" alt="" width="467" height="59" /></td> | ||
| − | <td> | + | <td>You can choose which "type" you will freeze in your cryostorage: female or male, or both.</td> |
</tr> | </tr> | ||
<tr> | <tr> | ||
| − | <td>[[Image: | + | <td>[[Image:CryoStore1.png|none|740px|thumb|left|link=http://wiki.meditex-software.com/images/CryoStore1.png| ]]</td> |
| − | <td> | + | <td> |
| + | <p>When a new unit will be created, the following fields have to be filled:</p> | ||
| + | <ul> | ||
| + | <li>Description</li> | ||
| + | <li>Type</li> | ||
| + | <li>Storage levels</li> | ||
| + | </ul> | ||
| + | </td> | ||
</tr> | </tr> | ||
<tr> | <tr> | ||
<td><img src="/images/CryoType.png" alt="" width="235" height="49" /></td> | <td><img src="/images/CryoType.png" alt="" width="235" height="49" /></td> | ||
| − | <td>You can also determine whether oocytes and embryos ("Ooc./emb.") or sperms (“Andro”) will be stored in a | + | <td>You can also determine whether oocytes and embryos ("Ooc./emb.") or sperms (“Andro”) will be stored in a unit.</td> |
</tr> | </tr> | ||
</tbody> | </tbody> | ||
</table> | </table> | ||
<ul> | <ul> | ||
| − | <li>It is possible to modify the name of the allocation units. Select an existing | + | <li>It is possible to modify the name of the allocation units. Select an existing unit by clicking on it in the column "Allocation unit" and edit name, type and storage level accordingly.</li> |
</ul> | </ul> | ||
<p> </p> | <p> </p> | ||
Revision as of 11:12, 5 December 2012
Contents |
Clinic
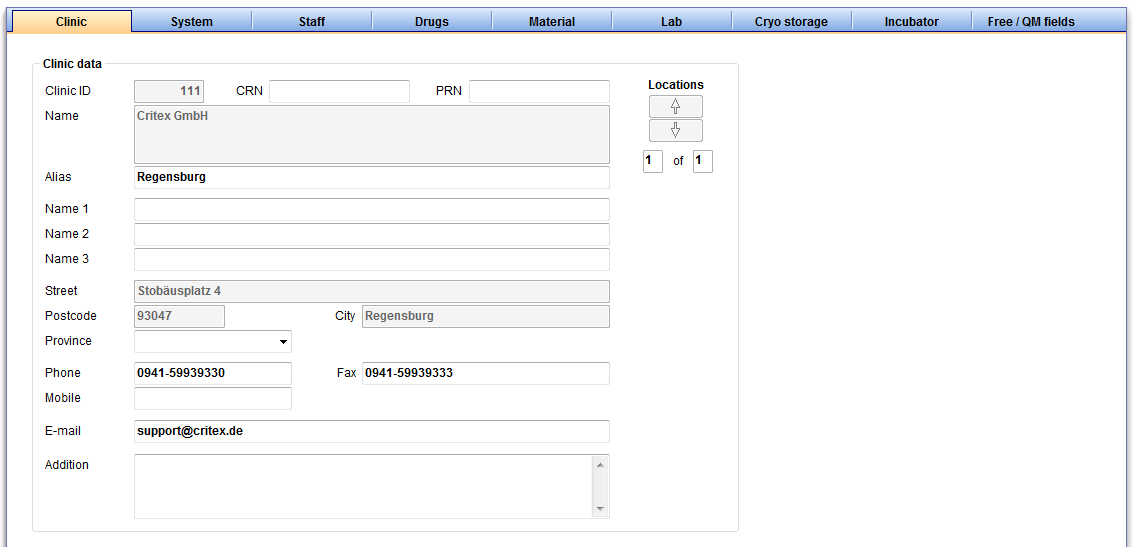
Here you can enter the contact details about your clinic and see your clinic ID.
Enter and edit the alias of your clinic, as well as the names of the main clinican and other data.
If there are several clinics, you can switch with the "location" button between them.
System
General
| <img src="/images/UpdateTableGenerators.png" alt="" width="249" height="29" /> |
|
| <img src="/images/SystemPath.png" alt="" width="421" height="89" /> |
|
| <img src="/images/Waring.png" alt="" width="263" height="120" /> |
|
!!! Only change the warning settings if you are sure in what you are doing. Otherwise, incorrect entries may go unnoticed. !!!
Functions
General
|
<img src="/images/SFGeneral2.png" alt="" width="488" height="148" /> |
|
| <img src="/images/SFGeneral3.png" alt="" width="490" height="167" /> | |
| <img src="/images/SFGeneral4.png" alt="" width="491" height="90" /> | |
| <img src="/images/SFGeneral5.png" alt="" width="490" height="117" /> | |
| <img src="/images/SFGeneral6.png" alt="" width="366" height="37" /> | |
| <img src="/images/SFGeneral7.png" alt="" width="428" height="299" /> | |
| <img src="/images/SFGeneral8.png" alt="" width="423" height="186" /> |
Report editor
Semen analysis
Cycle
Cryo contracts and accounting
Donation / surrogate motherhood
Presentation options
Statistics
General
Colours
Interfaces
!!! Only change the interface settings if you are sure in the changes you want to make. Otherwise there may be functionality errors or complete failure of certain functions. !!!
Internal
External
System tables
Moreover, you can define the parameters for the logos, pictures and templates used in letters that you can create with the report editor.
Staff
Drugs
The section “Drugs” contains a fixed list of the most important products which are used in the field of reproductive medicine.
Besides this, you can also define additional long-term and pill products that are used in your medical center.
| <img style="display: block; margin-left: auto; margin-right: auto;" src="/images/NewDrug.png" alt="" width="154" height="26" /> |
New drug: Add a new drug. Read more about adding new drugs, <a href="/index.php?title=How_to_add_new_drugs%3F">here</a>. |
| <img style="display: block; margin-left: auto; margin-right: auto;" src="/images/DeleteDrug.png" alt="" width="152" height="25" /> |
Delete drug: Only drugs you have added yourself can be deleted by pressing this button. |
- The list of drugs contains products in the groups Gonadotropin, GnRH Analogon, hCG, Progesterone, Gestagen, Estrogen, Antiestrogen and Pill according to the current Red List®
- The list of drugs is provided and updated by CRITEX and cannot be changed by the user.
- If you do not wish to use this drug, untick the box "Active". To do so, double-click on the drug to open the drug editor. There you can untick the "Active" box. Then the drug will not be shown in any selection window of the program.
- Press the column header to sort the entries according to their names, to reverse the sorting or to filter the list.
Material
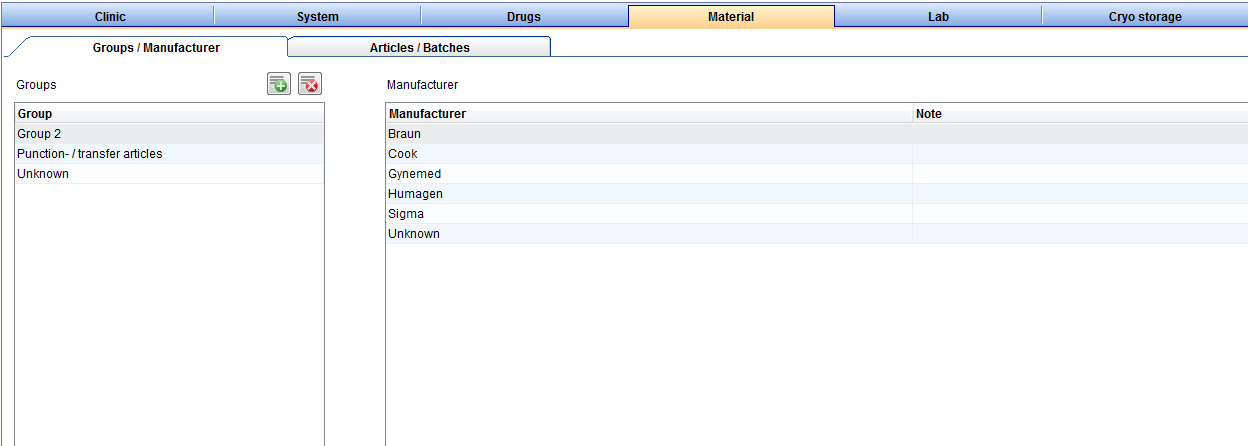
In the section “Material” you can enter data concerning material groups, manufacturers and products. You can also create different batches and "activate" them for a certain period of time.
Articles / Batches
At this tab you can add the needed materials to the list and make them available for the creation of QM fields.
| <img style="display: block; margin-left: auto; margin-right: auto;" src="/images/Plus.png" alt="" width="34" height="28" /> | Press this button on the top right to add a new article. |
| <img style="display: block; margin-left: auto; margin-right: auto;" src="/images/DeleteX.png" alt="" width="26" height="24" /> |
Delete it with this button. This is only possible if articles have not been assigned to QM fields or used otherwise. Should this be the case, deactivate the item by unticking the box "Active". This data will then be hidden without being deleted. Articles can only be deleted if they have not yet been used. |
Get more informations about the usability, <a href="/index.php?title=How_to_add_material_articles_/_batches%3F">here</a>.
Manufacturer
You can see a list of all existing manufactures at the tab “Manufacturer”.
| <img style="display: block; margin-left: auto; margin-right: auto;" src="/images/Plus.png" alt="" width="34" height="28" /> | Press this button on the top right to add a new manufacturer. |
| <img style="display: block; margin-left: auto; margin-right: auto;" src="/images/DeleteX.png" alt="" width="26" height="24" /> |
Delete it with this button. This is only possible if manufactures have not been assigned to QM fields or used otherwise. Should this be the case, deactivate the item by unticking the box "Active". This data will then be hidden without being deleted. Manufacturers can only be deleted if they have not yet been used. |
Get more informations about the usability, <a href="/index.php?title=How_to_add_material_manufacturer%3F">here</a>.
Groups
At this tab you can create a new material group, for example probes. Here you can see a list of all existing groups.
| <img style="display: block; margin-left: auto; margin-right: auto;" src="/images/Plus.png" alt="" width="34" height="28" /> | Press this button on the top right to create a new group. |
| <img style="display: block; margin-left: auto; margin-right: auto;" src="/images/DeleteX.png" alt="" width="26" height="24" /> |
Delete a group with this button. This is only possible if groups have not been assigned to QM fields or used otherwise. Should this be the case, deactivate the item by unticking the box "Active". This data will then be hidden without being deleted. Groups can only be deleted if they have not yet been used. |
Get more informations about the usability, <a href="/index.php?title=How_to_add_material_groups%3F">here</a>.
Lab
Cryo storage
In the section “Cryo storage” you can manage all cryo canisters and their storage system. You can define up to three hierarchic storage levels per canister. Their filling level can be checked in the freezing section to determine free space.
| <img style="display: block; margin-left: auto; margin-right: auto;" src="/images/Plus.png" alt="" width="34" height="28" /> |
Press this button to add a new unit. More information about adding a new unit read <a href="/index.php?title=How_to_add_a_new_canister_to_the_cryo_storage%3F">here</a>. |
| <img style="display: block; margin-left: auto; margin-right: auto;" src="/images/DeleteX.png" alt="" width="26" height="24" /> | Select the unit you wish to delete and click this button. |
| <img style="display: block; margin-left: auto; margin-right: auto;" src="/images/SaveChanges.png" alt="" width="162" height="29" /> | Save your changes. |
| <img src="/images/CryoFreeze.png" alt="" width="467" height="59" /> | You can choose which "type" you will freeze in your cryostorage: female or male, or both. |
|
When a new unit will be created, the following fields have to be filled:
|
|
| <img src="/images/CryoType.png" alt="" width="235" height="49" /> | You can also determine whether oocytes and embryos ("Ooc./emb.") or sperms (“Andro”) will be stored in a unit. |
- It is possible to modify the name of the allocation units. Select an existing unit by clicking on it in the column "Allocation unit" and edit name, type and storage level accordingly.
Incubator
Free / QM fields
<a href="/index.php?title=Report Editor">Report editor</a>
<a href="/index.php?title=MedITEX IVF System Settings">System</a>


