How to add resources to an appointment?
From MedITEX - Wiki
(Difference between revisions)
| Line 9: | Line 9: | ||
</tbody> | </tbody> | ||
</table> | </table> | ||
| − | < | + | <ul> |
| + | <li>To generate a new appointment you can click on the button "New appointment" or you can double click in the calendar of a certain resource.</li> | ||
| + | </ul> | ||
| + | <ul> | ||
| + | <li>An existing appointment must be opened for editing. </li> | ||
| + | </ul> | ||
| + | <ul> | ||
| + | <li>The appointment detail form will appear on the right side of the screen.</li> | ||
| + | </ul> | ||
<table border="0"> | <table border="0"> | ||
<tbody> | <tbody> | ||
Revision as of 11:27, 13 November 2012
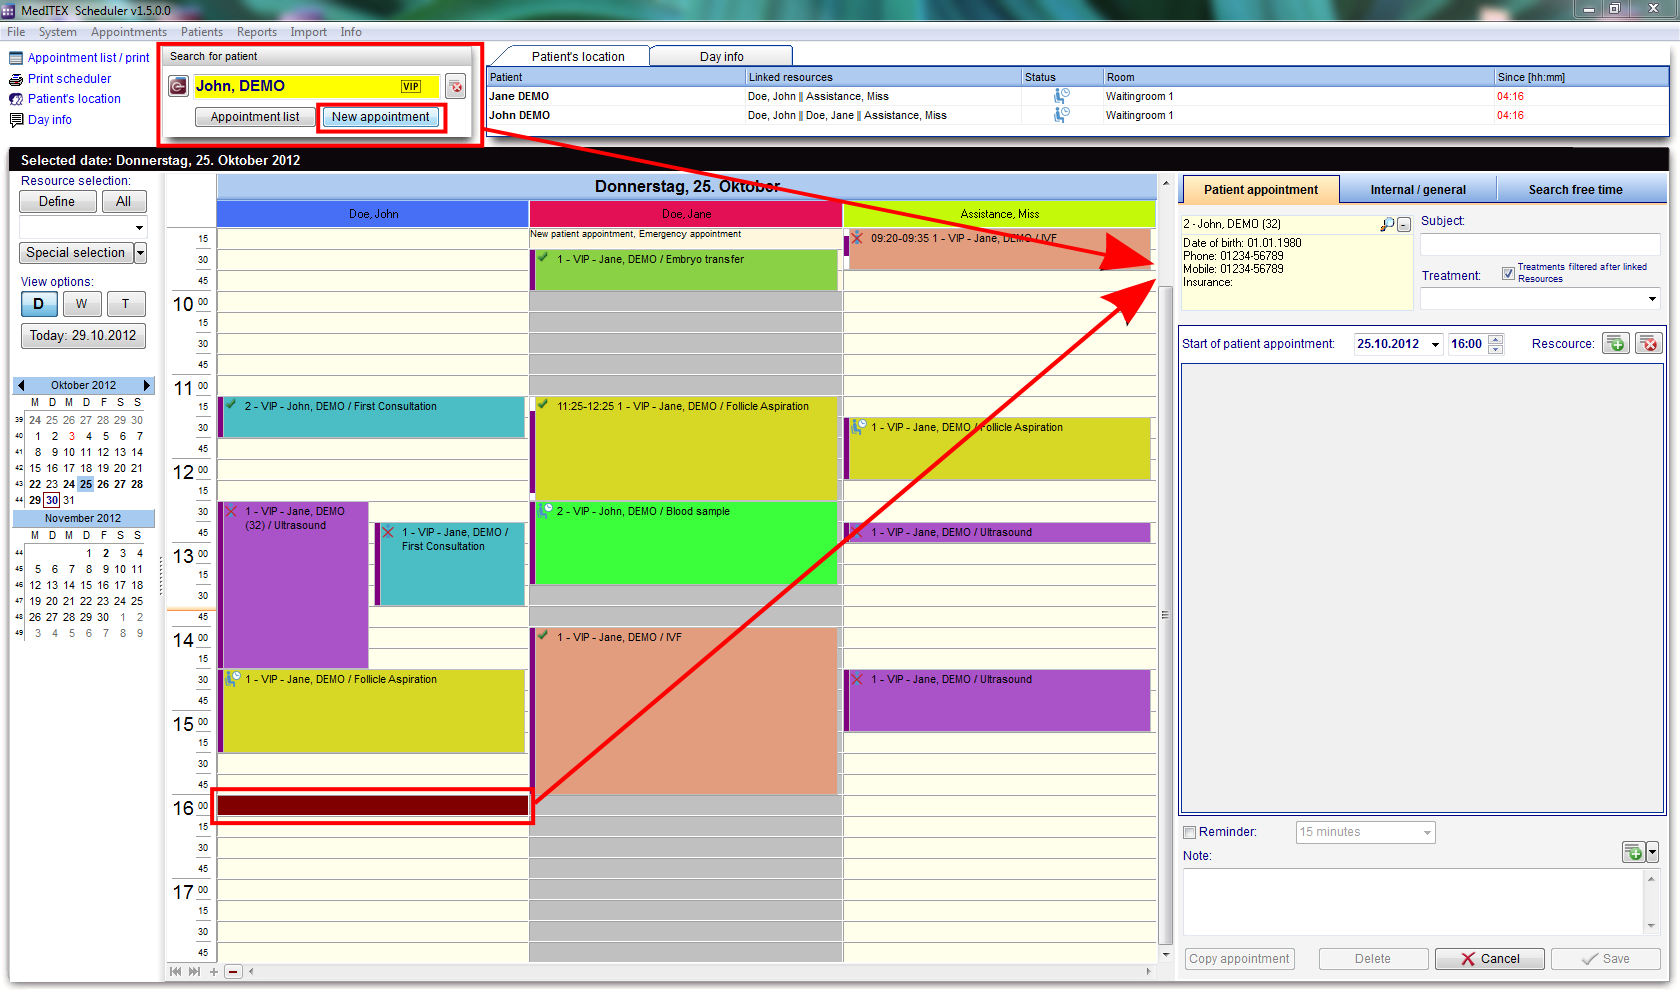
In order to add a resource as first an appointment is required.
- To generate a new appointment you can click on the button "New appointment" or you can double click in the calendar of a certain resource.
- An existing appointment must be opened for editing.
- The appointment detail form will appear on the right side of the screen.
| <img src="/images/fig41.png" alt="" width="486" height="101" /> |
If you choose to create a new appointment by double clicking a resource, this resource will automatically be inserted into the resource list of the appointment form. If you choose to click on "New appointment", the resource list will be empty. |
| <img src="/images/fig42.png" alt="" width="491" height="163" /> | You can add further resources to this appointment by clicking the green "+" button. The resource highlighted in the scheduler view will be added to the list. |
| <img src="/images/fig43.png" alt="" width="221" height="170" /> | In order to change the resource, you can click on the cell containing its name and select another one. |
| <a href="/index.php?title=MedITEX_Scheduler_how_to...">Back to How to...</a> | <a href="#top">Back to top</a> |
