How to add a internal/general appointment?
From MedITEX - Wiki
(Difference between revisions)
| Line 7: | Line 7: | ||
</tbody> | </tbody> | ||
</table> | </table> | ||
| + | <p>You have three ways to create a new appointment:</p> | ||
| + | <ol> | ||
| + | <li>To add a new internal/general appointment, click on the button "New appointment". The appointment editor will be opened. </li> | ||
| + | <li>Choose a field in the scheduler on double click. The appointment editor opens.</li> | ||
| + | <li>Select multiple fields by clicking on the first desired field and drag with the left mouse button down. Even now opens the Appointment Editor.</li> | ||
| + | </ol> | ||
| + | <p>Now go to the second tab called "Internal/general".</p> | ||
<ul> | <ul> | ||
| − | |||
<li>Fill in the subject and add all resources (doctors, nurses,...) which will be involved in this appointment with the “+” button. </li> | <li>Fill in the subject and add all resources (doctors, nurses,...) which will be involved in this appointment with the “+” button. </li> | ||
<li>It is also possible to set the appointment to “All day” and lock the resource(s) for the duration of appointment. If you decide to lock the resource, the table background of the affected resource(s) turns grey.</li> | <li>It is also possible to set the appointment to “All day” and lock the resource(s) for the duration of appointment. If you decide to lock the resource, the table background of the affected resource(s) turns grey.</li> | ||
</ul> | </ul> | ||
Revision as of 10:05, 7 November 2012
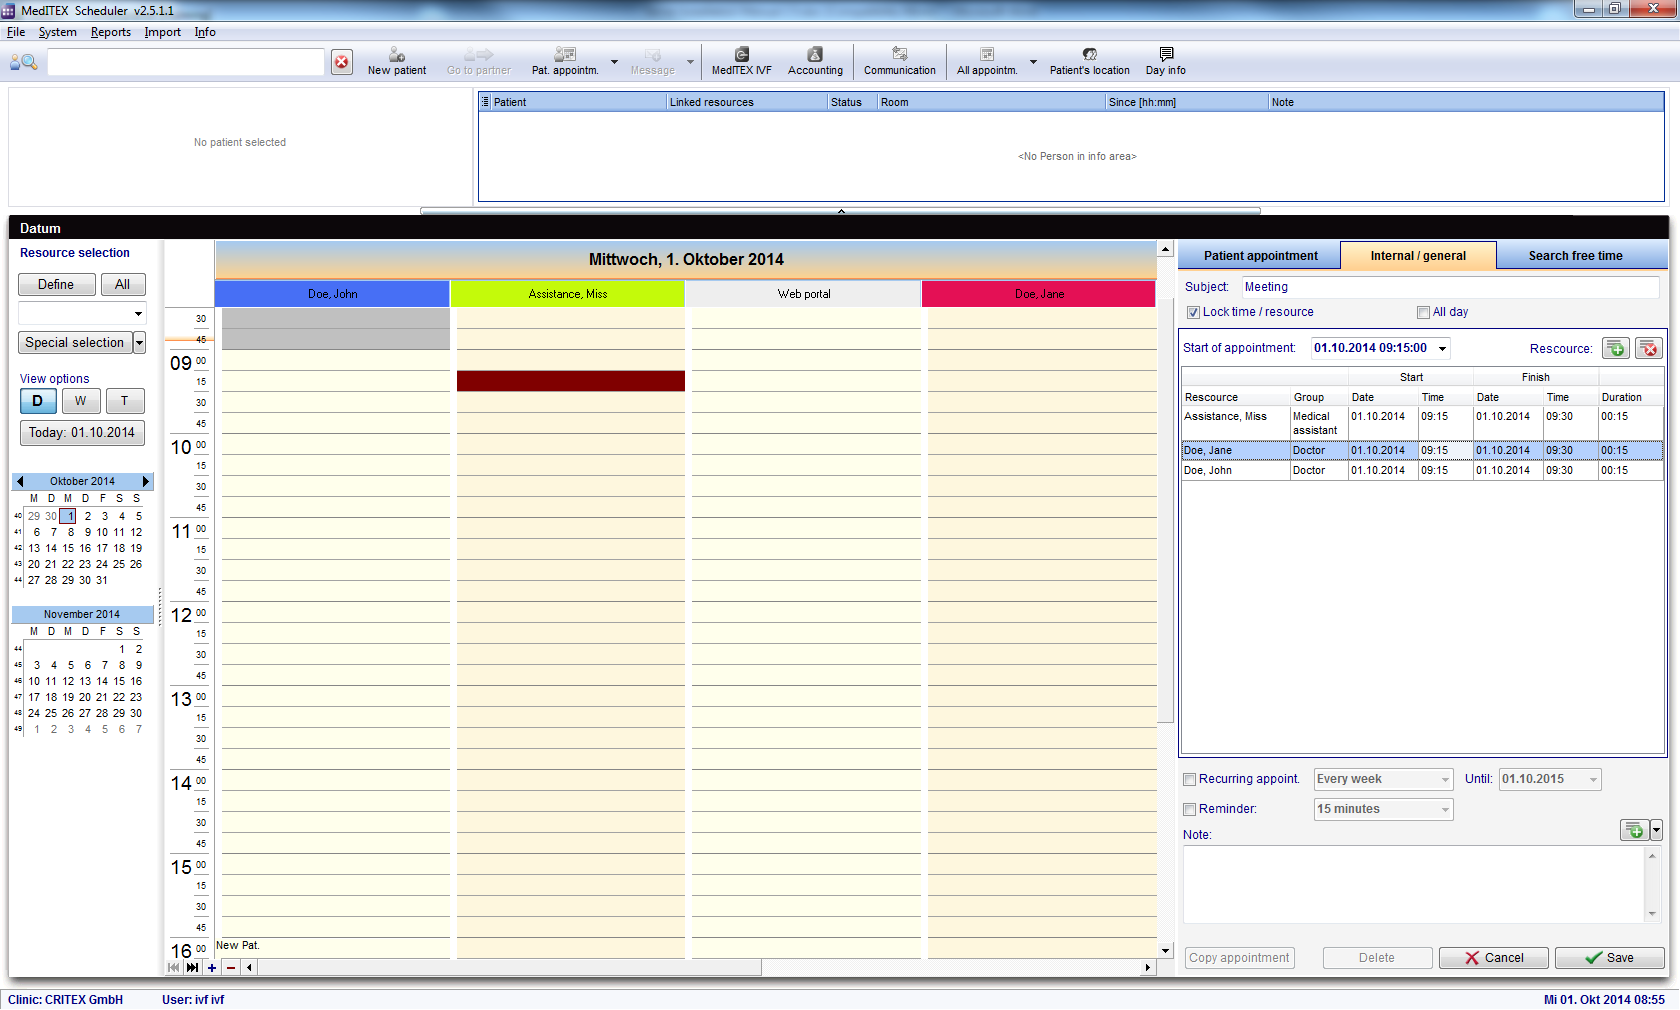
In order to generate appointments which are not related to a certain patient, like internal staff meetings, holiday etc., you can use the second tab sheet „Internal/general” of the appointment editor.
You have three ways to create a new appointment:
- To add a new internal/general appointment, click on the button "New appointment". The appointment editor will be opened.
- Choose a field in the scheduler on double click. The appointment editor opens.
- Select multiple fields by clicking on the first desired field and drag with the left mouse button down. Even now opens the Appointment Editor.
Now go to the second tab called "Internal/general".
- Fill in the subject and add all resources (doctors, nurses,...) which will be involved in this appointment with the “+” button.
- It is also possible to set the appointment to “All day” and lock the resource(s) for the duration of appointment. If you decide to lock the resource, the table background of the affected resource(s) turns grey.
