How to create and use text blocks?
From MedITEX - Wiki
| (7 intermediate revisions by one user not shown) | |||
| Line 16: | Line 16: | ||
</tbody> | </tbody> | ||
</table> | </table> | ||
| − | <p>All text | + | <p>All text blocks which you can use in a selected note field are listed in the upper part of this window. At the bottom you can find buttons which allow you to insert selected text block, as well as to create new and modify existing ones.</p> |
| − | < | + | <h4><span style="font-size: 1.17em;">Buttons</span></h4> |
<table border="0" align="center"> | <table border="0" align="center"> | ||
<tbody> | <tbody> | ||
| Line 23: | Line 23: | ||
<td><img style="display: block; margin-left: auto; margin-right: auto;" src="/images/TBButtonNew.png" alt="" width="55" height="31" /></td> | <td><img style="display: block; margin-left: auto; margin-right: auto;" src="/images/TBButtonNew.png" alt="" width="55" height="31" /></td> | ||
<td> | <td> | ||
| − | <p><a href="#Create_new_text_block" | + | <p><strong><a href="#Create_new_text_block">Create new</a></strong> text block.</p> |
</td> | </td> | ||
</tr> | </tr> | ||
| Line 41: | Line 41: | ||
<td><img style="display: block; margin-left: auto; margin-right: auto;" src="/images/TBButtonInsert.png" alt="" width="141" height="31" /></td> | <td><img style="display: block; margin-left: auto; margin-right: auto;" src="/images/TBButtonInsert.png" alt="" width="141" height="31" /></td> | ||
<td> | <td> | ||
| − | <p><strong>Insert</strong> selected text block.</p> | + | <p><strong><a href="#Insert_text_block">Insert</a></strong> selected text block.</p> |
</td> | </td> | ||
</tr> | </tr> | ||
</tbody> | </tbody> | ||
</table> | </table> | ||
| − | |||
<p> </p> | <p> </p> | ||
<h2>Create new text block</h2> | <h2>Create new text block</h2> | ||
| Line 104: | Line 103: | ||
</tbody> | </tbody> | ||
</table> | </table> | ||
| − | <p>Initially, name and content of a new text block, as well as the property "General text block" will be identical to all | + | <p>Initially, name and content of a new text block, as well as the property "General text block" will be identical to all corresponding properties of the text block you have selected, but all fields can be modified.</p> |
<p> </p> | <p> </p> | ||
<p>It is also possible to create new text block using a part of the text you have typed in the note field. To do this, select the part of text you want to save, press right-click and choose the option <strong><a href="#top">Save text as new text block.</a> </strong>The following window will open:</p> | <p>It is also possible to create new text block using a part of the text you have typed in the note field. To do this, select the part of text you want to save, press right-click and choose the option <strong><a href="#top">Save text as new text block.</a> </strong>The following window will open:</p> | ||
| Line 114: | Line 113: | ||
</tbody> | </tbody> | ||
</table> | </table> | ||
| + | <p style="text-align: center;"> </p> | ||
| + | <p style="text-align: center;"> </p> | ||
| + | <table style="margin-left: auto; margin-right: auto;" border="0"> | ||
| + | <tbody> | ||
| + | <tr> | ||
| + | <td><img src="/images/hint48.png" alt="" width="48" height="48" /></td> | ||
| + | <td> | ||
| + | <p>Remember to define the text block as <strong>General text block</strong> if you want to <strong>use it in all sections of MedITEX</strong>. </p> | ||
| + | </td> | ||
| + | </tr> | ||
| + | </tbody> | ||
| + | </table> | ||
| + | <p> </p> | ||
<p> </p> | <p> </p> | ||
<h2>Insert text block</h2> | <h2>Insert text block</h2> | ||
| − | <p>To insert a text block in the text you are typing, choose the | + | <p>To insert a text block in the text you are typing, <strong>choose the position</strong> were you want to insert it, <strong>press right-click</strong>, choose the option <strong>Text blocks</strong> from the drop-down menu, select the text block you want to insert and click on the button <strong>Insert</strong>: </p> |
<table style="margin-left: auto; margin-right: auto;" border="0" width="46" height="24"> | <table style="margin-left: auto; margin-right: auto;" border="0" width="46" height="24"> | ||
<tbody> | <tbody> | ||
| Line 124: | Line 136: | ||
</tbody> | </tbody> | ||
</table> | </table> | ||
| − | <p | + | <p style="text-align: center;"> </p> |
| − | + | ||
<p> </p> | <p> </p> | ||
<p> </p> | <p> </p> | ||
| Line 131: | Line 142: | ||
<tbody> | <tbody> | ||
<tr> | <tr> | ||
| − | <td><a href="/index.php?title= | + | <td><a href="/index.php?title=MedITEX_IVF_how_to">Back to How to</a></td> |
<td><a href="#top">Back to top</a><br /></td> | <td><a href="#top">Back to top</a><br /></td> | ||
</tr> | </tr> | ||
</tbody> | </tbody> | ||
</table> | </table> | ||
| − | |||
| − | |||
Latest revision as of 14:06, 19 September 2014
Text blocks give you the possibility to use predefined texts in all note fields in MedITEX IVF and MedITEX Scheduler.
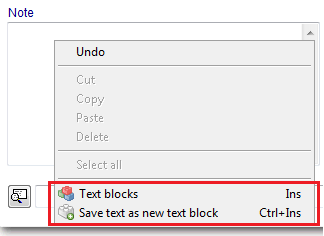
Right-click in a note field opens a drop-down menu which contains two options related to text blocks:
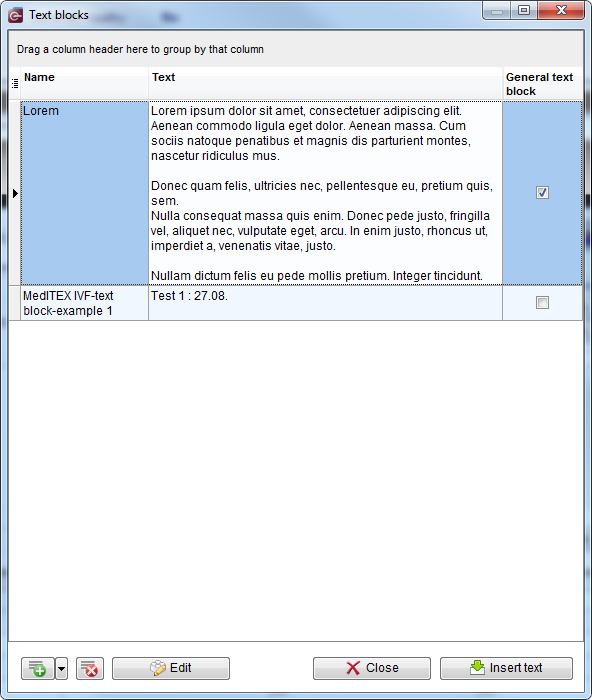
If you click on Text blocks option, the following window will open:
All text blocks which you can use in a selected note field are listed in the upper part of this window. At the bottom you can find buttons which allow you to insert selected text block, as well as to create new and modify existing ones.
Buttons
| <img style="display: block; margin-left: auto; margin-right: auto;" src="/images/TBButtonNew.png" alt="" width="55" height="31" /> |
<a href="#Create_new_text_block">Create new</a> text block. |
| <img style="display: block; margin-left: auto; margin-right: auto;" src="/images/TBButtonDelete.png" alt="" width="36" height="31" /> | Delete selected text block. |
| <img style="display: block; margin-left: auto; margin-right: auto;" src="/images/TBButtonEdit.png" alt="" width="126" height="31" /> | Edit selected text block. |
| <img style="display: block; margin-left: auto; margin-right: auto;" src="/images/TBButtonClose.png" alt="" width="126" height="31" /> | Close the window. |
| <img style="display: block; margin-left: auto; margin-right: auto;" src="/images/TBButtonInsert.png" alt="" width="141" height="31" /> |
<a href="#Insert_text_block">Insert</a> selected text block. |
Create new text block
The button for creating new text blocks offers two ways for doing this (click on an arrow on the right side of the button):
| <img src="/images/TBButtonNewDropDownMenu.png" alt="" width="342" height="69" /> |
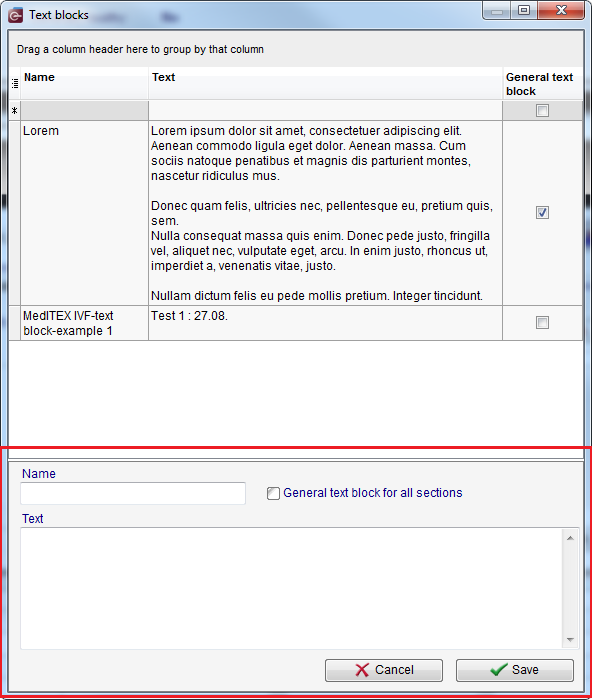
If you click on the first one (or press the key Ins on your keyboard), the following window will open:
The section at the bottom is used for creating new text blocks.
| <img style="display: block; margin-left: auto; margin-right: auto;" src="/images/TBName.png" alt="" width="236" height="47" /> | Name of the new text block. |
| <img style="display: block; margin-left: auto; margin-right: auto;" src="/images/TBText.png" alt="" width="231" height="55" /> | Content of the new text block. |
| <img style="display: block; margin-left: auto; margin-right: auto;" src="/images/TBGeneral.png" alt="" width="204" height="32" /> |
General text blocks are available in all sections in MedITEX. Check this option if you want to define text block you are creating as general. Text blocks which are not defined as general are available only in the section where the note field you have selected is. |
| <img style="display: block; margin-left: auto; margin-right: auto;" src="/images/TBNewCancelButton.png" alt="" width="129" height="32" /> | Cancel the operation. |
| <img style="display: block; margin-left: auto; margin-right: auto;" src="/images/TBNewSaveButton.png" alt="" width="128" height="32" /> | Save the text block. |
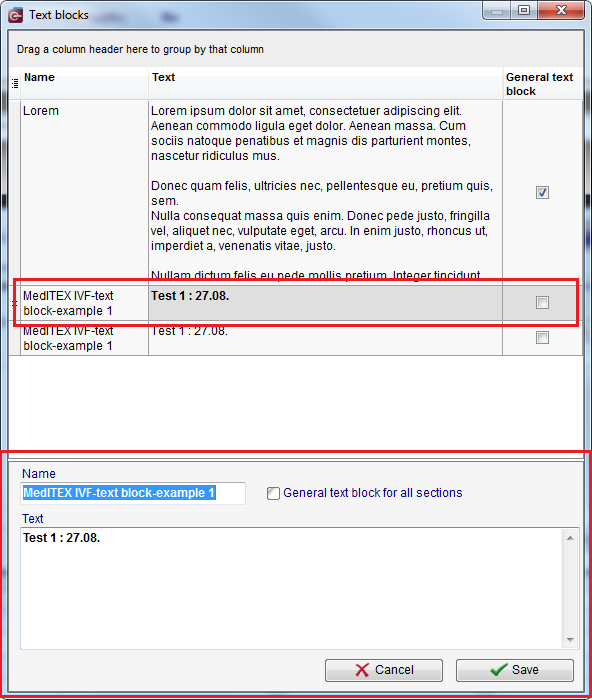
If you want to create new text block as a copy of selected one, choose this option from drop-down menu of the button (or press key combination Ctrl+C on your keyboard). The following window will open:
Initially, name and content of a new text block, as well as the property "General text block" will be identical to all corresponding properties of the text block you have selected, but all fields can be modified.
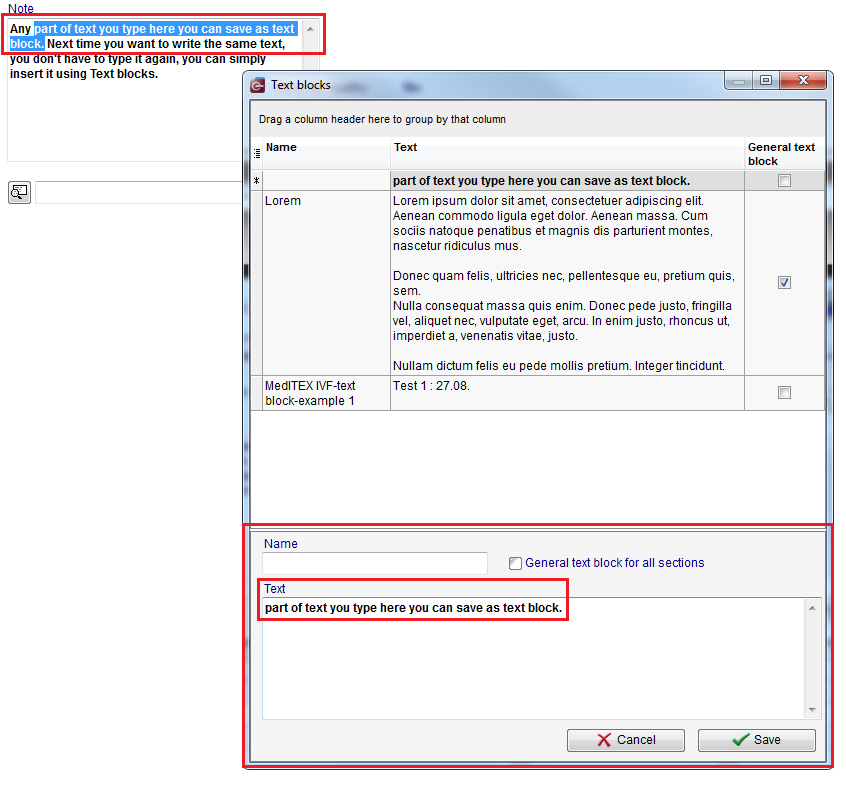
It is also possible to create new text block using a part of the text you have typed in the note field. To do this, select the part of text you want to save, press right-click and choose the option <a href="#top">Save text as new text block.</a> The following window will open:
| <img src="/images/hint48.png" alt="" width="48" height="48" /> |
Remember to define the text block as General text block if you want to use it in all sections of MedITEX. |
Insert text block
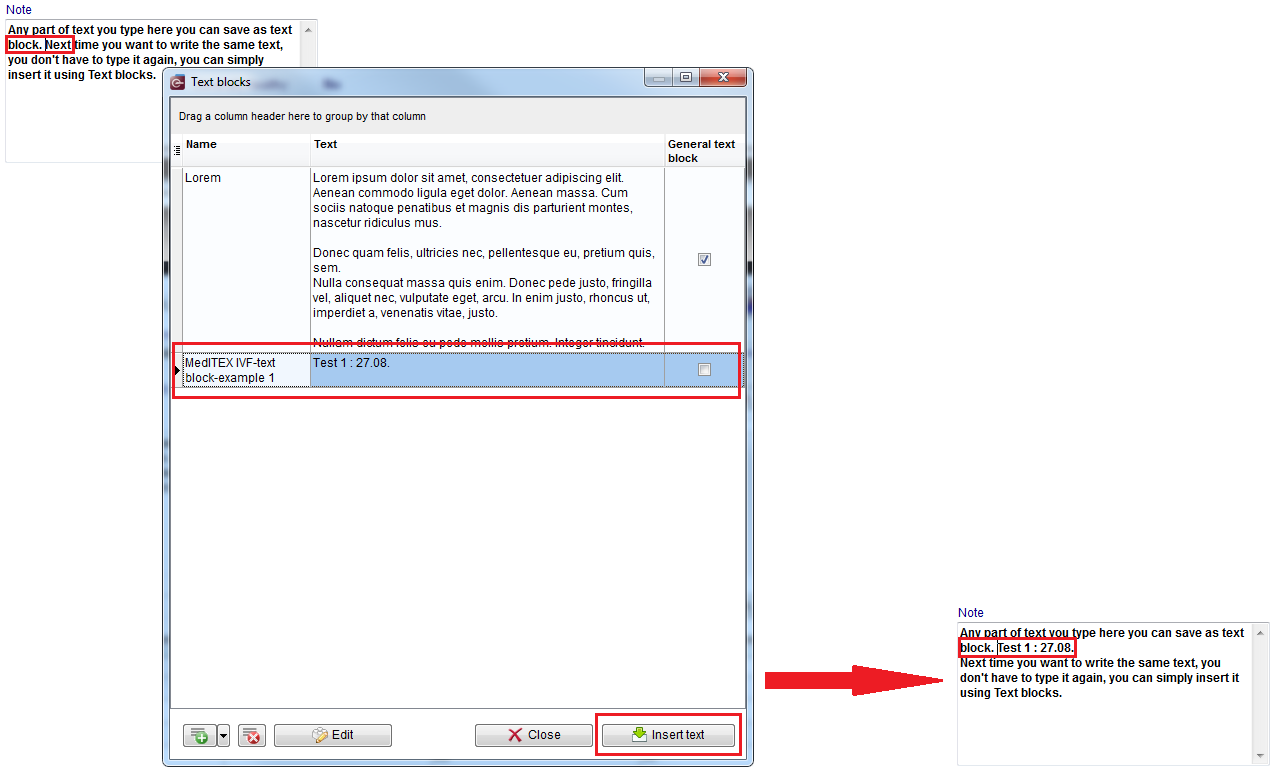
To insert a text block in the text you are typing, choose the position were you want to insert it, press right-click, choose the option Text blocks from the drop-down menu, select the text block you want to insert and click on the button Insert:
| <a href="/index.php?title=MedITEX_IVF_how_to">Back to How to</a> | <a href="#top">Back to top</a> |
