How to add a new patient appointment?
From MedITEX - Wiki
| (3 intermediate revisions by 2 users not shown) | |||
| Line 7: | Line 7: | ||
</tr> | </tr> | ||
<tr> | <tr> | ||
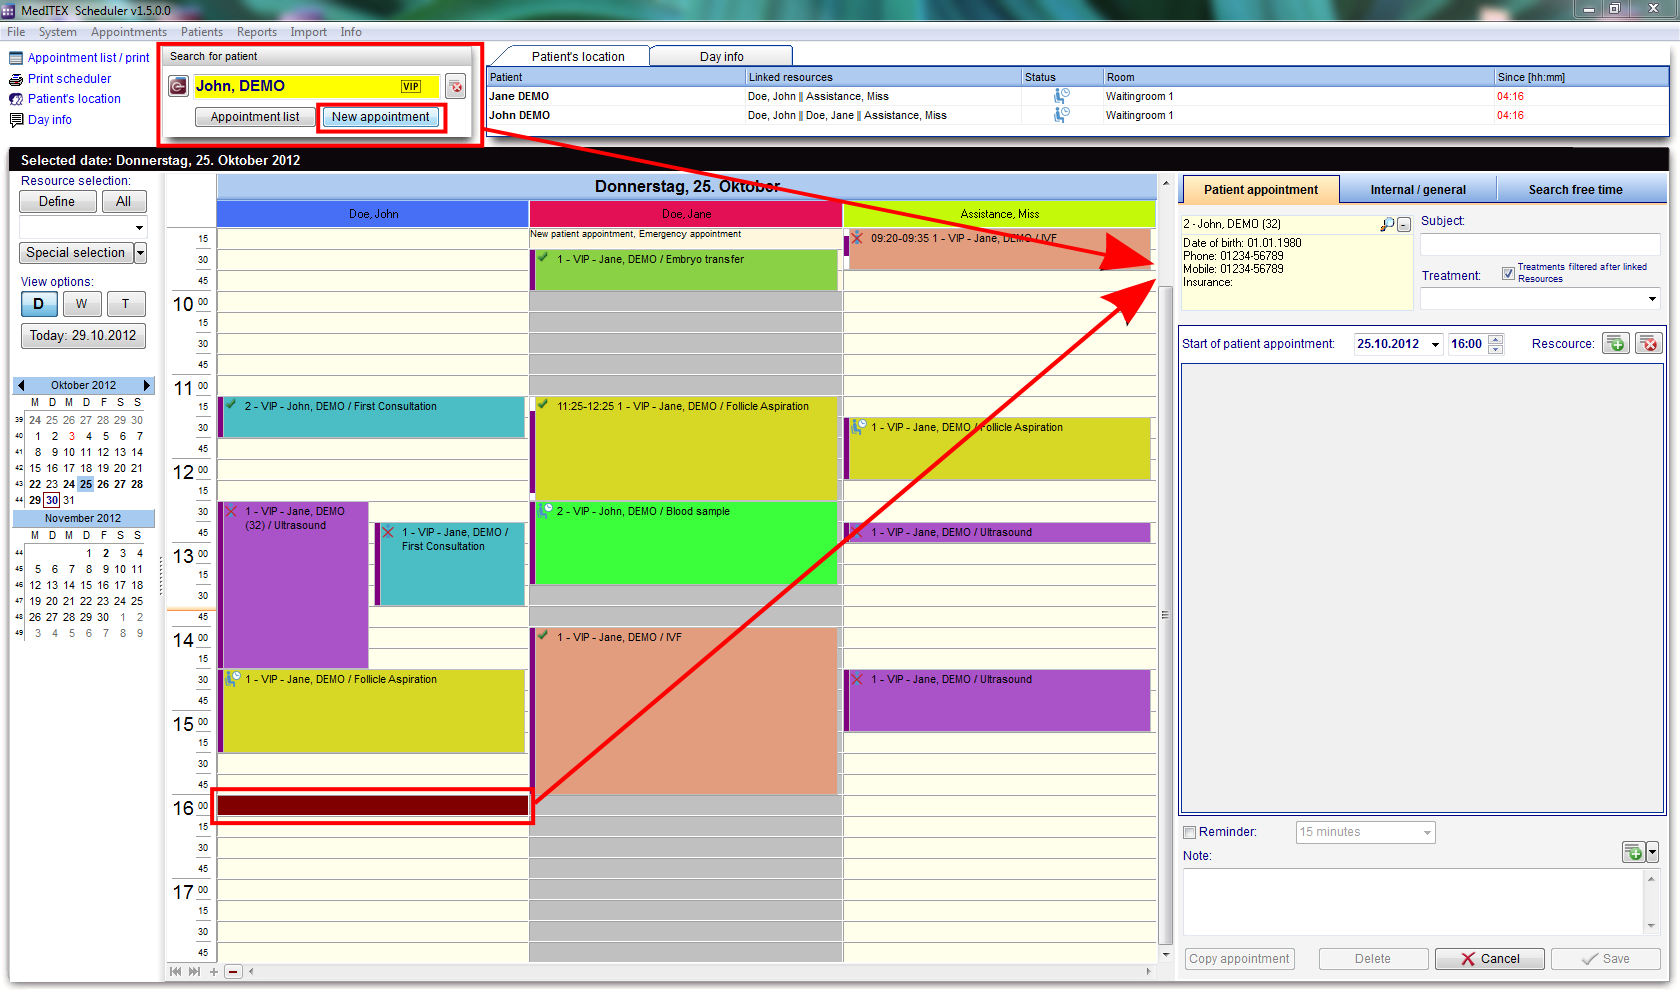
| − | <td>In order to generate | + | <td>In order to generate a new appointment you can click on <strong>New appointment</strong> or you can <strong>double-click a field in the schedule</strong> of a certain resource; the appointment detail form will appear on the right side of the screen.</td> |
</tr> | </tr> | ||
</tbody> | </tbody> | ||
| Line 16: | Line 16: | ||
<tr> | <tr> | ||
<td> | <td> | ||
| − | <p style="text-align: left;">If you choose to create a new appointment by double clicking a resource, this resource will automatically be inserted into the resource list of the appointment form.</p> | + | <p style="text-align: left;">If you choose to create a new appointment by double clicking a resource, this resource will <strong>automatically be inserted into the resource list</strong> of the appointment form.</p> |
| − | <p style="text-align: left;">If you choose to click on | + | <p style="text-align: left;">If you choose to click on <strong>New appointment</strong>, the resource list will be <strong>empty</strong>.</p> |
</td> | </td> | ||
<td><img src="/images/fig41.png" alt="" width="486" height="101" /></td> | <td><img src="/images/fig41.png" alt="" width="486" height="101" /></td> | ||
| Line 23: | Line 23: | ||
<tr> | <tr> | ||
<td> | <td> | ||
| − | <p style="text-align: left;">You can add further resources to this appointment by clicking the green "+" button. The resource highlighted in the | + | <p style="text-align: left;">You can<strong> add further resources</strong> to this appointment by clicking the green <strong>"+" button</strong>. The resource<strong> highlighted</strong> in the schedule will be added to the list.</p> |
</td> | </td> | ||
<td><img src="/images/fig42.png" alt="" width="491" height="163" /></td> | <td><img src="/images/fig42.png" alt="" width="491" height="163" /></td> | ||
</tr> | </tr> | ||
<tr> | <tr> | ||
| − | <td style="text-align: left;">In order to change the resource, you can click on the cell containing its name and select another one.</td> | + | <td style="text-align: left;">In order to<strong> change the resource</strong>, you can click on the cell containing its name and select another one.</td> |
| − | <td><img src="/images/fig43.png" alt="" width="221" height="170" /></td> | + | <td><img style="display: block; margin-left: auto; margin-right: auto;" src="/images/fig43.png" alt="" width="221" height="170" /></td> |
</tr> | </tr> | ||
</tbody> | </tbody> | ||
</table> | </table> | ||
<p> </p> | <p> </p> | ||
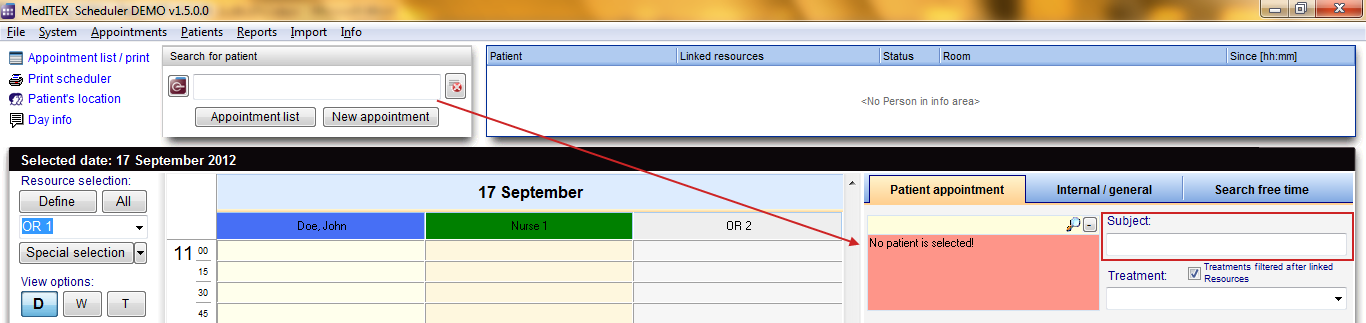
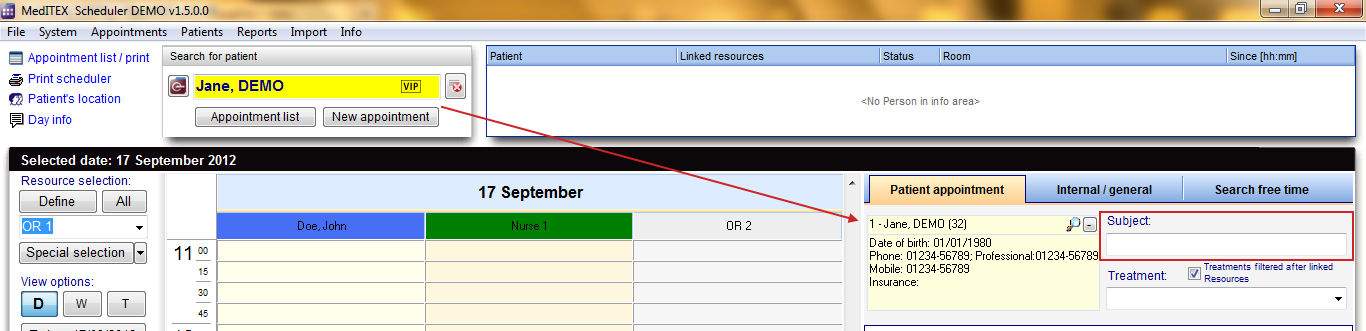
| − | <p style="text-align: justify;">In order to create the appointment for a certain patient, search for a patient and the appointment will automatically be filled out with the patient data in the left yellow box of the appointment form. The patient search is always equal to the patient data in the appointment editor. If the patient is not in the database yet, you can also fill out the | + | <p style="text-align: justify;">In order to <strong>create the appointment for a certain patient</strong>, search for a patient and the appointment will automatically be filled out with the patient data in the left yellow box of the appointment form. The patient search is always equal to the patient data in the appointment editor. <strong>If the patient is not in the database yet</strong>, you can also fill out the <strong>Subject</strong> field of the appointment form. You have to use at least one of these two options in order to be able to save the appointment.</p> |
<table style="margin-left: auto; margin-right: auto;" border="0" width="128" height="44"> | <table style="margin-left: auto; margin-right: auto;" border="0" width="128" height="44"> | ||
<tbody> | <tbody> | ||
| Line 46: | Line 46: | ||
</table> | </table> | ||
<p> </p> | <p> </p> | ||
| − | <p>The patient data can be accessed in the menu item | + | <p>The patient data can be accessed in the menu item <strong>Patients</strong>, or by clicking on the magnifier symbol in the appointment editor. In this form you can also input the complete data of a new patient.</p> |
<table style="margin-left: auto; margin-right: auto;" border="0" width="261" height="44"> | <table style="margin-left: auto; margin-right: auto;" border="0" width="261" height="44"> | ||
<tbody> | <tbody> | ||
| Line 60: | Line 60: | ||
<tbody> | <tbody> | ||
<tr> | <tr> | ||
| + | <td style="text-align: right;"><a href="/index.php?title=MedITEX_Scheduler_how_to">Back to How to</a></td> | ||
<td style="text-align: right;"><a href="#top">Back to top</a></td> | <td style="text-align: right;"><a href="#top">Back to top</a></td> | ||
</tr> | </tr> | ||
Latest revision as of 13:09, 17 January 2013
 |
| In order to generate a new appointment you can click on New appointment or you can double-click a field in the schedule of a certain resource; the appointment detail form will appear on the right side of the screen. |
|
If you choose to create a new appointment by double clicking a resource, this resource will automatically be inserted into the resource list of the appointment form. If you choose to click on New appointment, the resource list will be empty. |
<img src="/images/fig41.png" alt="" width="486" height="101" /> |
|
You can add further resources to this appointment by clicking the green "+" button. The resource highlighted in the schedule will be added to the list. |
<img src="/images/fig42.png" alt="" width="491" height="163" /> |
| In order to change the resource, you can click on the cell containing its name and select another one. | <img style="display: block; margin-left: auto; margin-right: auto;" src="/images/fig43.png" alt="" width="221" height="170" /> |
In order to create the appointment for a certain patient, search for a patient and the appointment will automatically be filled out with the patient data in the left yellow box of the appointment form. The patient search is always equal to the patient data in the appointment editor. If the patient is not in the database yet, you can also fill out the Subject field of the appointment form. You have to use at least one of these two options in order to be able to save the appointment.
 |
 |
The patient data can be accessed in the menu item Patients, or by clicking on the magnifier symbol in the appointment editor. In this form you can also input the complete data of a new patient.
 |
After saving, the appointment will be displayed in the scheduler in all entered resources with the patient’s id, name and age and/or the subject.
| <a href="/index.php?title=MedITEX_Scheduler_how_to">Back to How to</a> | <a href="#top">Back to top</a> |