How to generate an appointment with a treatment?
From MedITEX - Wiki
| Line 1: | Line 1: | ||
| − | + | <table border="0"> | |
| + | <tbody> | ||
| + | <tr> | ||
| + | <td>[[Image:TreatmentRed.png|none|765px|thumb|left|link=http://wiki.meditex-software.com/images/TreatmentRed.png| ]]</td> | ||
| + | </tr> | ||
| + | </tbody> | ||
| + | </table> | ||
| + | <table style="margin-left: auto; margin-right: auto;" border="0" width="722" height="184"> | ||
| + | <tbody> | ||
| + | <tr> | ||
| + | <td> | ||
| + | <p style="text-align: justify;">If you want to simplify the generation of appointments, you can predefine treatments in the<a href="/index.php?title=Welcome_to_MedITEX_Scheduler#Treatments"> program settings</a> by stating the duration, colour and assigned resources. These treatments will be offered in the treatment drop-down field of the appointment editor. If the box “Treatments filtered after linked resources” is checked you will only see the treatments that contain the same resources which you entered in the resource list of the appointment or have no resource at all.</p> | ||
| + | </td> | ||
| + | <td><img src="/images/fig47.png" alt="" width="252" height="179" /></td> | ||
| + | </tr> | ||
| + | </tbody> | ||
| + | </table> | ||
| + | <p> </p> | ||
| + | <p>If you chose a treatment, all linked resources will automatically be entered in the resource list of the appointment with the predefined duration, which can be different for each resource. The saved appointment will be shown in the colour that was defined with the treatment.</p> | ||
| + | <table style="margin-left: auto; margin-right: auto;" border="0" width="189" height="44"> | ||
| + | <tbody> | ||
| + | <tr> | ||
| + | <td> | ||
| + | <p>[[Image:fig48.png|none|740px|thumb|left|link=http://wiki.meditex-software.com/images/fig48.png|]]</p> | ||
| + | </td> | ||
| + | </tr> | ||
| + | </tbody> | ||
| + | </table> | ||
| + | <p> </p> | ||
| + | <p>The following screenshots show that the appointment editor was opened for a new appointment, while the resource “Doe, John” is selected (a cell in his calendar is selected). Because the box <em>“Treatments filtered after linked resources”</em> is checked, we see all treatments in which the resource “Doe, John” participates.</p> | ||
| + | <p>With the selection of treatment “Follicle aspiration a” all other resources which are linked with the treatment, in this case “OR 2”, were entered in the resource list and the duration was automatically adjusted for every resource.</p> | ||
| + | <table style="margin-left: auto; margin-right: auto;" border="0" width="157" height="44"> | ||
| + | <tbody> | ||
| + | <tr> | ||
| + | <td>[[Image:fig49.png|none|740px|thumb|left|link=http://wiki.meditex-software.com/images/fig49.png|]]</td> | ||
| + | </tr> | ||
| + | <tr> | ||
| + | <td>[[Image:fig50.png|none|740px|thumb|left|link=http://wiki.meditex-software.com/images/fig50.png|]]</td> | ||
| + | </tr> | ||
| + | </tbody> | ||
| + | </table> | ||
| + | <p> </p> | ||
| + | <p>Once you save the appointment, you can see it in the scheduler across the involved resources with the defined colour and the duration for each resource involved.</p> | ||
| + | <p>[[Image:fig51.png|none|740px|thumb|left|link=http://wiki.meditex-software.com/images/fig51.png|]]</p> | ||
| + | <table style="float: right;" border="0"> | ||
| + | <tbody> | ||
| + | <tr> | ||
| + | <td style="text-align: right;"><a href="#top">Back to top</a></td> | ||
| + | </tr> | ||
| + | </tbody> | ||
| + | </table> | ||
| + | <p><span class="mw-headline"><br /></span></p> | ||
Revision as of 13:02, 7 November 2012
|
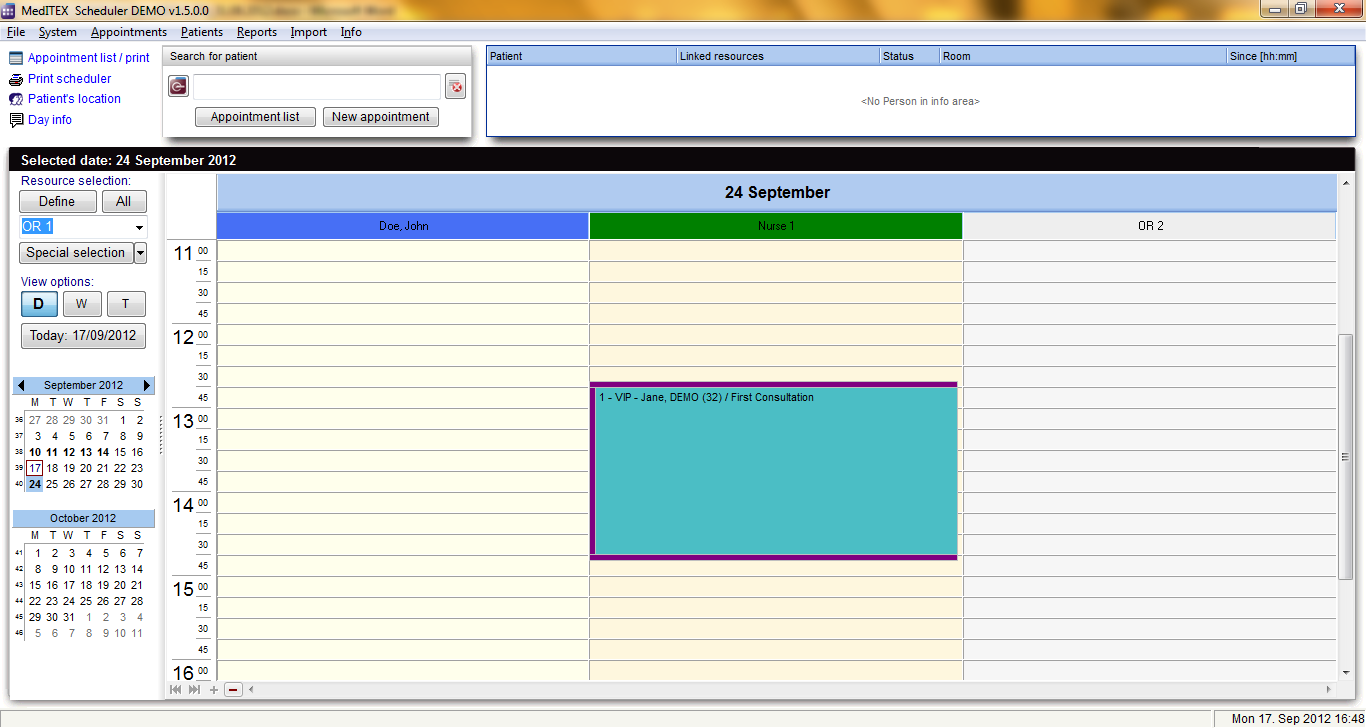
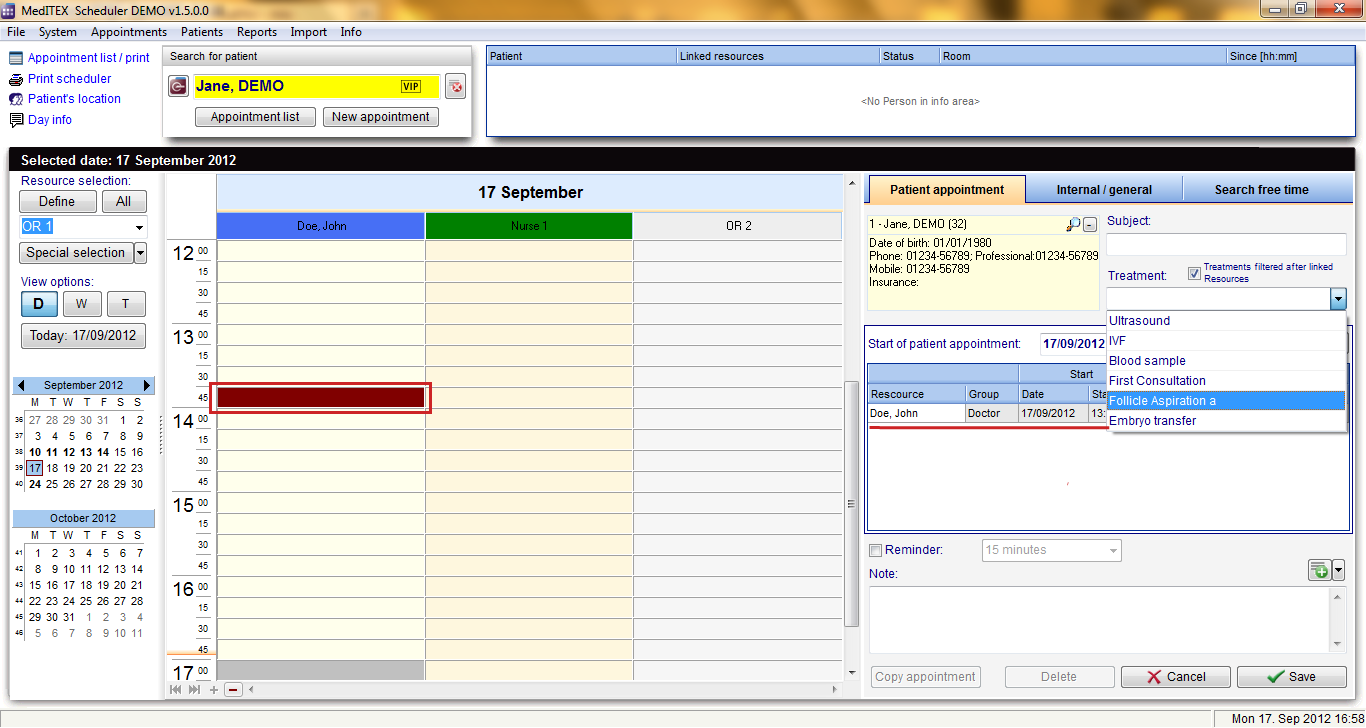
If you want to simplify the generation of appointments, you can predefine treatments in the<a href="/index.php?title=Welcome_to_MedITEX_Scheduler#Treatments"> program settings</a> by stating the duration, colour and assigned resources. These treatments will be offered in the treatment drop-down field of the appointment editor. If the box “Treatments filtered after linked resources” is checked you will only see the treatments that contain the same resources which you entered in the resource list of the appointment or have no resource at all. |
<img src="/images/fig47.png" alt="" width="252" height="179" /> |
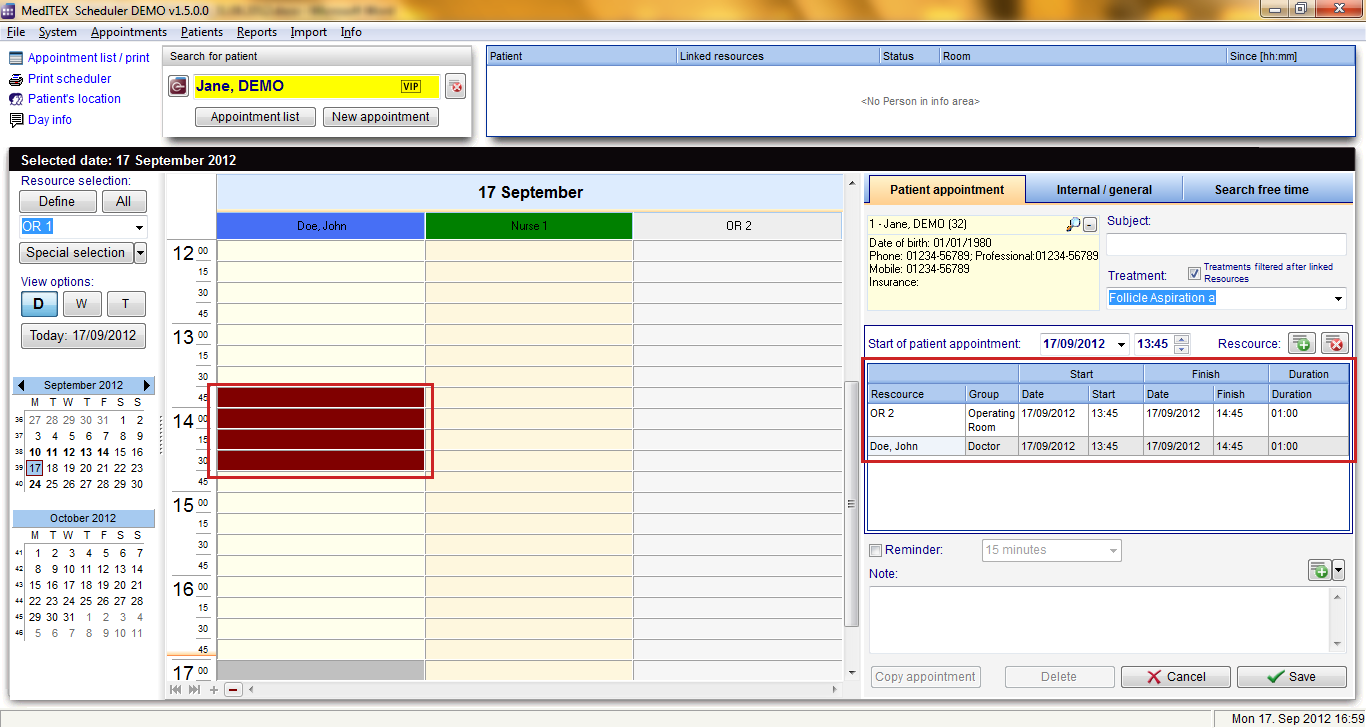
If you chose a treatment, all linked resources will automatically be entered in the resource list of the appointment with the predefined duration, which can be different for each resource. The saved appointment will be shown in the colour that was defined with the treatment.
The following screenshots show that the appointment editor was opened for a new appointment, while the resource “Doe, John” is selected (a cell in his calendar is selected). Because the box “Treatments filtered after linked resources” is checked, we see all treatments in which the resource “Doe, John” participates.
With the selection of treatment “Follicle aspiration a” all other resources which are linked with the treatment, in this case “OR 2”, were entered in the resource list and the duration was automatically adjusted for every resource.
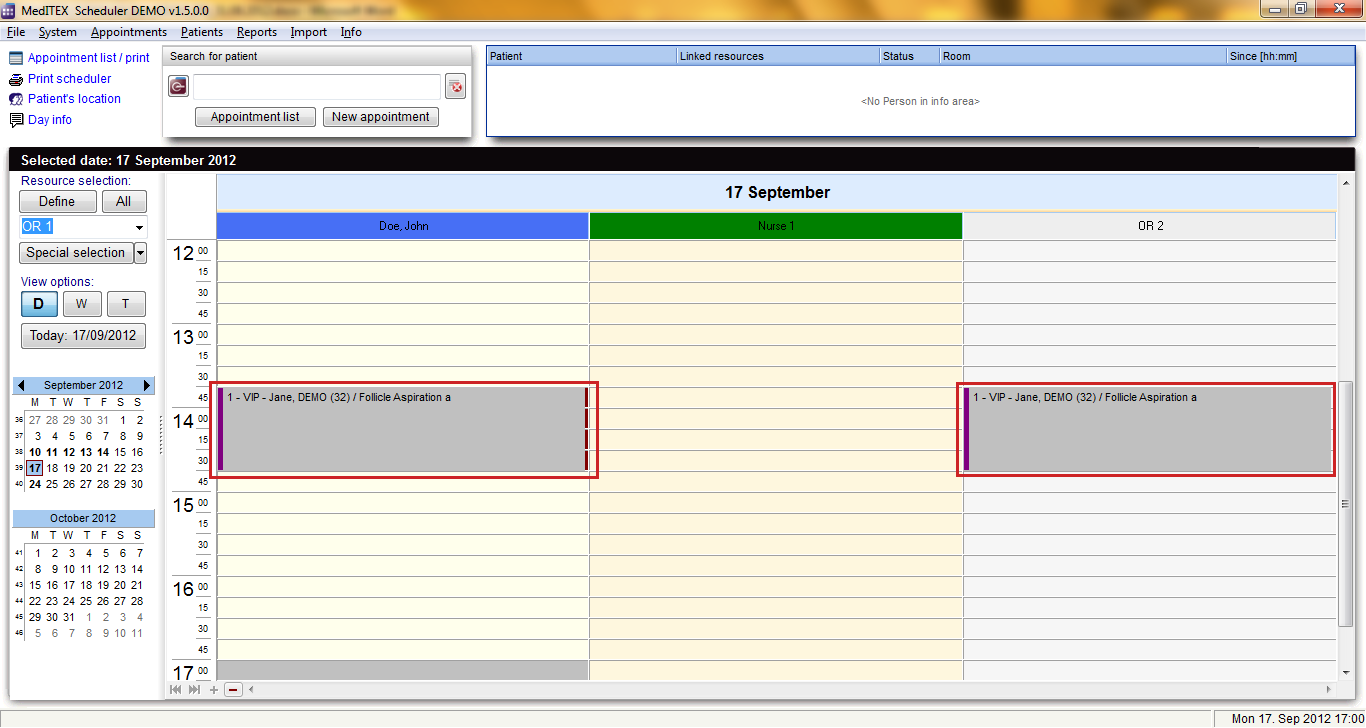
Once you save the appointment, you can see it in the scheduler across the involved resources with the defined colour and the duration for each resource involved.
| <a href="#top">Back to top</a> |


