Welcome to MedITEX Scheduler
From MedITEX - Wiki
The MedITEX Scheduler is an ideal tool to manage your time and clearly plan your appointments – for your team, your patients, your medical counselling and treatment. As an organisation, planning and coordination tool, the MedITEX Scheduler is exactly tailored to medical treatments and the progress of therapy. We will personally be available, of course, if you require assistance to adapt the tool to your individual technical and organisational requirements.
We show you the initialisation of the scheduler step by step:
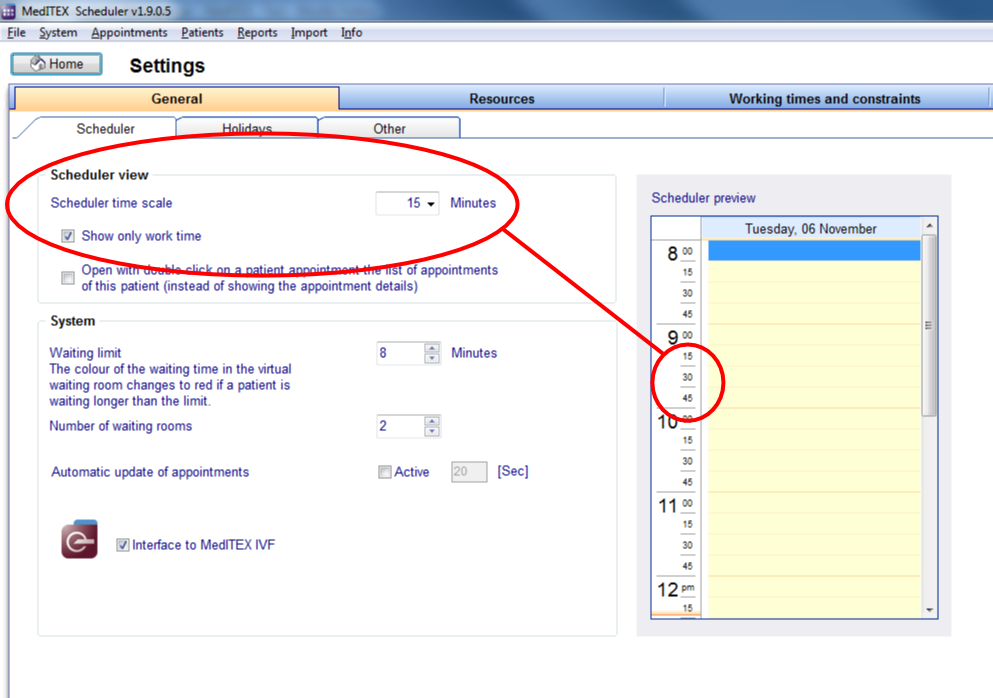
To edit SETTINGS of MedITEX Scheduler click on the menu item System → Settings:

First, the tabs are explained in detail.
Contents |
General
Scheduler timescale
In tab sheet “Scheduler” you can adjust the general time unit of the calendar. This will affect all users of the program. However, each user may temporarily change this general time unit at any time, with a right click on the time scale.
 |
 |
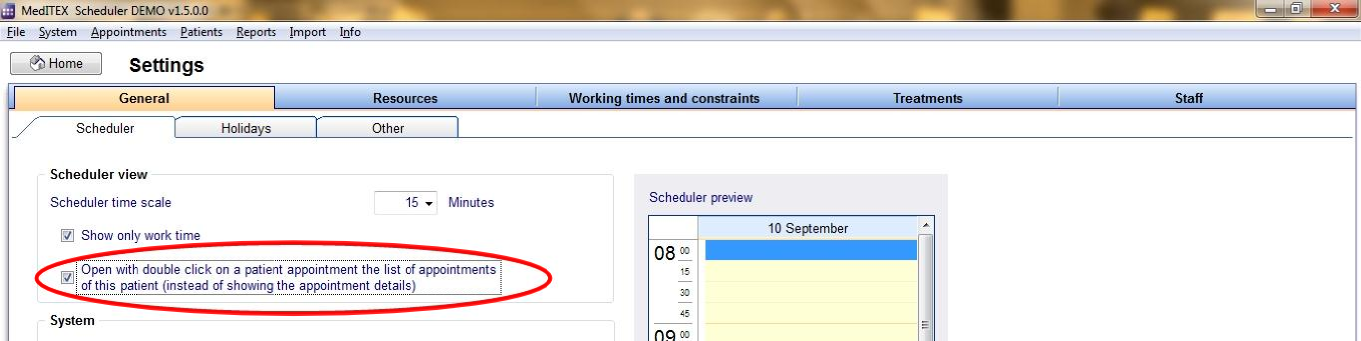
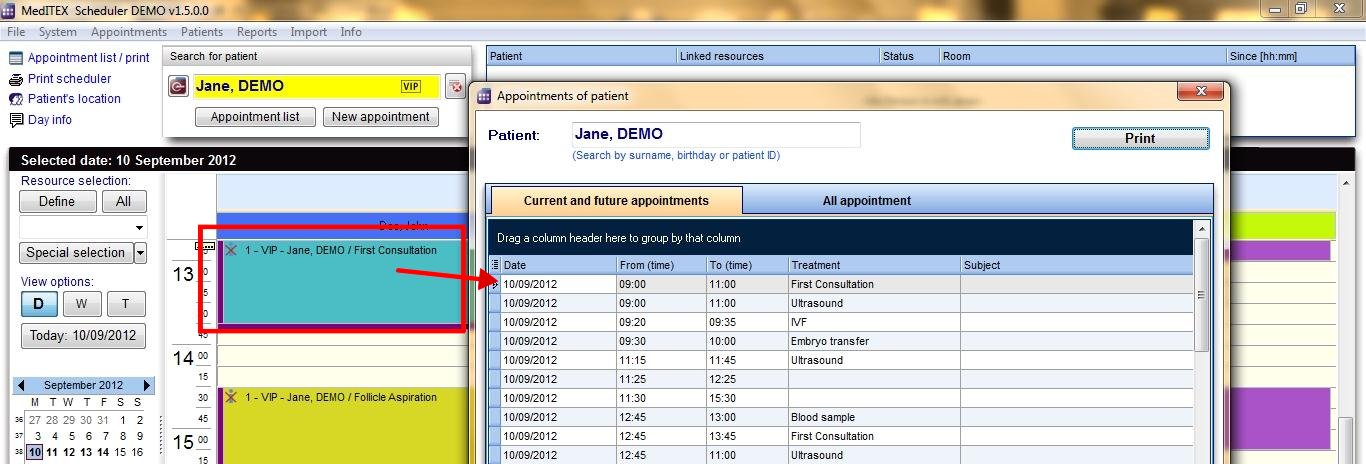
Open patient appointment
If the checkbox „Open with double-click on a patient appointment the list of appointments of this patient“
is checked and you double click on an appointment in the scheduler, the appointment list with all appointments of this patient will be opened instead of the appointment editor. The advantage is that the user can get an overview about every appointment of that patient. The details of each appointment from the list can also be opened with a double click.
 |
 |
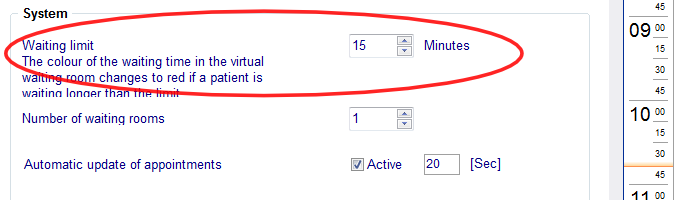
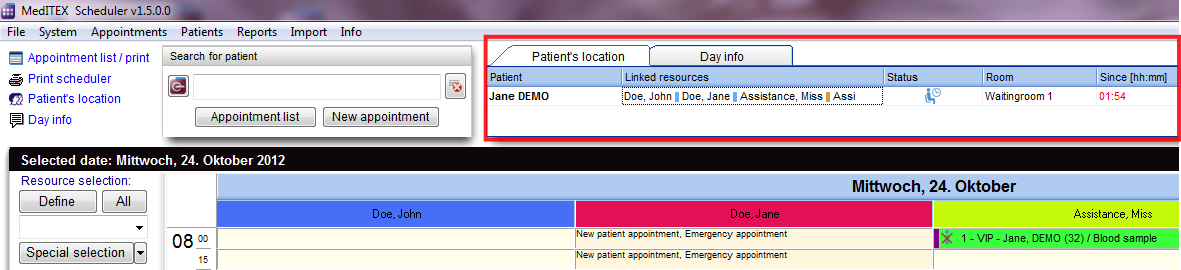
Waiting time limit
The waiting limit defines the maximal allowed time for the patient to wait in the waiting room. If this limit is exceeded, the waiting time info (“Since [hh:mm]”) will turn red.
 |
 |
Interface to MedITEX IVF
This setting enables you to open the selected patient’s data in MedITEX IVF, using the patient search mask, or the patient appointment (right click on appointment).
 |
 |
 |
Resource administration
Groups
A group has to be assigned to each resource. There are three group types: “Person”, “Room” and “Object”. For example, the group „Doctor“ belongs to the group type „Person“, and the group „Device“ to the group type „Object“.
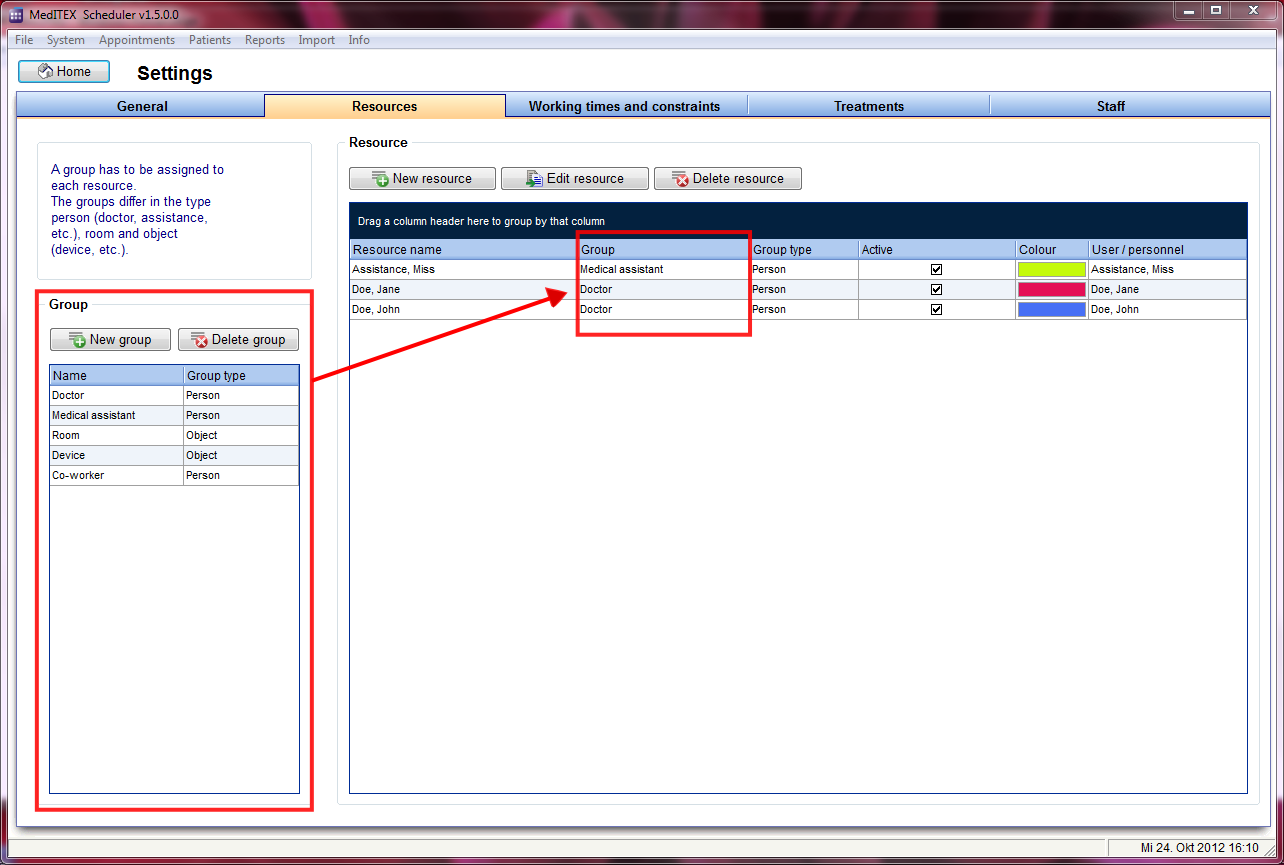 |
| You can create new groups and edit or delete existing ones in the area “Group”, to the left. |
Resources
Every resource is located in the table to the right
 |
|
|
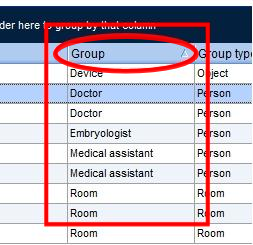
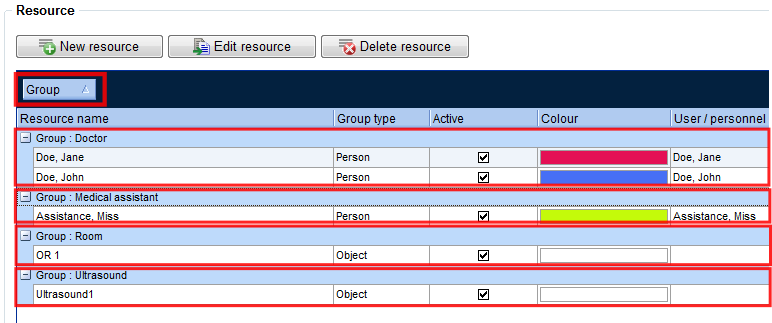
Hint: there are several important features available in every table in MedITEX Scheduler: With a click on the column header you can sort the table content by that column, ascending or descending. If you want to change the order of columns in a table, simply move the column header to the position where you want the column to be. To group the table content by the data of one column, move the column header into the table header (dark blue area on the top of a table). |
|
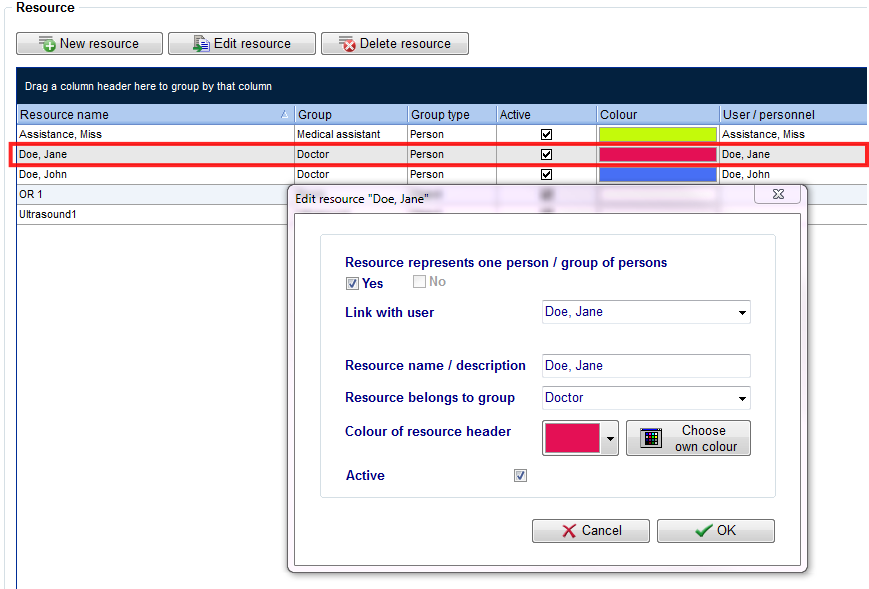 |
| By double-clicking a line - or by clicking on the button „Edit resource“ - the editor window for the selected resource will appear. |
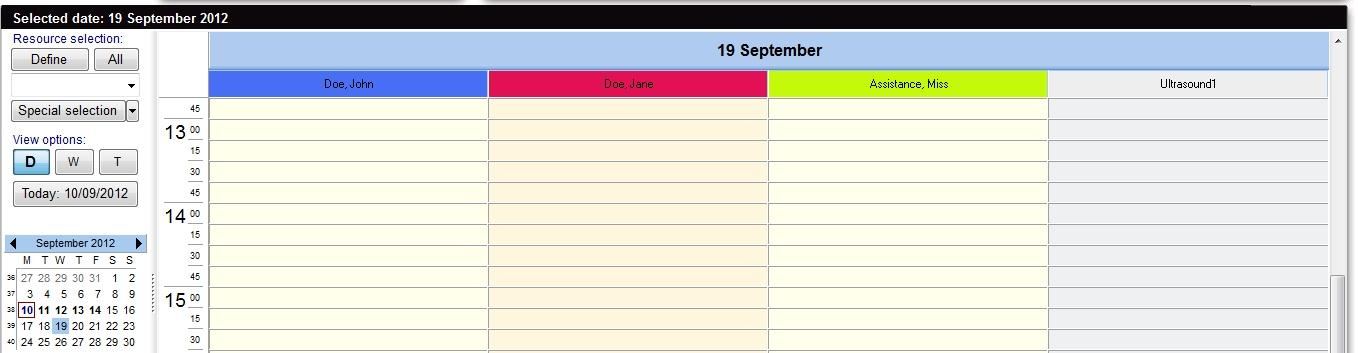 |
| A view of the main scheduler window. On the left, the time scale is set to time interval of 15 minutes. On the right all resources are displayed side by side, in one day. Every user can reorder the resources individually. |
Working times and restrictions (Resources settings)
In this area each resource can be adjusted in detail. General working times can be defined for the whole clinic, as well as special working times for each individual resource. Using “appointment types” it is possible to restrict some parts of the day to only accept certain appointment types, for each resource. It is also possible to restrict a resource to an allocated maximum number of appointments.
Appointment type
Time sections that allow only certain types of appointments can be defined for each resource. For example on Monday from 08:00 AM to 10:00 AM the doctor X performs only first interviews with new patients. By defining an appointment type “First interview” and assigning it to this resource and time, it will be possible to schedule only first interviews with doctor X on Monday morning. Or you may want to schedule on Thursday from 09:30 AM to 02:00 PM only appointments that take place in the operation room (OR)? In this case you can define an appointment type “OR” which you should assign to the involved resources and the specific time.
 |
| In the table to the left you can create and edit the appointment types. The first line in the table cannot be changed because it stands for all types of appointments (all kinds of appointments are possible). |
| If the box „Show text for the appointment types in resource row” is checked, the allocated possible appointment types will be shown as text for each resource in the scheduler. It is also possible to provide these times with a special resource background colour. However, this colour is the same for all appointment types, so if you have several appointment types defined it is advisable to use only the text. | 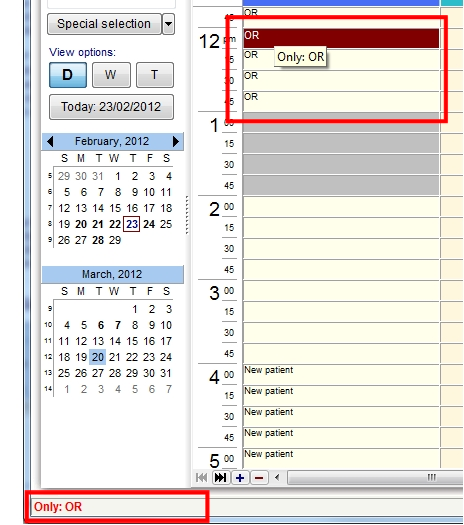 |
Working times, assignment of an appointment type, and limitations
Over the right table you can define the working times for each resource. The first upper line of this table represents the general work times of your clinic. These will be automatically valid for all resources that have no specific work time defined. In the bottom table you can see the overview of each selected resource.
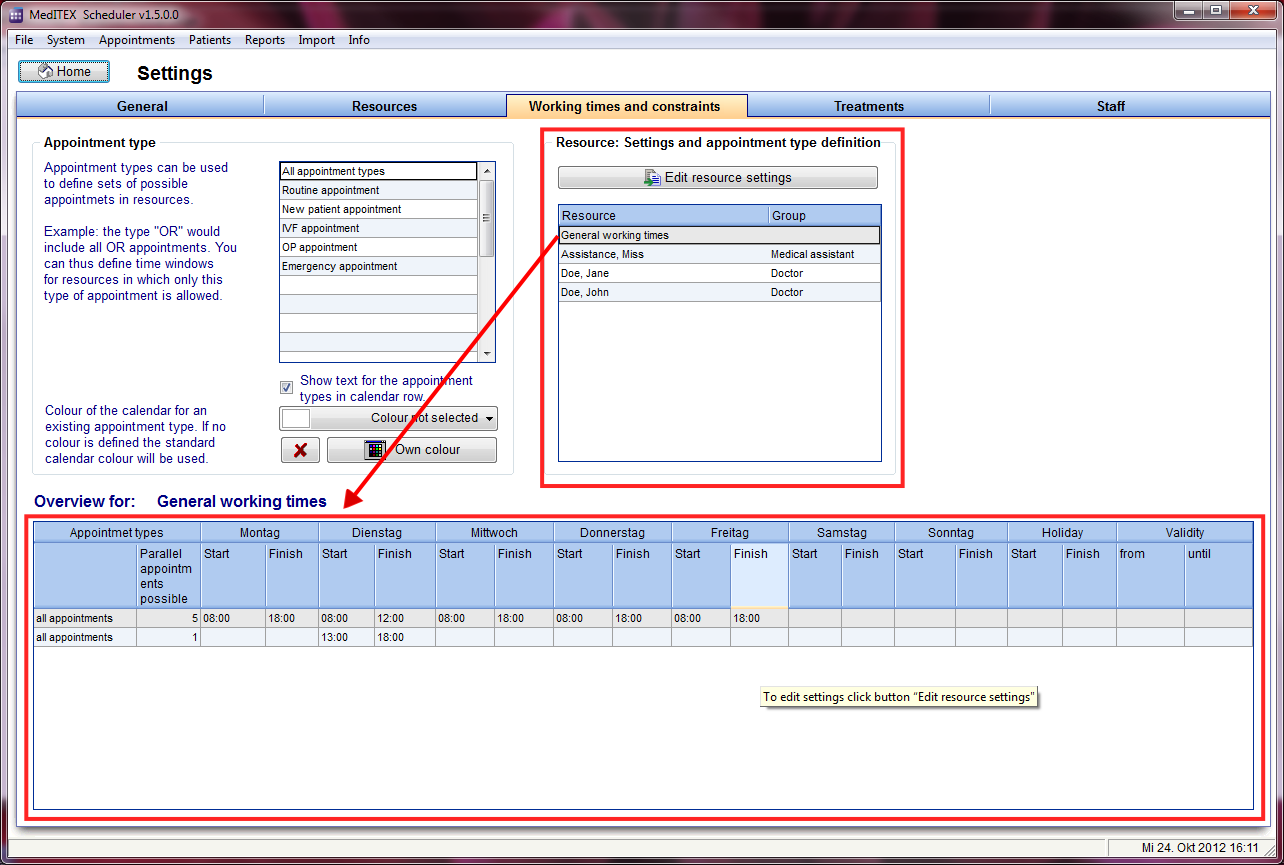 |
| With double click on a resource or with the button „Edit resource settings“ you can open the settings window of the selected resource. |
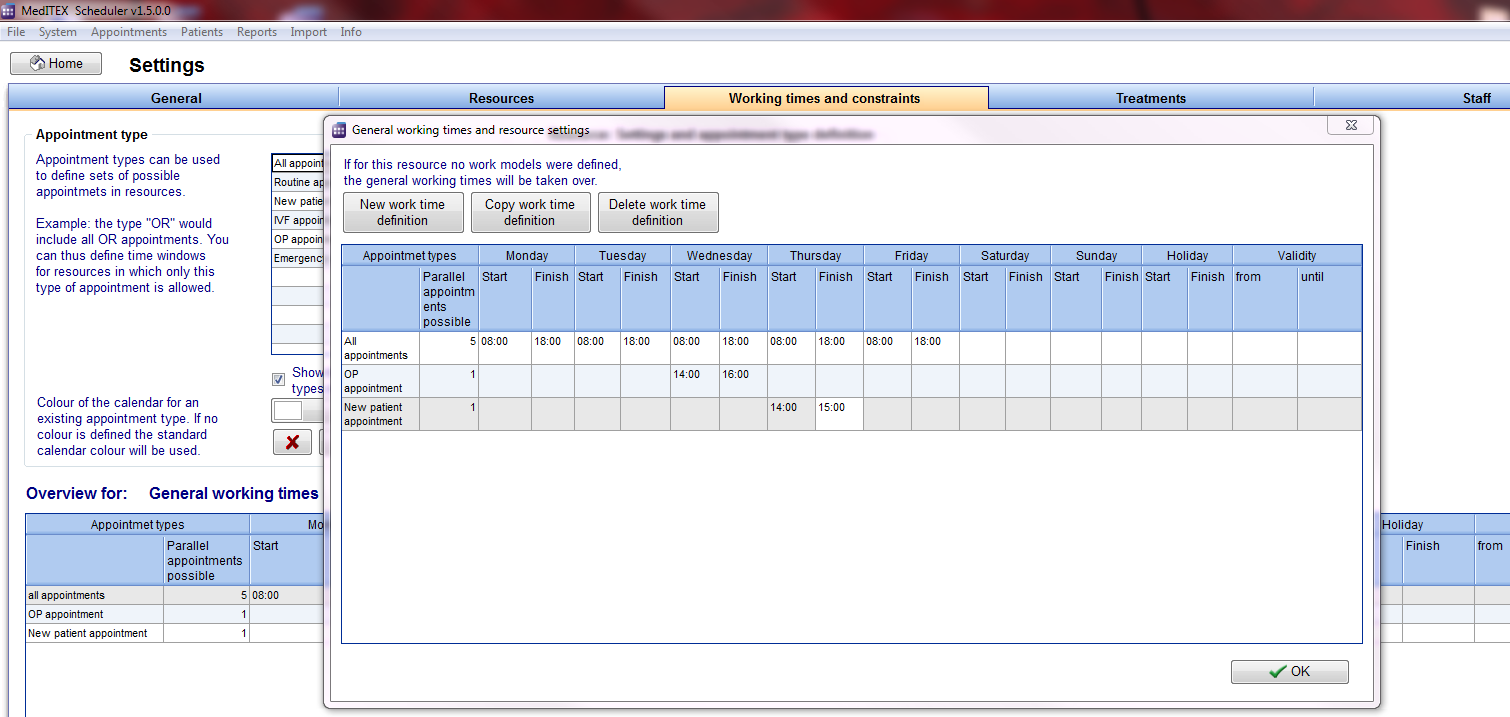 |
| With a click on the button “New work time definition” a new line will be inserted, in which you can define a new work model for the selected resource. |