Notebook / screenshots
From MedITEX - Wiki
(Difference between revisions)
| Line 3: | Line 3: | ||
<tr> | <tr> | ||
<td> | <td> | ||
| − | <p>[[Image:Notebook.png|none| | + | <p>[[Image:Notebook.png|none|550px|thumb|left|link=http://wiki.meditex-software.com/images/Notebook.png| ]]</p> |
</td> | </td> | ||
<td> | <td> | ||
Revision as of 12:50, 12 February 2013
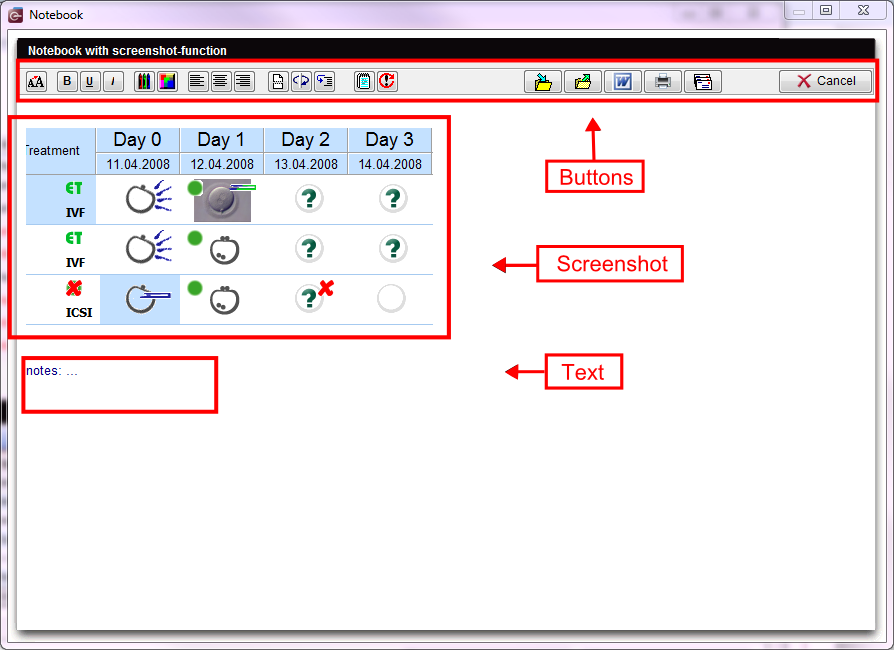 |
Functionality of the buttons:
|
The most important buttons:
The most buttons on the notepad have visual functionalities like in a normal word program. We will only describe the other functionalities.
Screenshot functionality:
If a check is placed at the system settings at "Screenshot functionality / notebook", you can use the screenshot key (ALT + Print) for notebook. All generated screenshots will be displayed in the notebook, if this is in use.
| <a href="/index.php?title=MedITEX_IVF_manual">Back to the MedITEX IVF menu </a> | <a href="#top">Back to top</a> |