Medical History
From MedITEX - Wiki
Back to MedITEX IVF Manual home page
 |
Click on this icon to go to the Homepage |
||
| Click on this icon to print the list of Medical Histories and messages | |||
| Click on this icon to add a new Medical History or a new Note or an attention message | |||
| Click here to go to the partner's Medical History | |||
| |
Click on this link to open a window showing more info related to previous pregnancies' outcome |
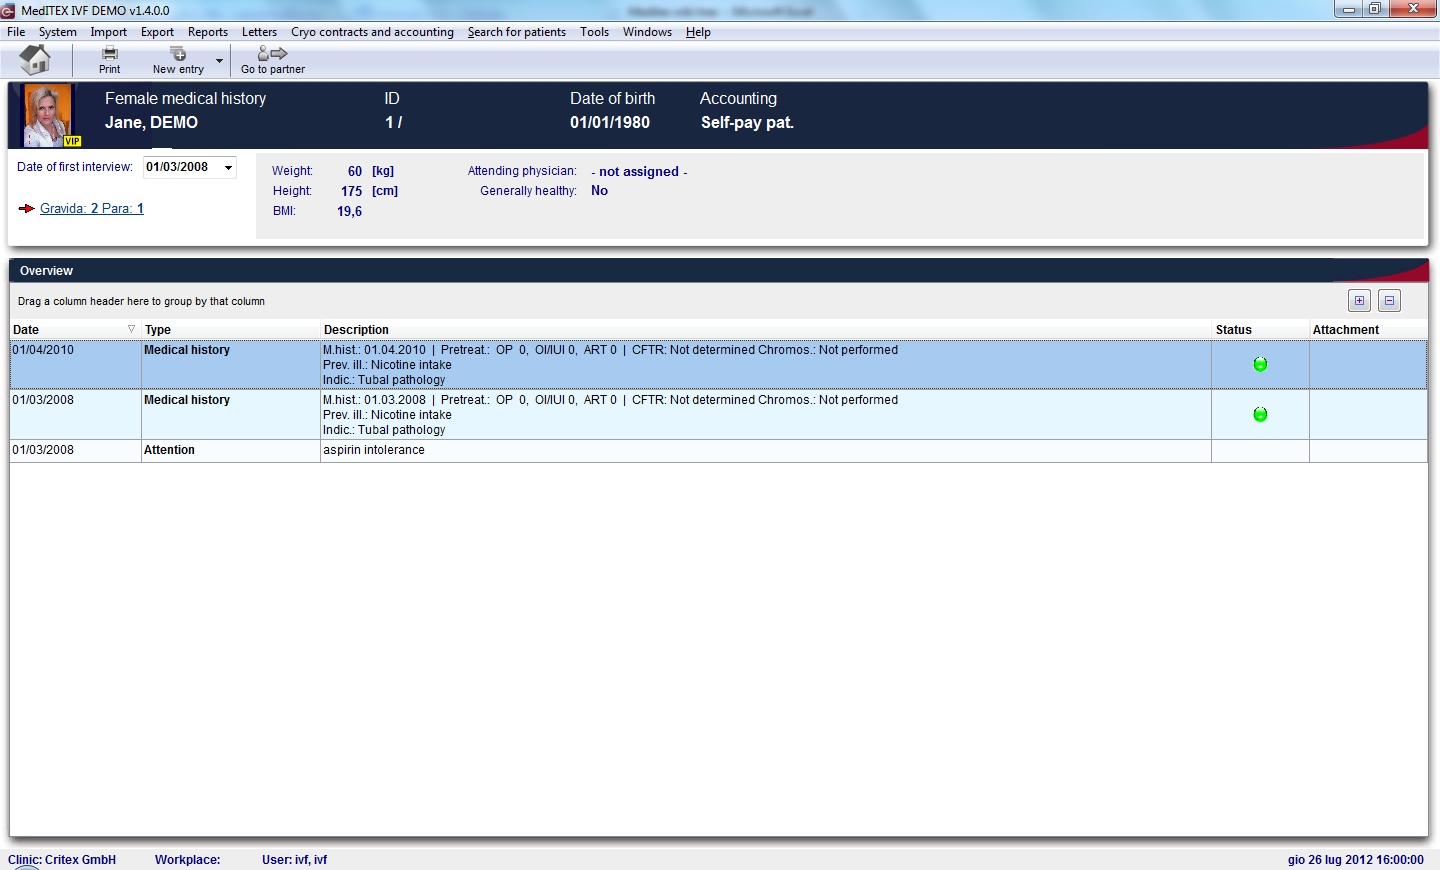
The Medical History page is divided in two main parts. The upper contains a summary of previous pregnancies and some anthropometric data. If the summary of previous pregnancies is clicked a window will pop up The lower section contains a list of all the medical histories and messages recorded for the patient.

In order to create a new Medical History or a Note/Attention Message click on the arrow at the right of the "New entry" icon and choose the option desired.
Contents |
Creating a Note or an Attention message
When "Attention" or "Note" are selected the following window will open (the only difference will be the title area):

Explaination of the fields/icons:
- Date: date of the registration of the document
- By: author of the document or of the notes
- QM: QM field icon can be used to access the QM fields associated to this document
- Browse: clicking on the arrows will scroll the documents archived upwards or downwards
- Text area: a "WordPad" like tool that can be used to input a text.
- Container for pictures and documents: pictures and files can be easily linked to the document by dragging and dropping them into the blue box. Then they can be opened doble clicking on the icon.
- Open patient directory: opens the directory that contains all the files related to the patient
- Add document: allows to browse the directories and to add a single document
- Open document: always to open the document added. ff
By clicking on "OK" the Note/Attention message will be created and published in the homepage. Attention messages will be in red whilst note will be in black.

Creating a Medical History
When "Medical History" is selected a window will open. There are two different windows, one for the female patient the other for the male patient.
Creating a female Medical History
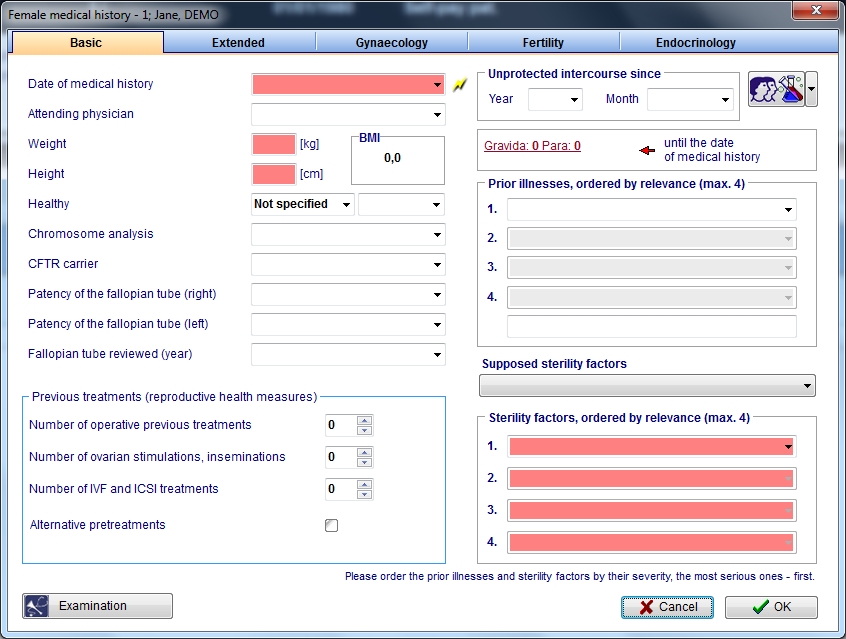
If "Medical History" is selected when the selected patient is a woman the following window will open:
 |
|
Click on this icon to access the QM field section related to this area or on the right arrow to block the QM fields or to see the change log. | |
| Click on this link to document previous pregnancies' outcome | |||
| Click on this icon to document examination findings related to the Medical History |
On each section of the Medical History may be documented several data. The fields with the red background have to be filled in order to fullfil the D.I.R. (German Registry for assisted reproduction techniques) requirements. From this page it is possible to access to the previous pregnancies section and to to the examination section. When all the data are documented just press ok.
Note: If exists at least one previous Medical History the system will ask if the user wants to take over data from the most recent Medical History.
Note 2: If the date of the new Medical History is empty or younger than the date of an existing Medical History, the system will ask if the date of the first interview is to be updated to the date of the Medical History.