MedITEX IVF Settings
From MedITEX - Wiki
| Line 30: | Line 30: | ||
<tr> | <tr> | ||
<td><img src="/images/UpdateTableGenerators.png" alt="" width="249" height="29" /></td> | <td><img src="/images/UpdateTableGenerators.png" alt="" width="249" height="29" /></td> | ||
| − | <td> | + | <td> |
| + | <ul> | ||
| + | <li>Update table generators. To use this function, please make sure that no-one is using the program and all users are logged off the system.</li> | ||
| + | </ul> | ||
| + | </td> | ||
</tr> | </tr> | ||
<tr> | <tr> | ||
Revision as of 10:22, 5 December 2012
 |
Contents |
Clinic
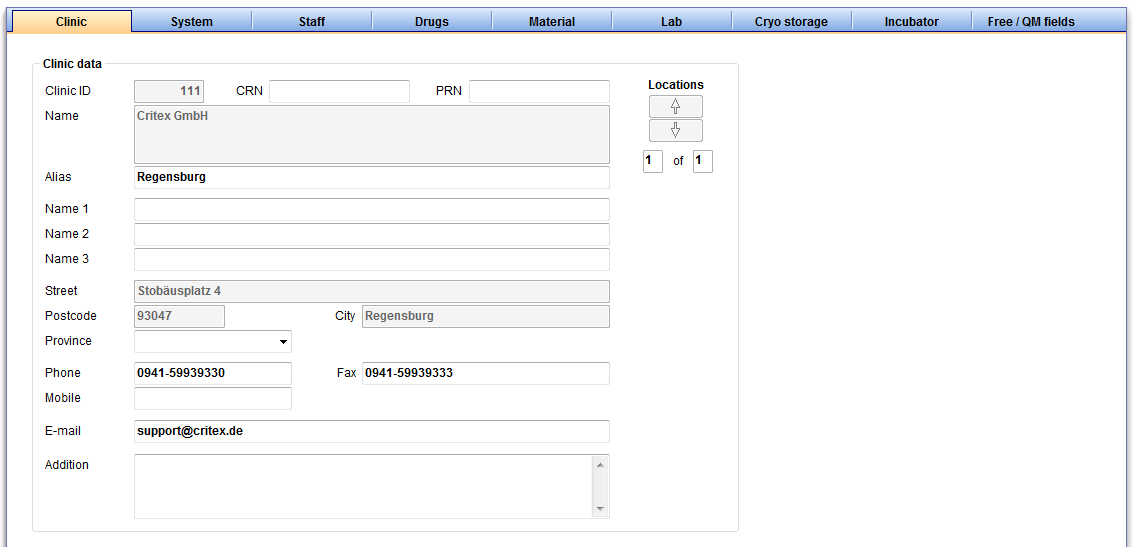 |
Here you can enter the contact details about your clinic and see your clinic ID.
Enter and edit the alias of your clinic, as well as the names of the main clinican and other data.
If there are several clinics, you can switch with the "location" button between them.
System
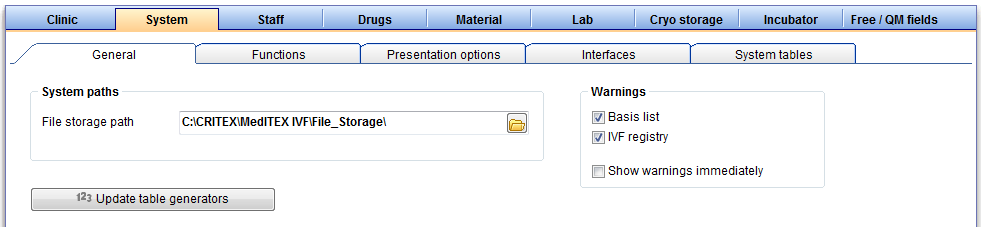 |
General
| <img src="/images/UpdateTableGenerators.png" alt="" width="249" height="29" /> |
|
| <img src="/images/SystemPath.png" alt="" width="421" height="89" /> |
|
| <img src="/images/Waring.png" alt="" width="263" height="120" /> |
|
!!! Only change the warning settings if you are sure in what you are doing. Otherwise, incorrect entries may go unnoticed. !!!
Functions
General
 |
|
<img src="/images/SFGeneral2.png" alt="" width="488" height="148" /> |
|
| <img src="/images/SFGeneral3.png" alt="" width="490" height="167" /> | |
| <img src="/images/SFGeneral4.png" alt="" width="491" height="90" /> | |
| <img src="/images/SFGeneral5.png" alt="" width="490" height="117" /> | |
| <img src="/images/SFGeneral6.png" alt="" width="366" height="37" /> | |
| <img src="/images/SFGeneral7.png" alt="" width="428" height="299" /> | |
| <img src="/images/SFGeneral8.png" alt="" width="423" height="186" /> |
Report editor
Semen analysis
Cycle
Cryo contracts and accounting
Donation / surrogate motherhood
Presentation options
Statistics
General
Colours
Interfaces
!!! Only change the interface settings if you are sure in the changes you want to make. Otherwise there may be functionality errors or complete failure of certain functions. !!!
Internal
External
System tables
Moreover, you can define the parameters for the logos, pictures and templates used in letters that you can create with the report editor.
Staff
 |
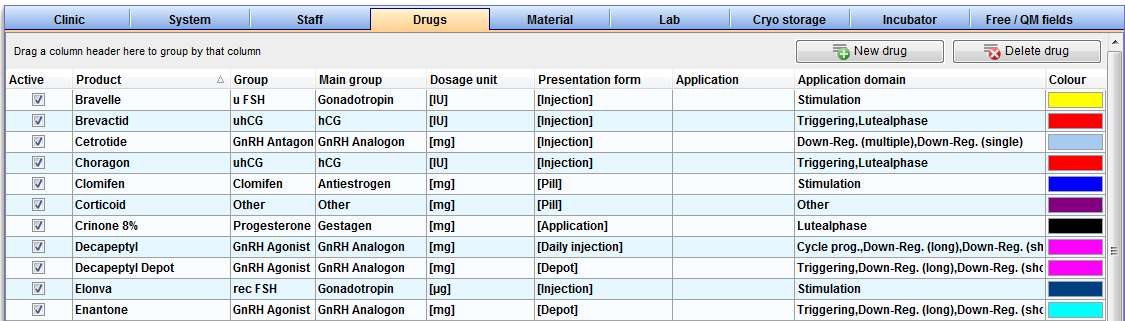
Drugs
 |
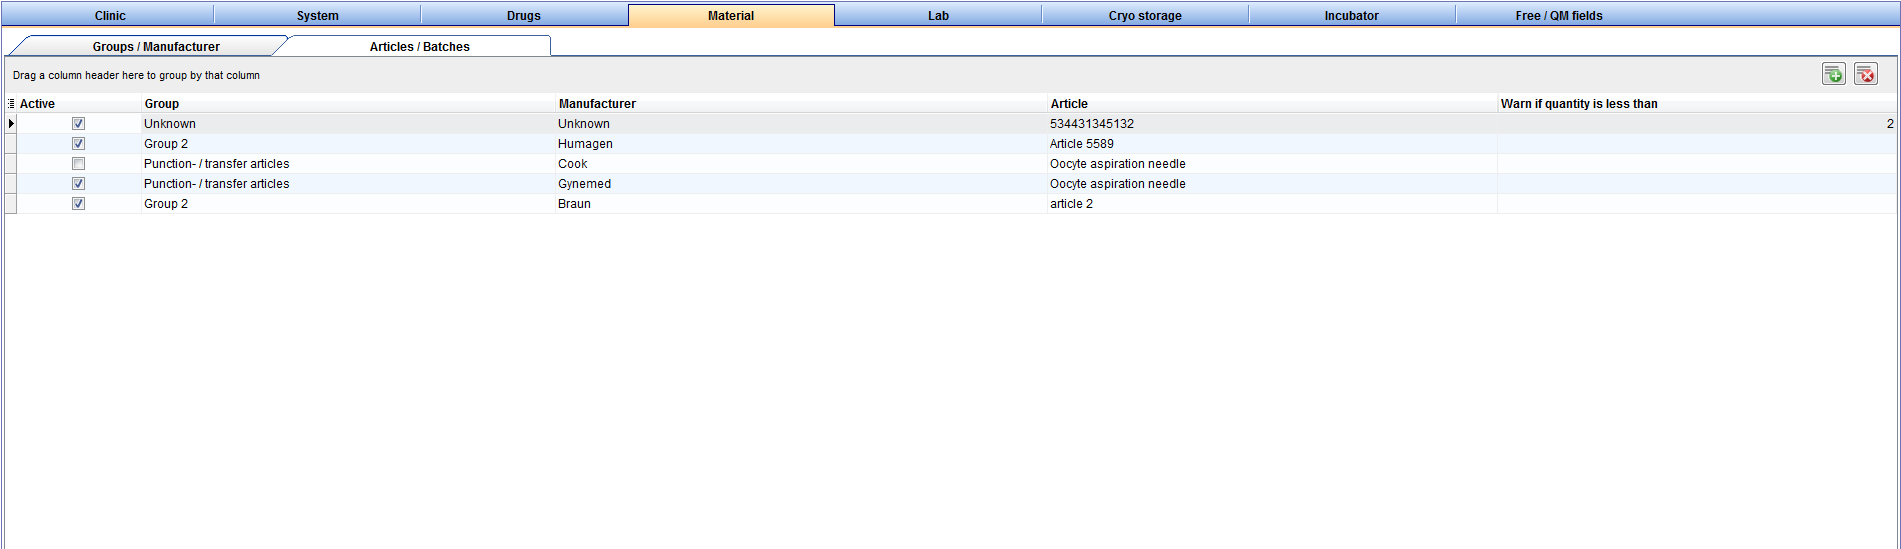
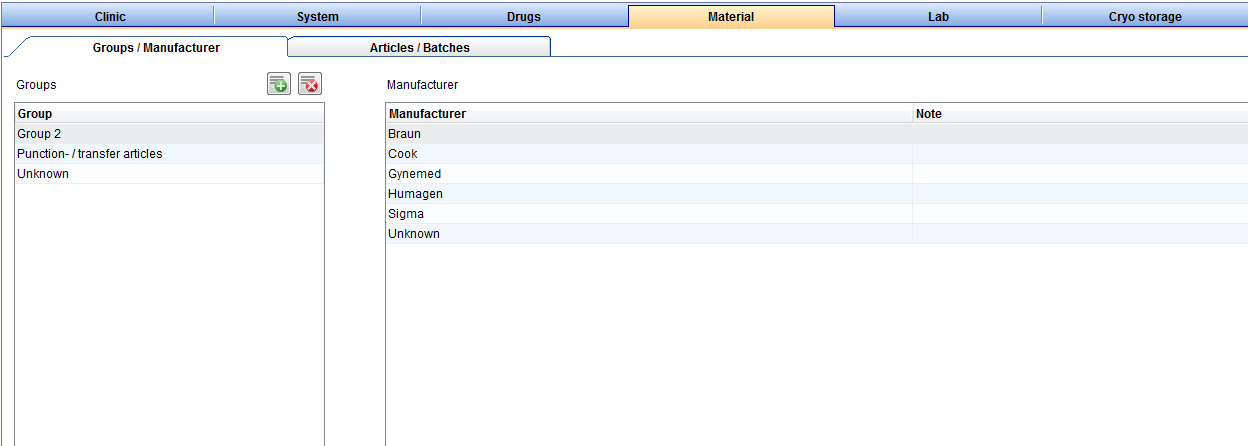
Material
In the section “Material” you can enter data concerning material groups, manufacturers and products. You can also create different batches and "activate" them for a certain period of time.
Articles / Batches
At this tab you can add the needed materials to the list and make them available for the creation of QM fields.
 |
| <img style="display: block; margin-left: auto; margin-right: auto;" src="/images/Plus.png" alt="" width="34" height="28" /> | Press this button on the top right to add a new article. |
| <img style="display: block; margin-left: auto; margin-right: auto;" src="/images/DeleteX.png" alt="" width="26" height="24" /> |
Delete it with this button. This is only possible if articles have not been assigned to QM fields or used otherwise. Should this be the case, deactivate the item by unticking the box "Active". This data will then be hidden without being deleted. Articles can only be deleted if they have not yet been used. |
Get more informations about the usability, <a href="/index.php?title=How_to_add_material_articles_/_batches%3F">here</a>.
Manufacturer
You can see a list of all existing manufactures at the tab “Manufacturer”.
 |
| <img style="display: block; margin-left: auto; margin-right: auto;" src="/images/Plus.png" alt="" width="34" height="28" /> | Press this button on the top right to add a new manufacturer. |
| <img style="display: block; margin-left: auto; margin-right: auto;" src="/images/DeleteX.png" alt="" width="26" height="24" /> |
Delete it with this button. This is only possible if manufactures have not been assigned to QM fields or used otherwise. Should this be the case, deactivate the item by unticking the box "Active". This data will then be hidden without being deleted. Manufacturers can only be deleted if they have not yet been used. |
Get more informations about the usability, <a href="/index.php?title=How_to_add_material_manufacturer%3F">here</a>.
Groups
At this tab you can create a new material group, for example probes. Here you can see a list of all existing groups.
 |
| <img style="display: block; margin-left: auto; margin-right: auto;" src="/images/Plus.png" alt="" width="34" height="28" /> | Press this button on the top right to create a new group. |
| <img style="display: block; margin-left: auto; margin-right: auto;" src="/images/DeleteX.png" alt="" width="26" height="24" /> |
Delete a group with this button. This is only possible if groups have not been assigned to QM fields or used otherwise. Should this be the case, deactivate the item by unticking the box "Active". This data will then be hidden without being deleted. Groups can only be deleted if they have not yet been used. |
Get more informations about the usability, <a href="/index.php?title=How_to_add_material_groups%3F">here</a>.
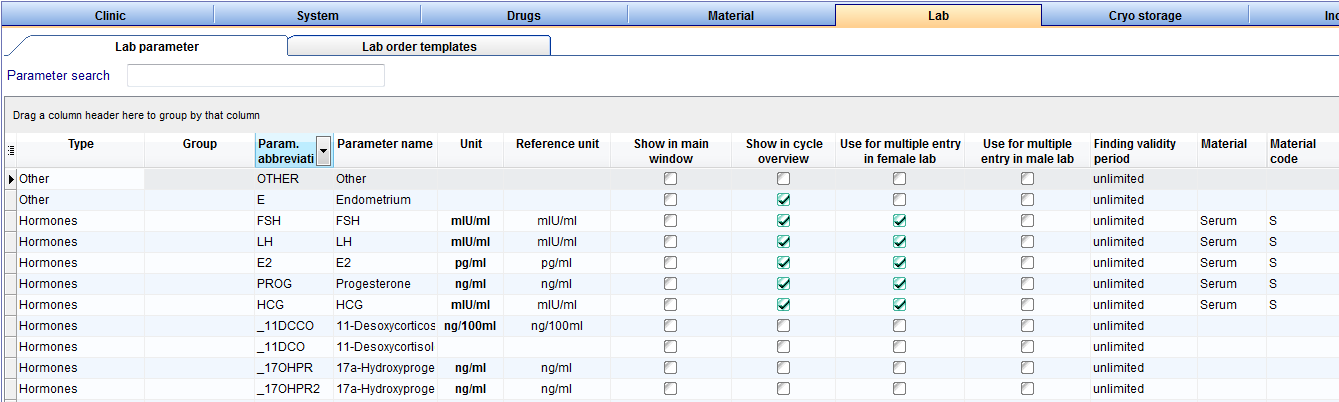
Lab
 |
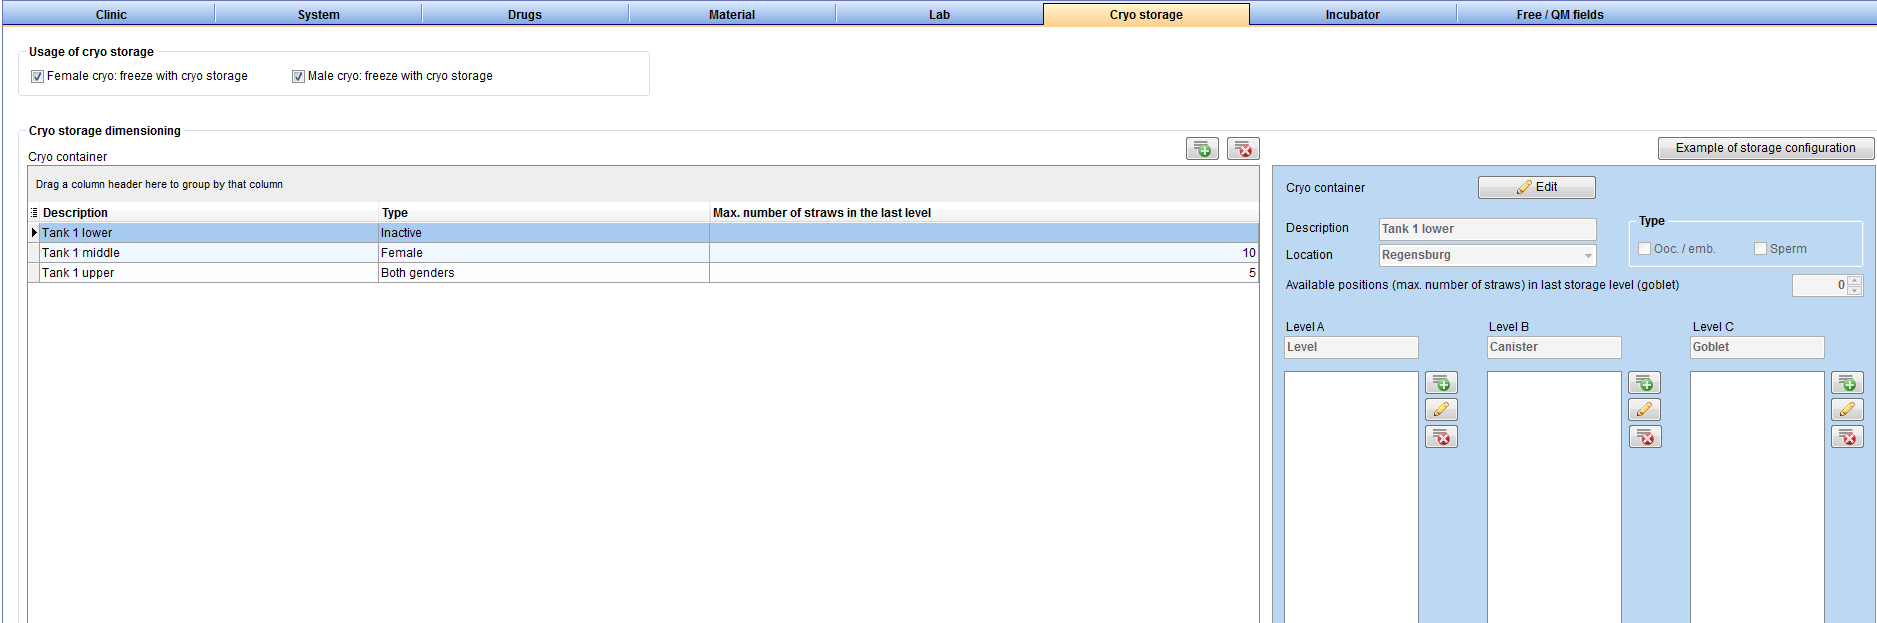
Cryo storage
 |
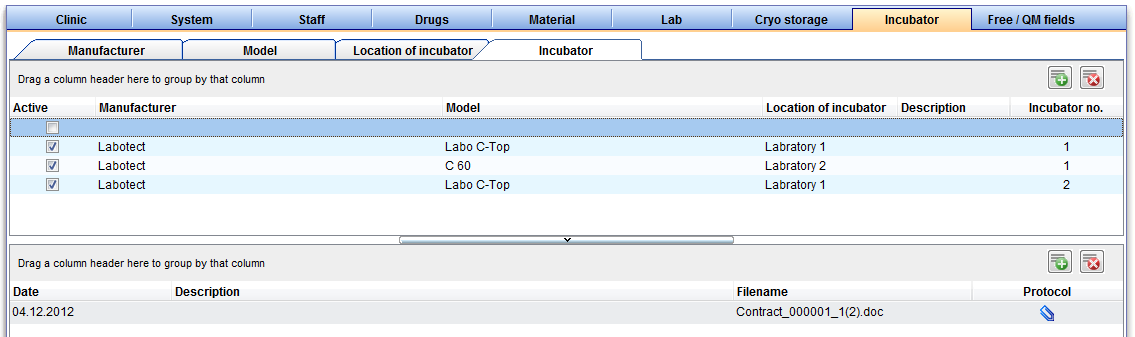
Incubator
 |
Free / QM fields
 |
<a href="/index.php?title=Report Editor">Report editor</a>
<a href="/index.php?title=MedITEX IVF System Settings">System</a>