How to add a person to MedITEX Administration?
From MedITEX - Wiki
| Line 24: | Line 24: | ||
<p><strong>External staff member:</strong> select this box for external members working for the clinic.</p> | <p><strong>External staff member:</strong> select this box for external members working for the clinic.</p> | ||
<p> </p> | <p> </p> | ||
| − | <p><strong>Active:</strong> this check box allows this person to be | + | <p><strong>Active:</strong> this check box allows this person to be selectable throughout program forms. For example: if Dr. Johnson does not have this box checked, he will not be able to be selected for a treatment.</p> |
<p> </p> | <p> </p> | ||
<p><strong>Function:</strong> type of work done by this person.</p> | <p><strong>Function:</strong> type of work done by this person.</p> | ||
| Line 33: | Line 33: | ||
</tbody> | </tbody> | ||
</table> | </table> | ||
| + | <p> </p> | ||
<table style="margin-left: auto; margin-right: auto;" border="0"> | <table style="margin-left: auto; margin-right: auto;" border="0"> | ||
<tbody> | <tbody> | ||
| Line 43: | Line 44: | ||
</tbody> | </tbody> | ||
</table> | </table> | ||
| + | <p> </p> | ||
| + | <p>The last step is clicking on the button <strong>Enter username and password</strong> at the bottom on this screen. The following window will open:</p> | ||
| + | <table style="margin-left: auto; margin-right: auto;" border="0"> | ||
| + | <tbody> | ||
| + | <tr> | ||
| + | <td><img style="display: block; margin-left: auto; margin-right: auto;" src="/images/PasswordUsername.png" alt="" width="279" height="238" /></td> | ||
| + | </tr> | ||
| + | <tr> | ||
| + | <td>Please add a username of 10 characters maximum and a password of at least 6 characters.<br /></td> | ||
| + | </tr> | ||
| + | </tbody> | ||
| + | </table> | ||
| + | <p> </p> | ||
| + | <p>Press the <strong>OK </strong>button to confirm the username and password, then press <strong>OK </strong>one more time to save this user.</p> | ||
<table style="float: right;" border="0"> | <table style="float: right;" border="0"> | ||
<tbody> | <tbody> | ||
Latest revision as of 11:07, 14 November 2013
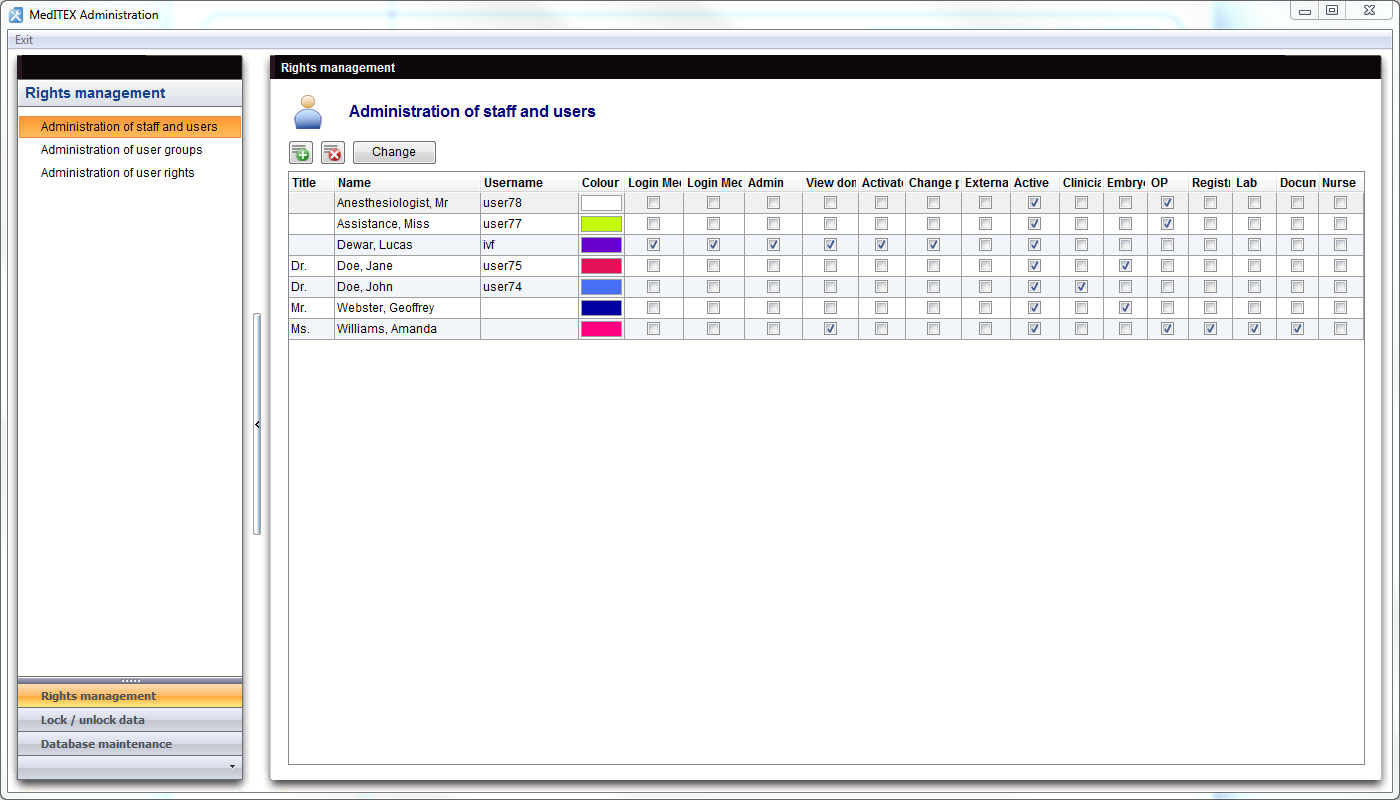 |
To add a new user to MedITEX Administration, open the tab Administration of staff and users.
- Press the <img src="/images/Plus.png" alt="" width="23" height="23" /> button at the top of the window.
- An empty window will be opened. Here you can enter the necessary data.
| <img style="display: block; margin-left: auto; margin-right: auto;" src="/images/NewPersonPerson.png" alt="" width="500" height="631" /> |
User name: displays the username when editing a person. If a new person is being added, this field will be blank.
Show in colour: this is the colour that will be displayed for this user throughout all MedITEX programs.
External staff member: select this box for external members working for the clinic.
Active: this check box allows this person to be selectable throughout program forms. For example: if Dr. Johnson does not have this box checked, he will not be able to be selected for a treatment.
Function: type of work done by this person.
Rights: these are the permissions of this person. |
| <img src="/images/NewPersonContacts.png" alt="" width="540" height="682" /> |
| Contact information about this person. |
The last step is clicking on the button Enter username and password at the bottom on this screen. The following window will open:
| <img style="display: block; margin-left: auto; margin-right: auto;" src="/images/PasswordUsername.png" alt="" width="279" height="238" /> |
| Please add a username of 10 characters maximum and a password of at least 6 characters. |
Press the OK button to confirm the username and password, then press OK one more time to save this user.
| <a href="/index.php?title=MedITEX_Administration_how_to">Back to How to</a> | <a href="#top">Back to top</a> |