How to add a new canister to the cryo storage?
From MedITEX - Wiki
(Difference between revisions)
| Line 14: | Line 14: | ||
<tr> | <tr> | ||
<td><img style="display: block; margin-left: auto; margin-right: auto;" src="/images/SaveChanges.png" alt="" width="162" height="29" /></td> | <td><img style="display: block; margin-left: auto; margin-right: auto;" src="/images/SaveChanges.png" alt="" width="162" height="29" /></td> | ||
| − | <td> </td> | + | <td> Save your changes.</td> |
</tr> | </tr> | ||
</tbody> | </tbody> | ||
Revision as of 11:59, 5 December 2012
 |
| <img style="display: block; margin-left: auto; margin-right: auto;" src="/images/Plus.png" alt="" width="34" height="28" /> | Press this button to add a new tray. |
| <img style="display: block; margin-left: auto; margin-right: auto;" src="/images/SaveChanges.png" alt="" width="162" height="29" /> | Save your changes. |
 |
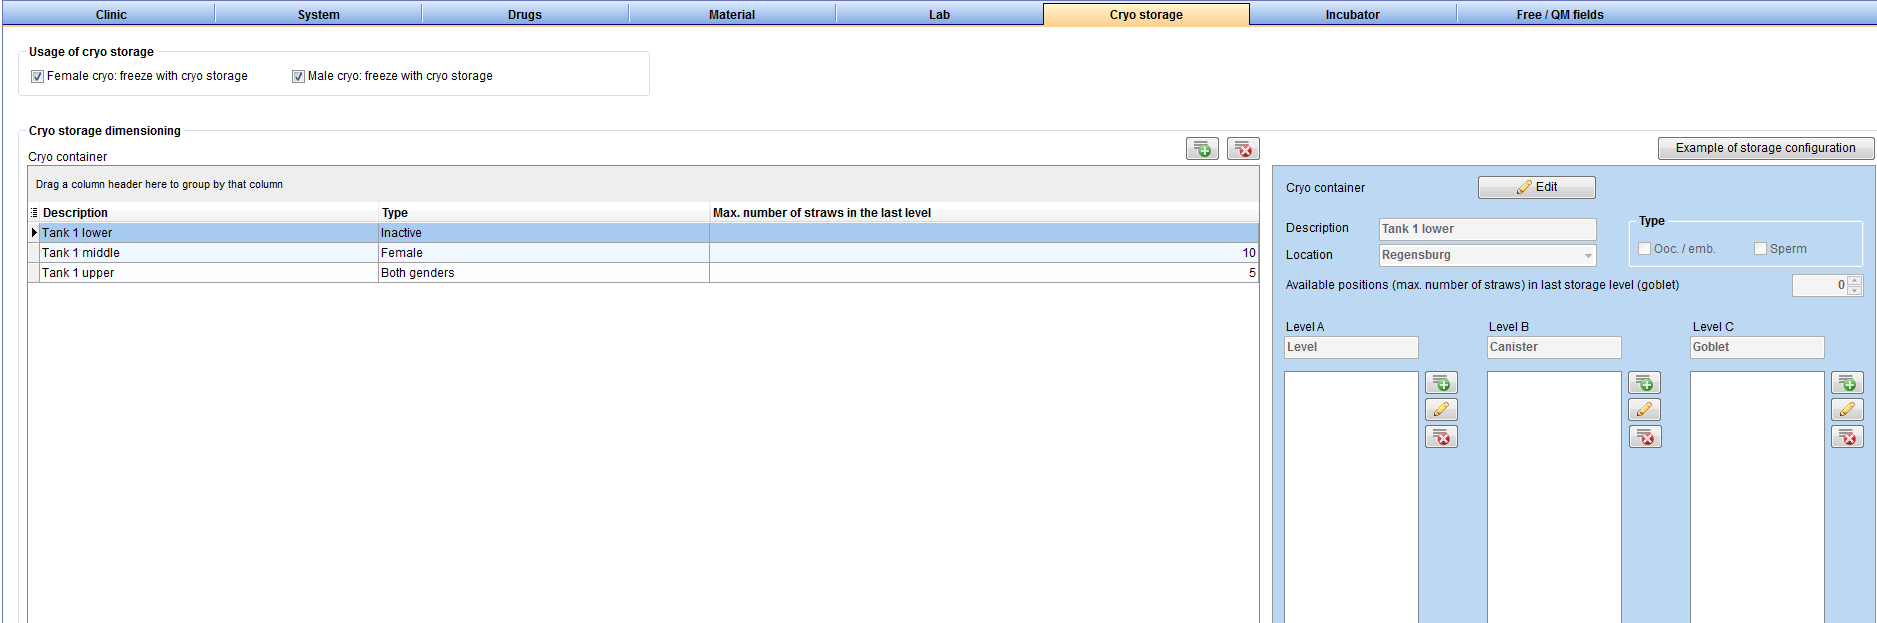
- Choose a name for the new tray in the field "Description".
- Tick Ooc./emb., Sperm or both in the panel "Type", depending on what types of samples should be stored in the tray.
- Enter the names of a maximum of three storage levels in the columns. Always define the storage levels from the left to the right side – if necessary, leave the right column empty but not the left.
- Enter all elements of the corresponding storage level in the pre-defined columns.
| <a href="/index.php?title=MedITEX_IVF_how_to">Back to How to</a> | <a href="#top">Back to top</a> |