How To Configure Cronus 3?
From MedITEX - Wiki
Follow the steps bellow to configure the connection between Cronus 3 and MedITEX IVF.
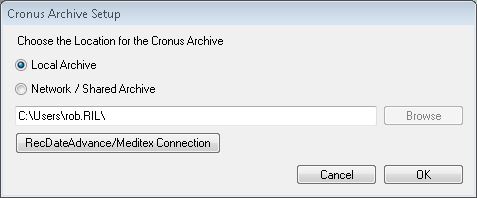
The connection to the Meditex Database can be configured using the RecDateAdvance/Meditex Connection button (click File, Archive Setup, RecDateAdvance/Meditex Connection).
 |
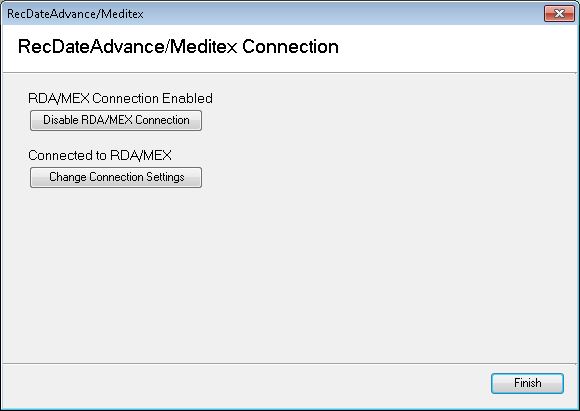
Clicking on RDA/MEX Connection button allows you to either Disable or Enable the Connection using the Disable RDA/MEX Connection button.
If the connection is enabled you can configure the connection settings using the Change Connection Settings button.
 |
Clicking on the Change Connection Settings will show the Connection Settings to the MedITEX database.
Clicking Next will take you back to the previous screen that confirms if it is connected or not connected to the database.
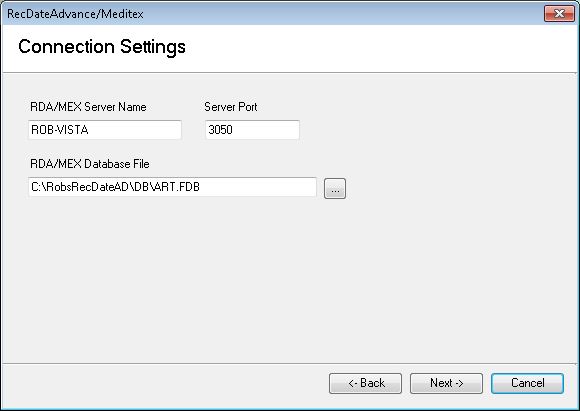 |
MEX Server Name: name of the server where MedITEX is installed. Server Port: by default the port is 3050, if connection is not established, use 3060. If the connection is still not possible, please contact support. MEX Database File: if the tool is not running from a client, enter art. ART is the name of the database. It will be enough to run it from clients. If Cronus is running from the server, enter the full path to the database. |
If the connection has been successfully established it should display Connected to RDA/MEX otherwise it will display Not Connected to RDA/MEX.
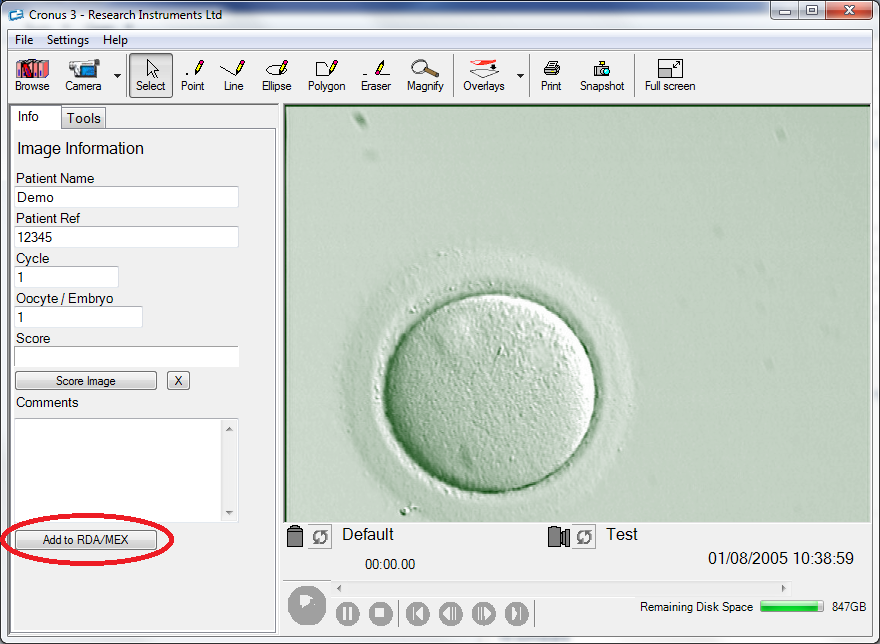
| From Cronus 3, it is possible to send images to MedITEX IVF by clicking on the Add to RDA/MEX button. |
 |
| Back to Microscope Interfaces | Back to top |