Examinations
From MedITEX - Wiki
(Difference between revisions)
| (19 intermediate revisions by 2 users not shown) | |||
| Line 1: | Line 1: | ||
| − | < | + | <p>In the examination section it is possible to <strong>document several exams</strong>. If you want to <strong>import data from an existing examination</strong>, select the desired examination and press the <strong>Copy data</strong> button. When all the data you need to document are inserted, press <strong>OK</strong>.</p> |
<p> </p> | <p> </p> | ||
| − | < | + | <h2>Female finding, ultrasound, other examinations</h2> |
| − | + | ||
| − | + | ||
<table style="margin-left: auto; margin-right: auto;" border="0" width="10" height="24"> | <table style="margin-left: auto; margin-right: auto;" border="0" width="10" height="24"> | ||
<tbody> | <tbody> | ||
| Line 11: | Line 9: | ||
</tbody> | </tbody> | ||
</table> | </table> | ||
| − | < | + | <p style="text-align: justify;"><strong>Explanation of the fields/icons</strong></p> |
<ul style="text-align: justify;"> | <ul style="text-align: justify;"> | ||
<li><strong>Date:</strong> date of the registration of the document. If the lightning icon is clicked will be selected the current date.</li> | <li><strong>Date:</strong> date of the registration of the document. If the lightning icon is clicked will be selected the current date.</li> | ||
| Line 18: | Line 16: | ||
<li><strong>Browse: </strong>clicking on the arrows will scroll the documents archived upwards or downwards.</li> | <li><strong>Browse: </strong>clicking on the arrows will scroll the documents archived upwards or downwards.</li> | ||
<li><strong>Text area:</strong> a "WordPad" like tool that can be used to input a text.</li> | <li><strong>Text area:</strong> a "WordPad" like tool that can be used to input a text.</li> | ||
| − | <li><strong>Container for pictures and documents:</strong> pictures and | + | <li><strong>Container for pictures and documents:</strong> pictures and files can be easily linked to the document by dragging and dropping them into the blue box. Then they can be opened double-clicking on the icon.</li> |
<li><strong>Open patient directory:</strong> opens the directory that contains all the files related to the patient.</li> | <li><strong>Open patient directory:</strong> opens the directory that contains all the files related to the patient.</li> | ||
<li><strong>Add document:</strong> allows to browse the directories and to add a single document.</li> | <li><strong>Add document:</strong> allows to browse the directories and to add a single document.</li> | ||
| Line 24: | Line 22: | ||
</ul> | </ul> | ||
<p> </p> | <p> </p> | ||
| − | < | + | <p><strong>Buttons</strong></p> |
<table style="margin-left: auto; margin-right: auto;" border="0" width="575" height="37"> | <table style="margin-left: auto; margin-right: auto;" border="0" width="575" height="37"> | ||
<tbody> | <tbody> | ||
| Line 33: | Line 31: | ||
</tbody> | </tbody> | ||
</table> | </table> | ||
| + | <p> </p> | ||
| + | <h3>Examination Overview</h3> | ||
| + | <p>This overview can be accessed via the <strong>Examinations button</strong> directly in the <a href="/index.php?title=Cycles#Top_section"><strong>cycle area</strong></a>.</p> | ||
| + | <table style="margin-left: auto; margin-right: auto;" border="0" width="10" height="24"> | ||
| + | <tbody> | ||
| + | <tr> | ||
| + | <td>[[Image:examination.jpg|none|740px|thumb|left|link=http://wiki.meditex-software.com/images/examination.jpg| ]]</td> | ||
| + | </tr> | ||
| + | </tbody> | ||
| + | </table> | ||
| + | <p> </p> | ||
| + | <h2>Male finding</h2> | ||
| + | <table style="margin-left: auto; margin-right: auto;" border="0" width="10" height="24"> | ||
| + | <tbody> | ||
| + | <tr> | ||
| + | <td>[[Image:malef.png|none|740px|thumb|left|link=http://wiki.meditex-software.com/images/malef.png| ]]</td> | ||
| + | </tr> | ||
| + | </tbody> | ||
| + | </table> | ||
| + | <p style="text-align: justify;"><strong>Explanation of the fields/icons</strong></p> | ||
| + | <ul style="text-align: justify;"> | ||
| + | <li><strong>Date:</strong> date of the registration of the document. If the lightning icon is clicked will be selected the current date.</li> | ||
| + | <li><strong>By: </strong>author of the document or of the notes.</li> | ||
| + | <li><strong>QM: QM field</strong> icon can be used to access the QM fields associated to this document.</li> | ||
| + | <li><strong>Browse: </strong>clicking on the arrows will scroll the documents archived upwards or downwards.</li> | ||
| + | <li><strong>Text area:</strong> a "WordPad" like tool that can be used to input a text.</li> | ||
| + | <li><strong>Container for pictures and documents:</strong> pictures and files can be easily linked to the document by dragging and dropping them into the blue box. Then they can be opened double-clicking on the icon.</li> | ||
| + | <li><strong>Open patient directory:</strong> opens the directory that contains all the files related to the patient.</li> | ||
| + | <li><strong>Add document:</strong> allows to browse the directories and to add a single document.</li> | ||
| + | <li><strong>Open document:</strong> always to open the document added.</li> | ||
| + | </ul> | ||
| + | <table style="margin-left: auto; margin-right: auto;" border="0"> | ||
| + | <tbody> | ||
| + | <tr> | ||
| + | <td><a href="/index.php?title=Queries_of_Report_editor"><img src="/images/plus48.png" alt="" width="48" height="48" /></a></td> | ||
| + | <td><a href="/index.php?title=PDF_Function">Click here</a> if you cant save as PDF in your Microsoft Office.</td> | ||
| + | </tr> | ||
| + | </tbody> | ||
| + | </table> | ||
| + | <h2>Add additional subjects to the list</h2> | ||
| + | <table border="0"> | ||
| + | <tbody> | ||
| + | <tr> | ||
| + | <td><img src="/images/addList.png" alt="" width="262" height="347" /></td> | ||
| + | <td> | ||
| + | <p>The list could be <strong>extended indefinitely</strong>. You can add examination types and their using gender and state at the <a href="/index.php?title=MedITEX_IVF_Settings#System_tables">system tables in the settings</a>.</p> | ||
| + | <p> </p> | ||
| + | <p>To edit the examintations</p> | ||
| + | <ul> | ||
| + | <li>click on the button <strong>Examinations -> New examination -> Administrate list </strong>or</li> | ||
| + | </ul> | ||
| + | <ul> | ||
| + | <li>click on the menu item <strong>System -> Configuration</strong><strong> / administration</strong><strong> -> Settings -> System -> System tables</strong>.</li> | ||
| + | </ul> | ||
| + | </td> | ||
| + | </tr> | ||
| + | </tbody> | ||
| + | </table> | ||
| + | <p> </p> | ||
<table style="float: right;" border="0"> | <table style="float: right;" border="0"> | ||
<tbody> | <tbody> | ||
Latest revision as of 14:06, 11 August 2014
In the examination section it is possible to document several exams. If you want to import data from an existing examination, select the desired examination and press the Copy data button. When all the data you need to document are inserted, press OK.
Contents |
Female finding, ultrasound, other examinations
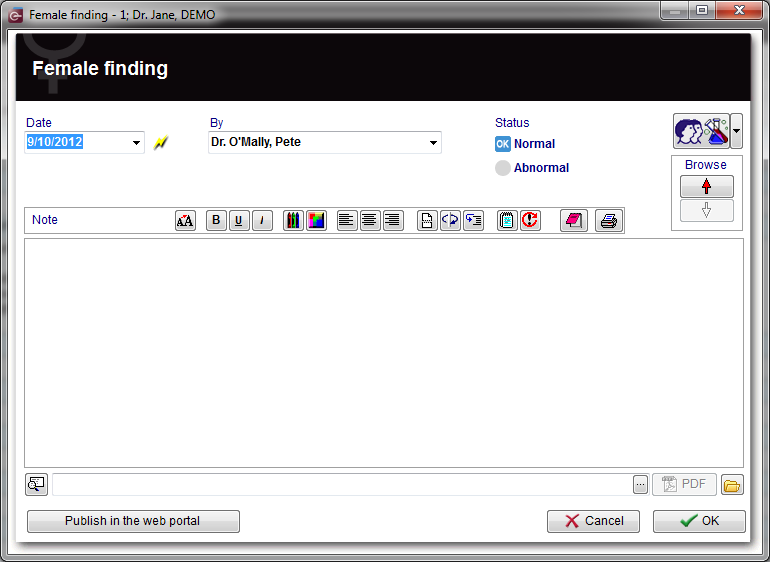 |
Explanation of the fields/icons
- Date: date of the registration of the document. If the lightning icon is clicked will be selected the current date.
- By: author of the document or of the notes.
- QM: QM field icon can be used to access the QM fields associated to this document.
- Browse: clicking on the arrows will scroll the documents archived upwards or downwards.
- Text area: a "WordPad" like tool that can be used to input a text.
- Container for pictures and documents: pictures and files can be easily linked to the document by dragging and dropping them into the blue box. Then they can be opened double-clicking on the icon.
- Open patient directory: opens the directory that contains all the files related to the patient.
- Add document: allows to browse the directories and to add a single document.
- Open document: always to open the document added.
Buttons
| <a href="/index.php?title=Web_portal_message"><img style="display: block; margin-left: auto; margin-right: auto; border: 2px dotted blue;" src="/images/PublishInWebPortal.png" alt="" width="213" height="23" /></a> | Sends the content of this window to the Web portal. |
Examination Overview
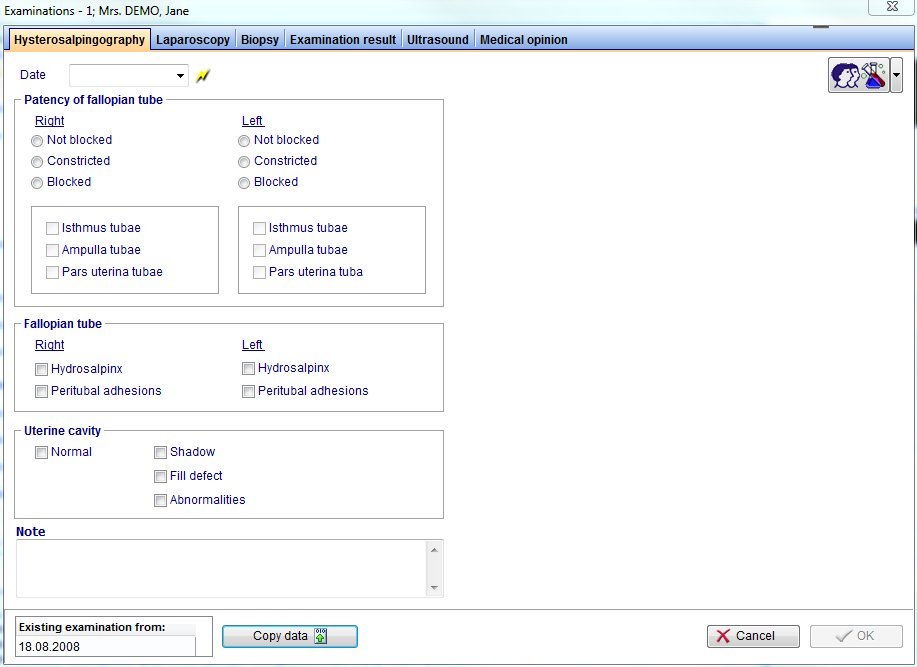
This overview can be accessed via the Examinations button directly in the <a href="/index.php?title=Cycles#Top_section">cycle area</a>.
 |
Male finding
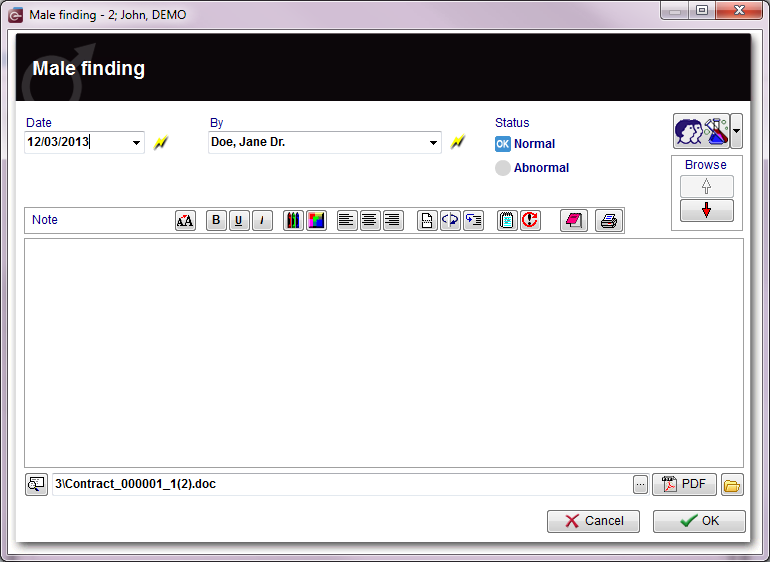 |
Explanation of the fields/icons
- Date: date of the registration of the document. If the lightning icon is clicked will be selected the current date.
- By: author of the document or of the notes.
- QM: QM field icon can be used to access the QM fields associated to this document.
- Browse: clicking on the arrows will scroll the documents archived upwards or downwards.
- Text area: a "WordPad" like tool that can be used to input a text.
- Container for pictures and documents: pictures and files can be easily linked to the document by dragging and dropping them into the blue box. Then they can be opened double-clicking on the icon.
- Open patient directory: opens the directory that contains all the files related to the patient.
- Add document: allows to browse the directories and to add a single document.
- Open document: always to open the document added.
| <a href="/index.php?title=Queries_of_Report_editor"><img src="/images/plus48.png" alt="" width="48" height="48" /></a> | <a href="/index.php?title=PDF_Function">Click here</a> if you cant save as PDF in your Microsoft Office. |
Add additional subjects to the list
| <img src="/images/addList.png" alt="" width="262" height="347" /> |
The list could be extended indefinitely. You can add examination types and their using gender and state at the <a href="/index.php?title=MedITEX_IVF_Settings#System_tables">system tables in the settings</a>.
To edit the examintations
|
| <a href="/index.php?title=MedITEX_IVF_manual">Back to the MedITEX IVF menu </a> | <a href="#top">Back to top</a> |