Come utilizzare MedITEX WebPortal
From MedITEX - Wiki
Questa pagina fornisce una documentazione dettagliata e istruzioni su come utilizzare MedITEX WebPortal.
Nella pagina seguente, in ogni sezione verranno mostrati screenshot sia per la versione Desktop version sia per la versione Mobile.
Contents |
Log In
Primo Log In
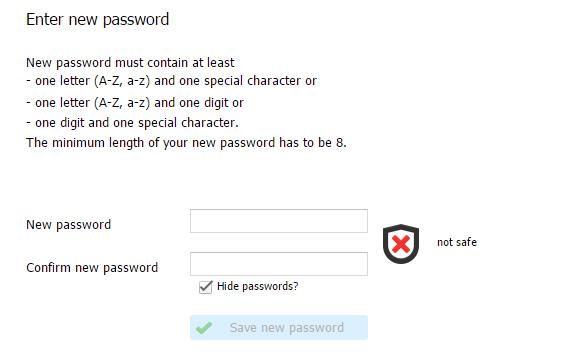
Se stai usando WebPortal per la prima volta, devi usare la password standard che è stata fornita dalla clinica.
Successivamente, prima di poter continuare, verrà chiesto di cambiare la password.
Se si vuole vedere la password, basterà deselezionare l'opzione 'Hide passwords?'.
 |
 |
Log In generale
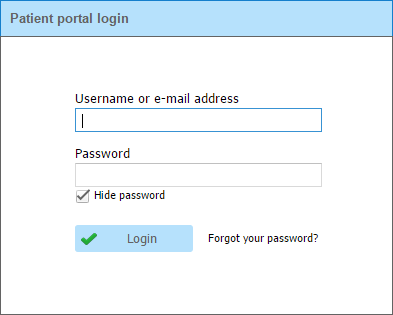
Digitare il nome utente o l'indirizzo email associato all'account WebPortal e la password.
Se si vuole vedere la password, basterà deselezionare l'opzione 'Hide passwords?'.
 |
 |
Dimenticata la password?
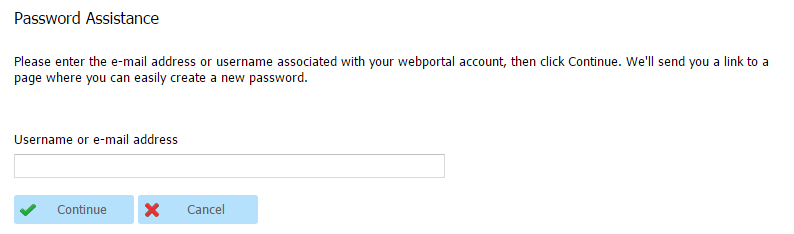
Se si dimentica la password si può cliccare su “Forgot your password?” nella pagina del Log In.
Si verrà rediretti su questa pagina dove è possibile digitare il nome utente o l'indirizzo email associato all'account WebPortal.
 |
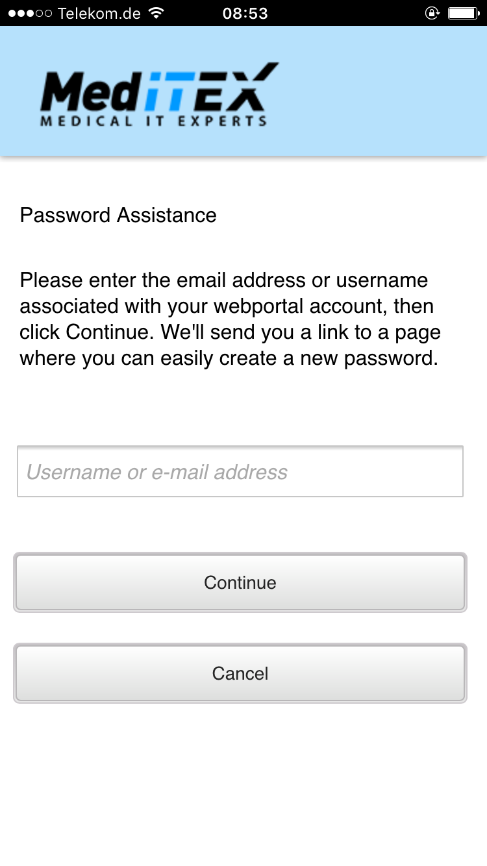 |
Dopo aver cliccato 'Continue', tramite email si riceverà un link per la pagina dove si potrà facilmente creare una nuova password.
 |
 |
Dopo aver salvato la password, si può effettuare il Log In.
Se non si possiede un indirizzo email associato all'account, questa funzionalità non può essere usata. Contattare la clinica per ottenere una nuova password.
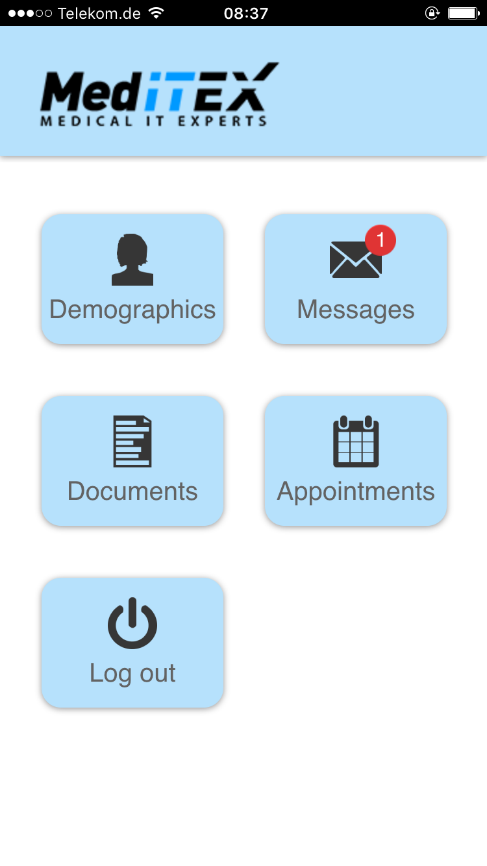
La navigazione mostra le diverse aree che si possono scegliere. Il cerchio rosso su 'Messaggi' indica il numero di messaggi non letti.
 |
 |
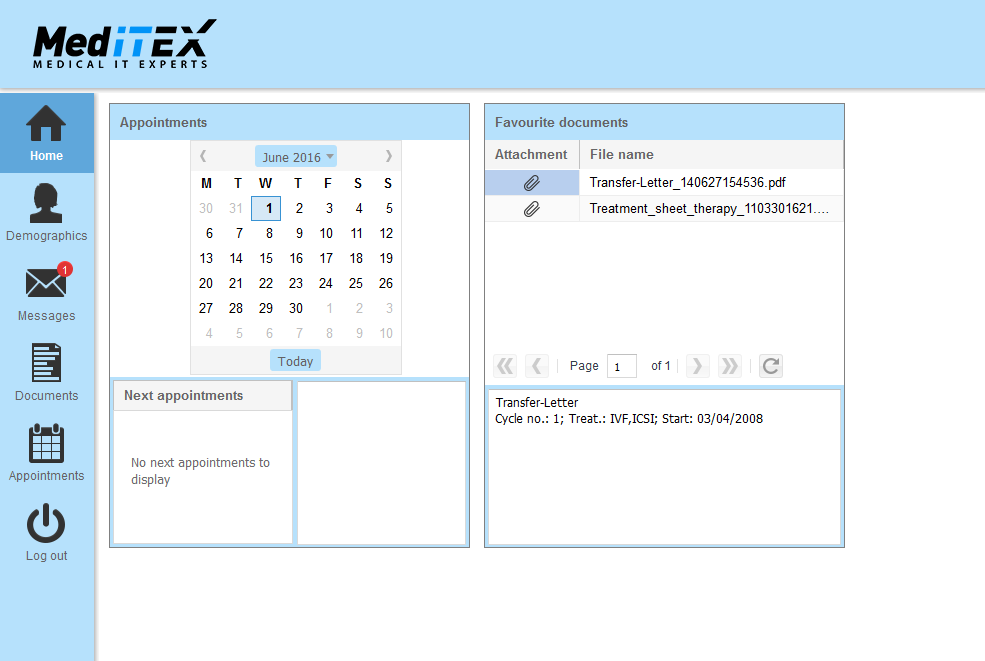
Home
La schermata Home è una panoramica in cui si possono mostrare i prossimi appuntamenti e i documenti preferiti..
Quest'area è disponibile solamente per la versione Desktop di WebPortal.
 |
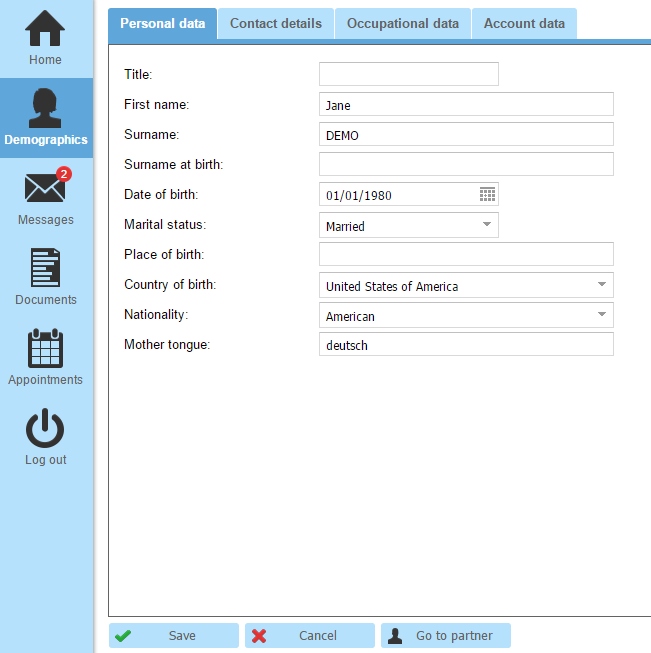
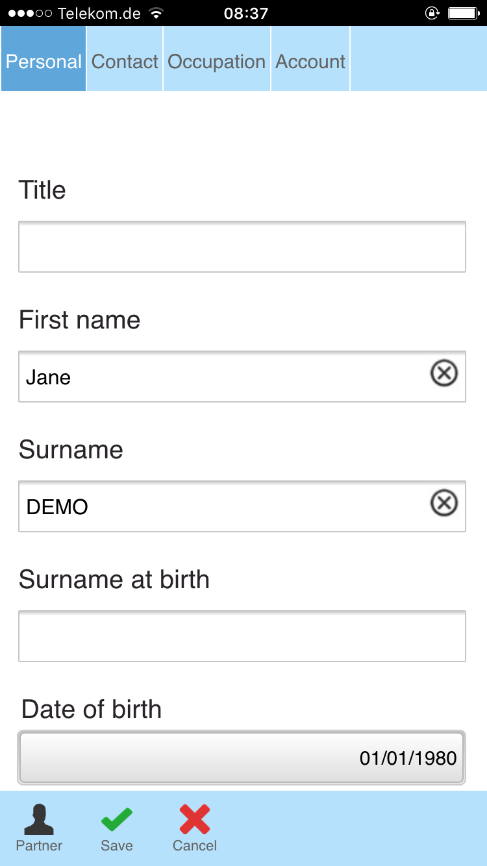
Anagrafica
In anagrafica si possono mostrare e cambiare i dati personali.
Modificare dati
Per trovare tutto facilmente, ci sono quattro aree differenti:
- Dati personali
- Dettagli contatto
- Occupazione
- Dati account
 |
 |
| Save all your changes. |
|
| Don’t save your changes and discard. | |
| If you are using your webportal together with your partner you can display the partner's data. |
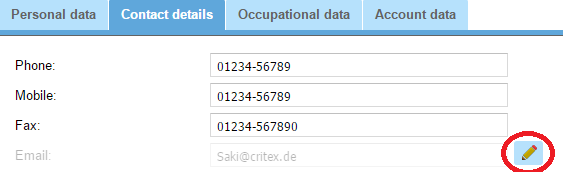
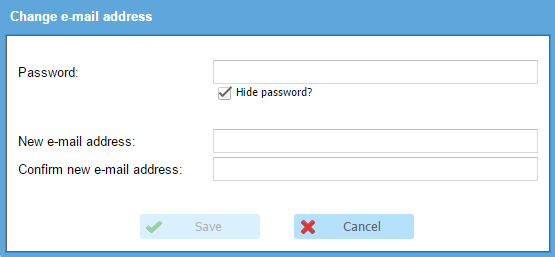
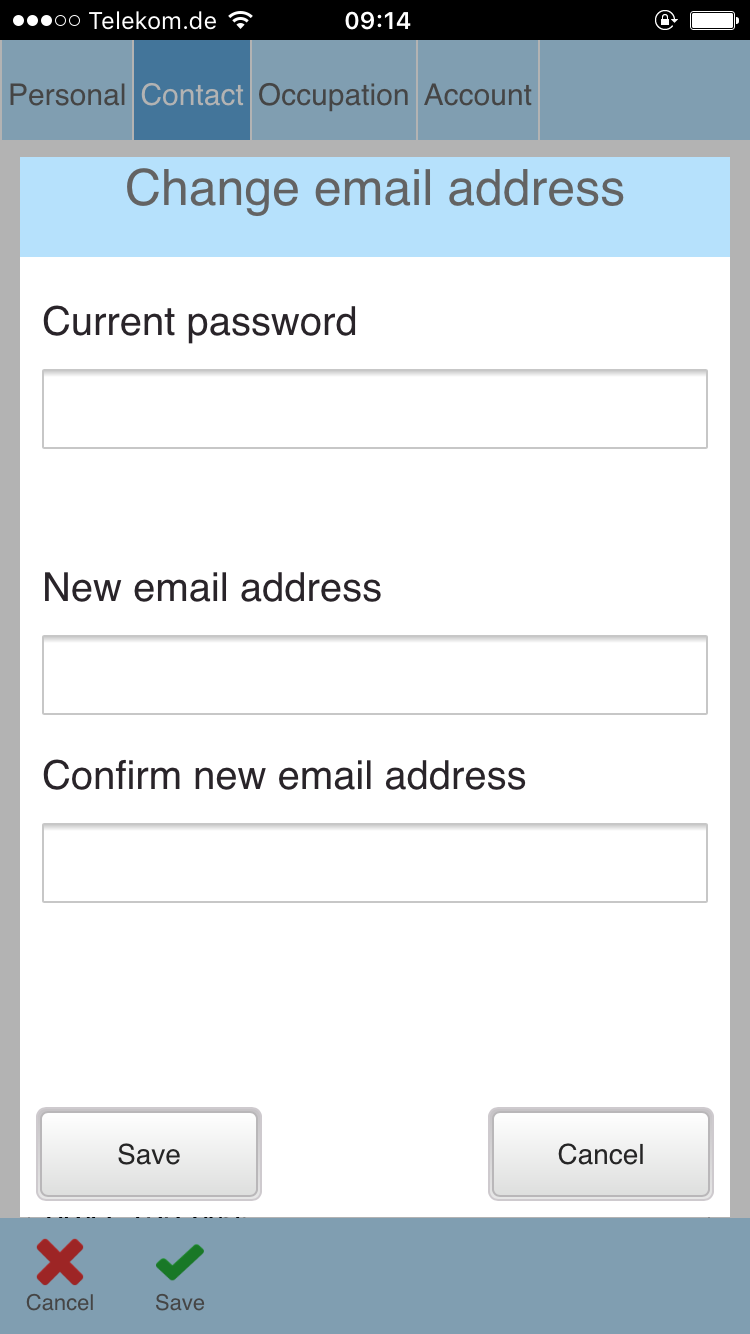
Modificare l'indirizzo email
Se si vuole modificare il proprio indirizzo email, andare su 'Dettagli contatto' e cliccare il pulsante vicino all'indirizzo email.
 |
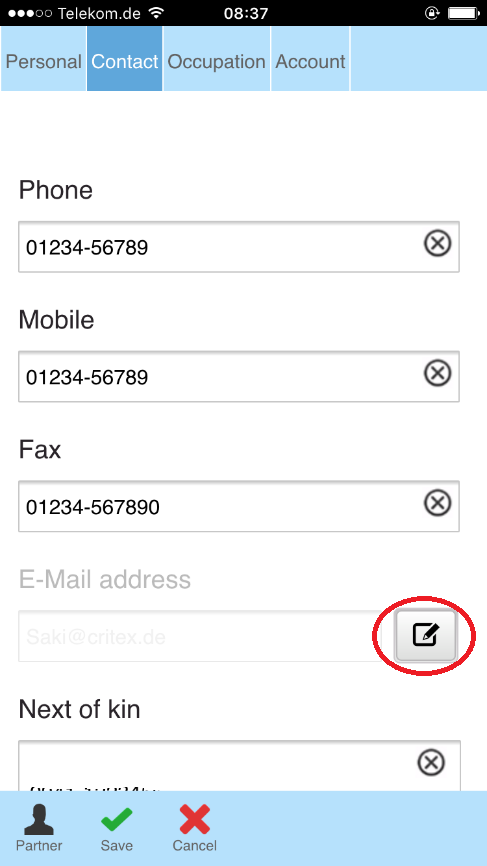 |
Si apriraà una nuova finestra dove sarà possibile modificare l'indirizzo email.
 |
 |
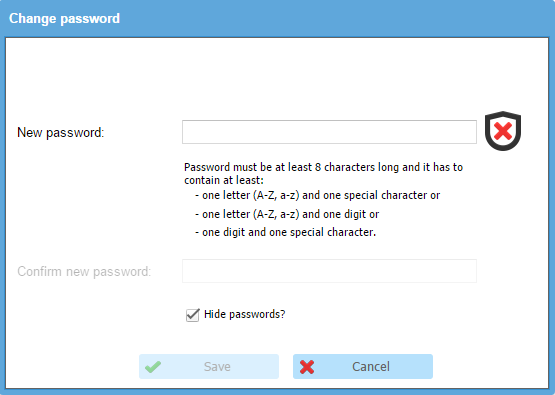
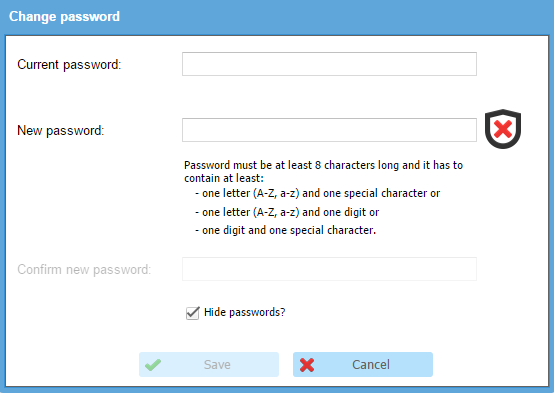
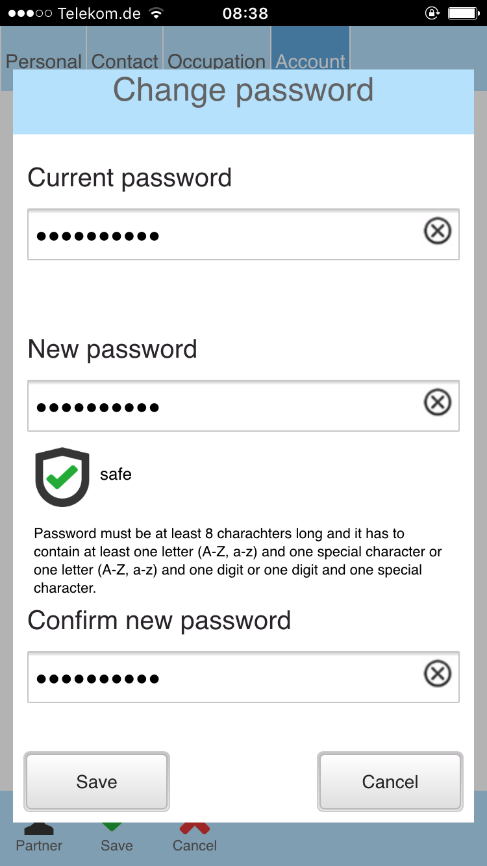
Modificare la password
Per modificare la password, andare su 'Dati account' e cliccare sul pulsante vicino alla password, come mostrato in figura.
 |
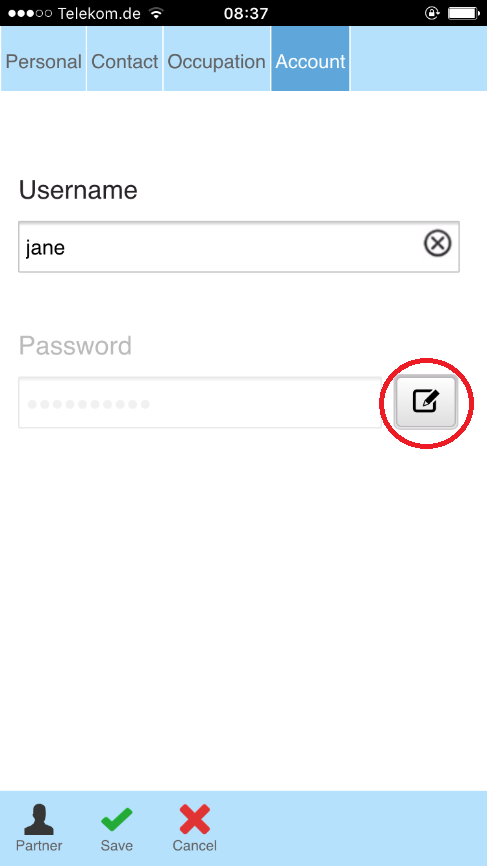 |
Si aprirà una nuova finestra dove sarà possibile modificare la password.
 |
 |
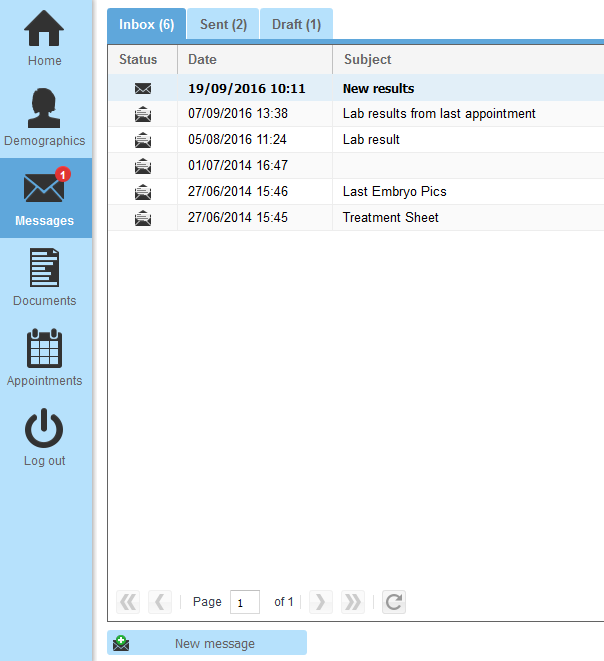
Messaggi
Aree
Ci sono 3 aree differenti:
- Ricevuti
- Inviati
- Bozze
 |
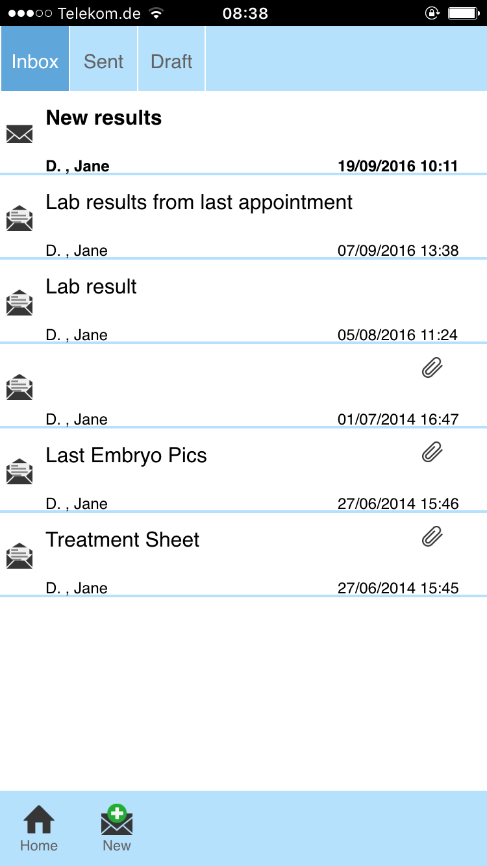 |
Aprire un messaggio
Per aprire un messaggio nella versione desktop , basta fare doppio clic sul messaggio desiderato.
Per aprire un messaggio nella versione mobile , basta cliccare sul messaggio desiderato.
|
Click on this button to create a new message. An empty page, where you can type in your message, will open. |
|
| Open the message you want to reply and click on this button. |
|
|
Print message is only available for inbox messages and sent messages. To print a message, open the message that you want to print and click on this button. |
|
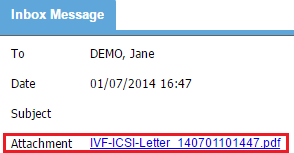 |
There are two different ways to open an attachment:
|
|
Only one document can be uploaded to one message. To upload a document open a new message or reply to a received message and press this button. Afterwards you can choose the document you want to upload. |
|
| If you want to remove an uploaded document, click on this button. |
|
|
|
| If you write a new message or reply to a message but you don’t want to send it immediately, you can save it as a draft. |
|
| If you want to delete a draft, click on this button. |
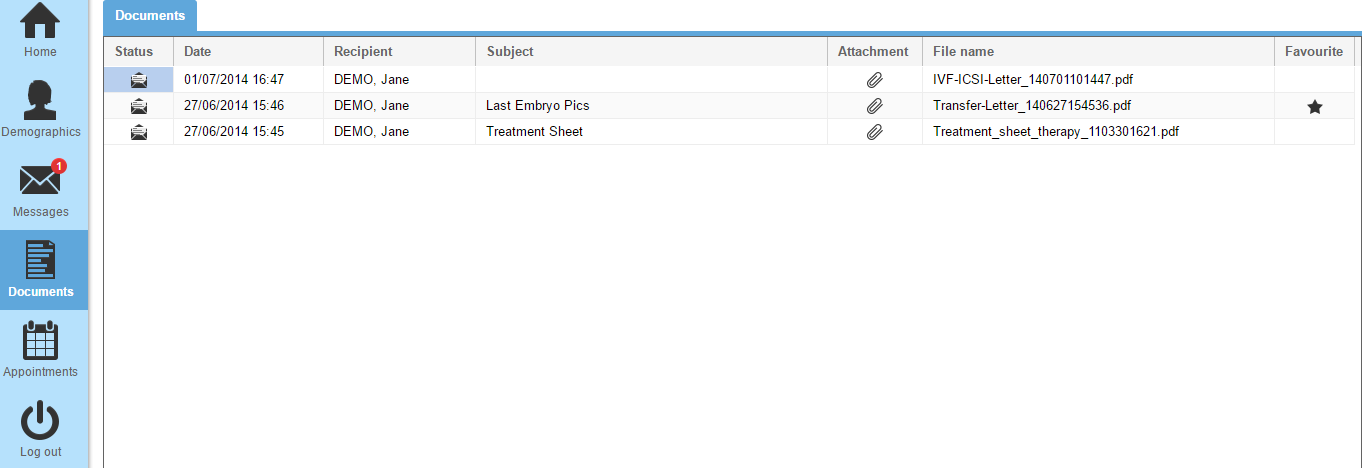
Documenti
 |
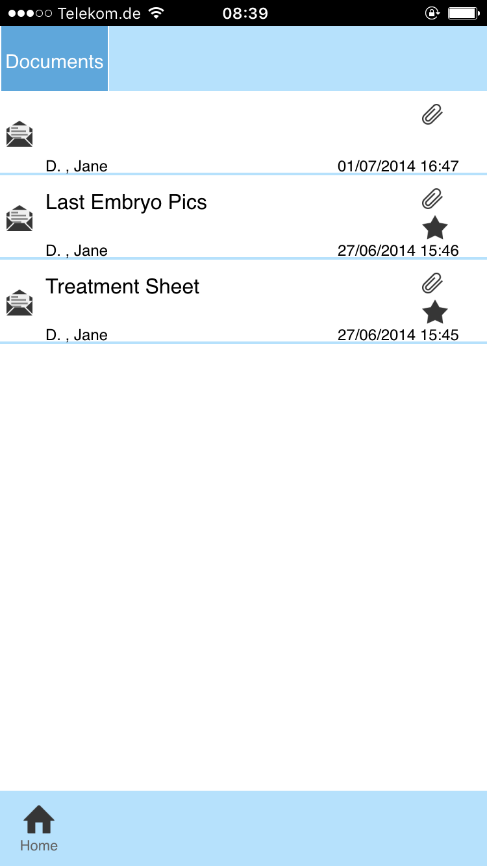 |
Aprire un documento
|
Ci sono due modi possibili per aprire un documento:
|
Impostare un documento come preferito/Rimuovere un documento dai preferiti
|
Impostare un documento come preferito/Rimuovere documento dai preferiti: s si riceve un messaggio con allegato, può impostare l'allegato come preferito o rimuoverlo dai preferiti. Basta clicca su uno di questi pulsanti. |
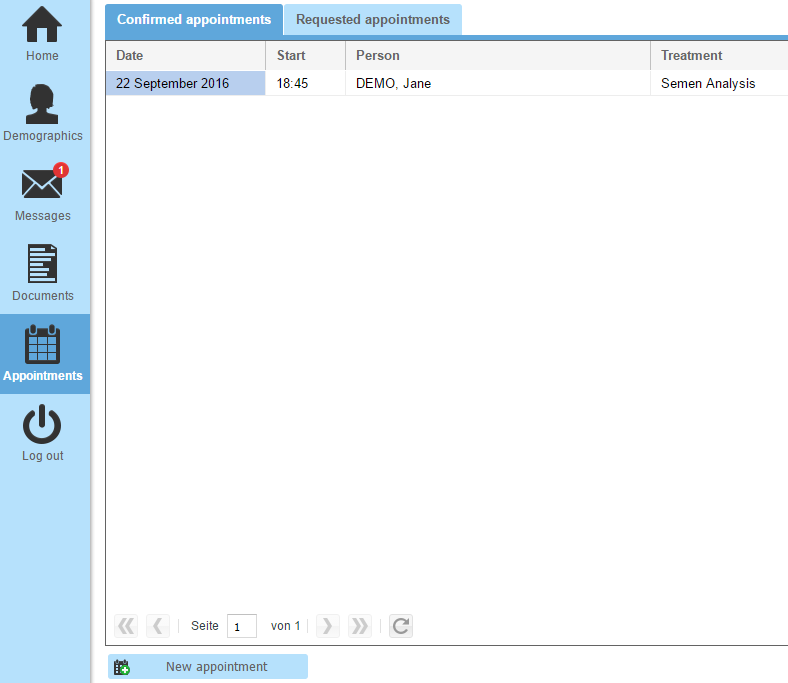
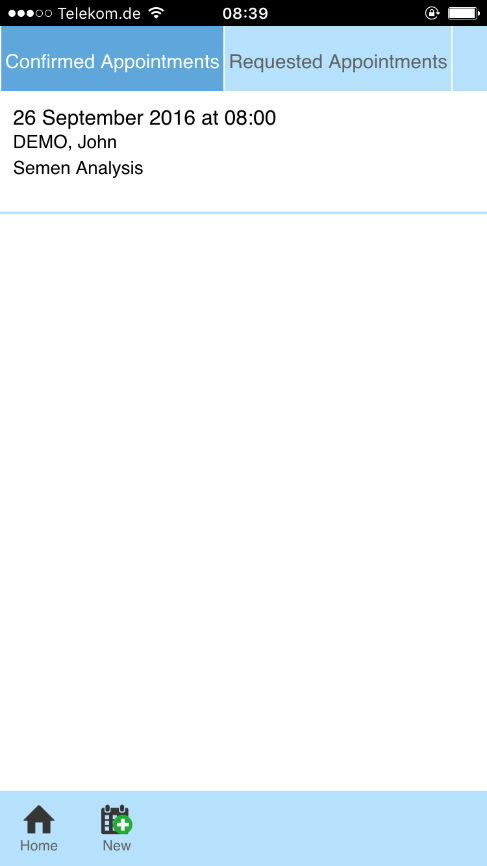
Appuntamenti
Nota: i tipi di appuntamento mostrati negli screenshot sono esempi, quelli reali saranno quelli definiti in MedITEX Scheduler e abilitati nel WebPortal.
E' possibile mostrare i propri appuntamenti e richiedere nuovi appuntamenti.
Aree
To have an overview of all appointments, we have two areas:
- Confirmed appointments: Displaying all appointments which are already confirmed by the clinic.
- Requested appointments: Here you can display all the requests which have not been confirmed yet and see the declined appointments.
 |
 |
Cancel appointment request
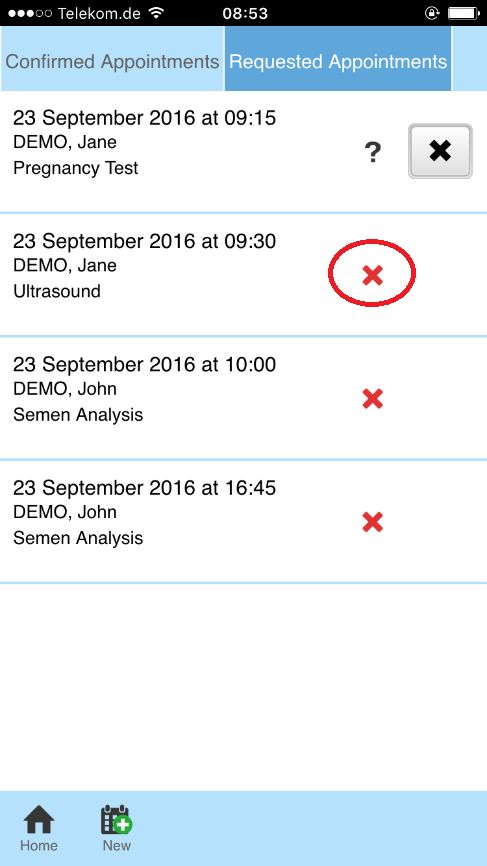 |
It is possible to cancel an appointment request if there is no answer from the clinic. If you want to cancel an appointment request go to 'Requested appointments' and click on this button. |
New appointment request
| To make a new appointment request, click on this button. |
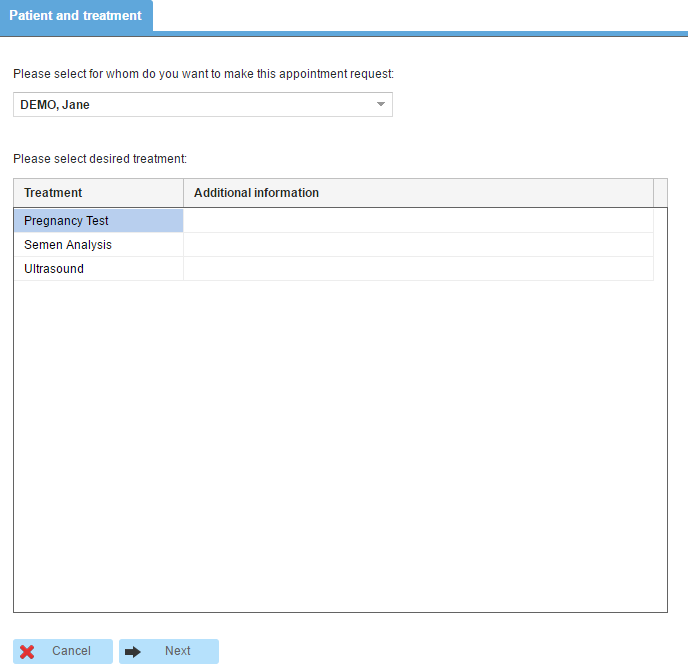
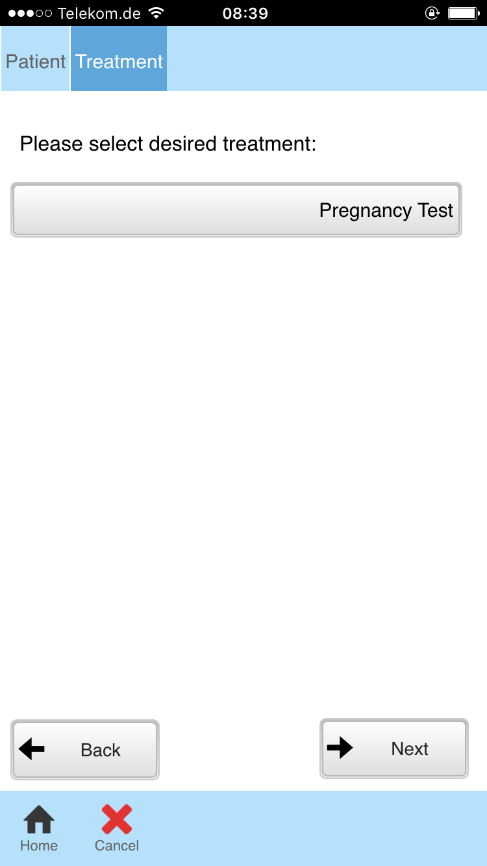
Now you have to fill out some information about the request:
- Patient and treatment: If you use the webportal together with your partner, you can also make a request for her/him. Afterwards you have to choose the desired treatment.
 |
|
|
 |
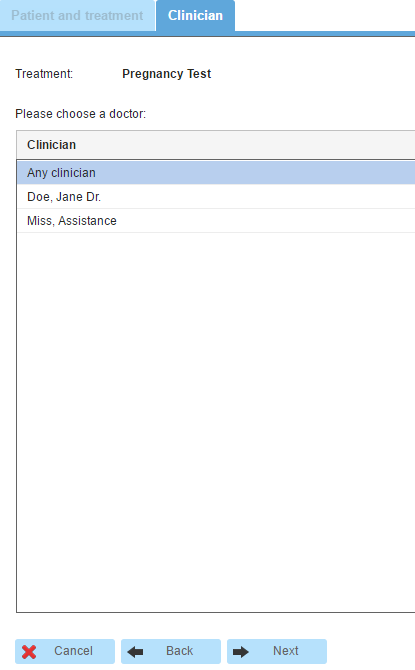
- Clinician: For some treatments (not for all), you can choose your desired clinician.
 |
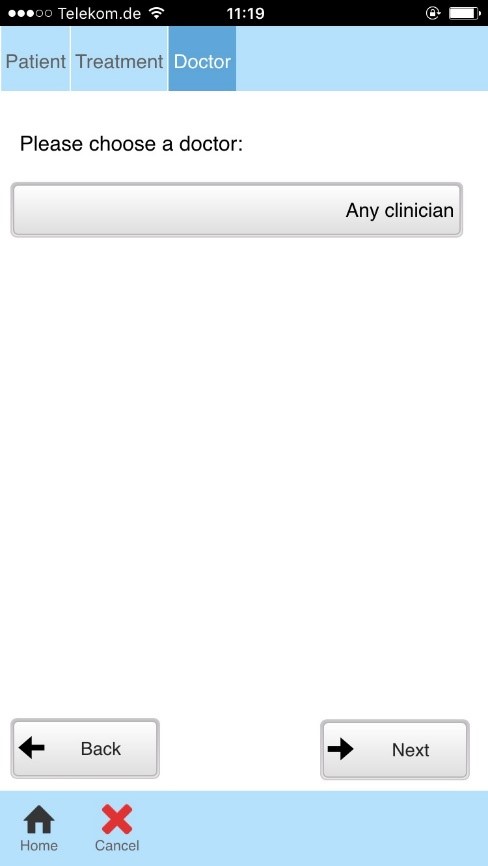 |
- Date and time: Here you can select a date and a time for your appointment. If you don’t want to search for the next possible date you can use the button 'Next possible date' and it will be made automatically.
 |
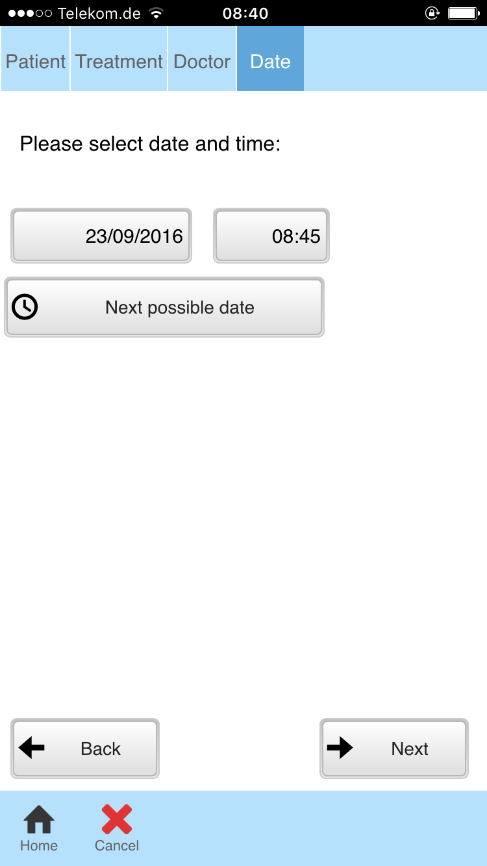 |
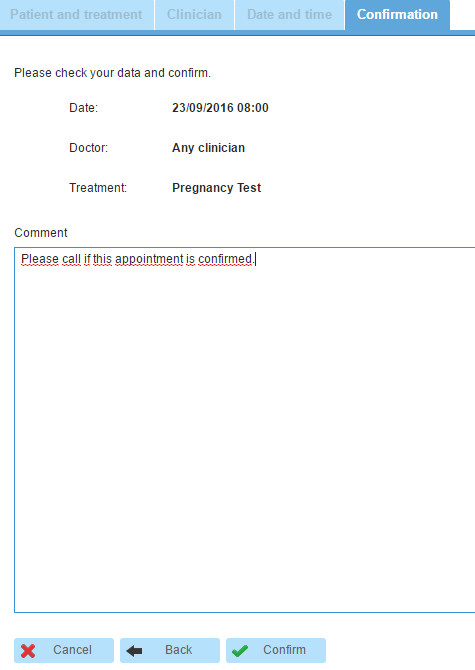
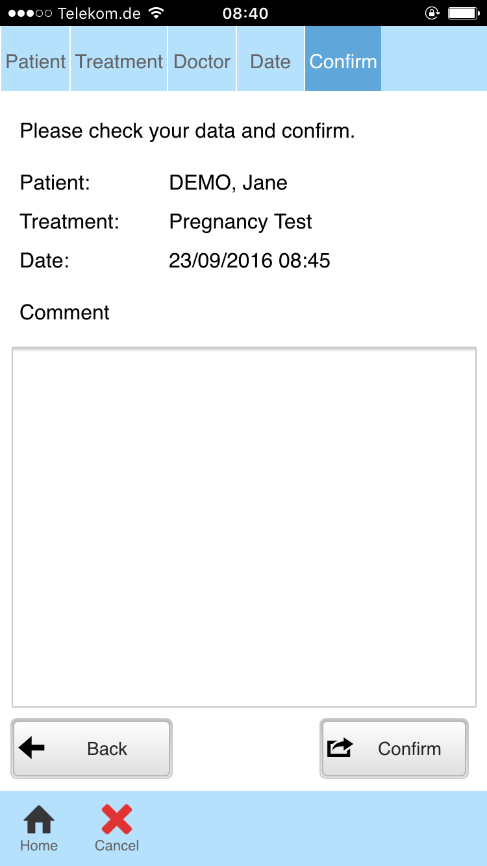
- Confirm: The last step is to check all the information and confirm the request. If you want to write something in addition, you can use the field for comments. Once your request is complete, please click on 'Confirm' to send the appointment request to the clinic.
 |
 |
| Back to top |