Come assegnare un matchcode ad un campo QM?
From MedITEX - Wiki
Contents |
Funzionalità Matchcode
La scansione del Matchcode in MedITEX IVF può essere eseguita ovunque nel programma.
A seconda della sezione in cui viene eseguita la scansione e dalle proprietà del matchcode (a che elemento è associato in MedITEX IVF), la scansione matchode ha diverse funzionalità:
1. Apertura di specifiche sezione di MedITEX IVF
- Basta scannerizzare il matchcode assegnato ad una finestra QM ("Area matchcode").
- Eccezione: se la scannerizzazione viene effettuata quando una finestra cosiddetta "modale" è aperta, non funzionerà. La finestra deve essere chiusa per poter proseguire. (es: "Criobanca di un paziente").
2. Aprire specifiche sezioni QM in MedITEX IVF
- Basta scannerizzare il matchcode assegnato ad uno specifico campo QM.
- Eccezione: vedi punto (1.).
La differenza tra la funzionalità (1.) e la funzionalità (2.) è che nella seconda non viene aperta solamente la sezione specifica di MedITEX IVF, ma in seguito viene aperta anche la finestra QM assegnata.
3. Confrontare il materiale di due pazienti al fine di determinare se è materiale di una coppia o meno (utilizzando l'RFID matcher).
4. Tracciabilità del materiale
- Scannerizzando il Matchcode assegnatio ad un partiocolare lotto di materiale (Impostazioni --> Materiale) il relativo campo QM verrà aggiunto.
- Il campo QM materiale corrispondente verrà aggiunto solo se la finestra QM è aperta e attiva. In caso contrario, il programma passerà a Impostazioni -> Materiale e aprirà il lotto dell'articolo corrispondente.
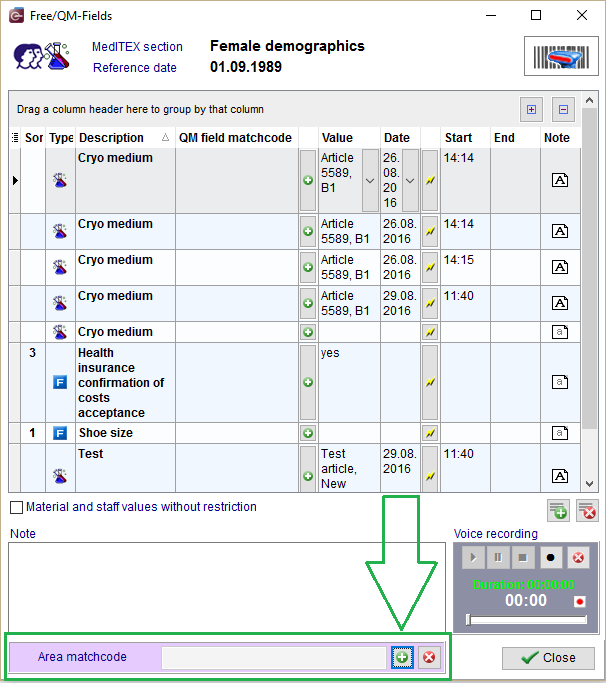
In MedITEX IVF, un matchcode (codice Barcode o RFID) può essere assegnato a ogni sezione QM e verrà visualizzato in "Area matchcode", facendo clic sul pulsante "+".
 |
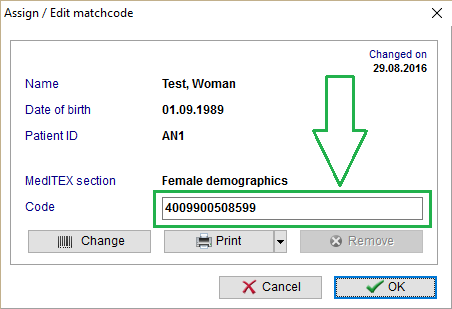
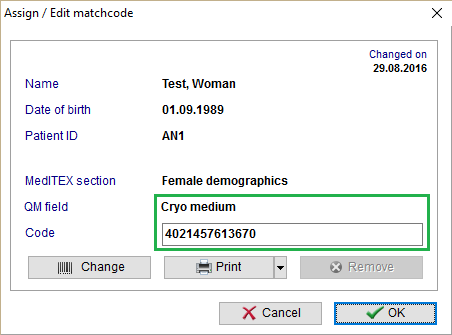
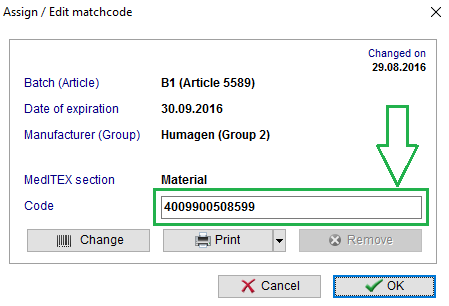
Si apre la seguente finestra e una volta che il codice è scannerizzato apparirà nel campo "Codice".
 |
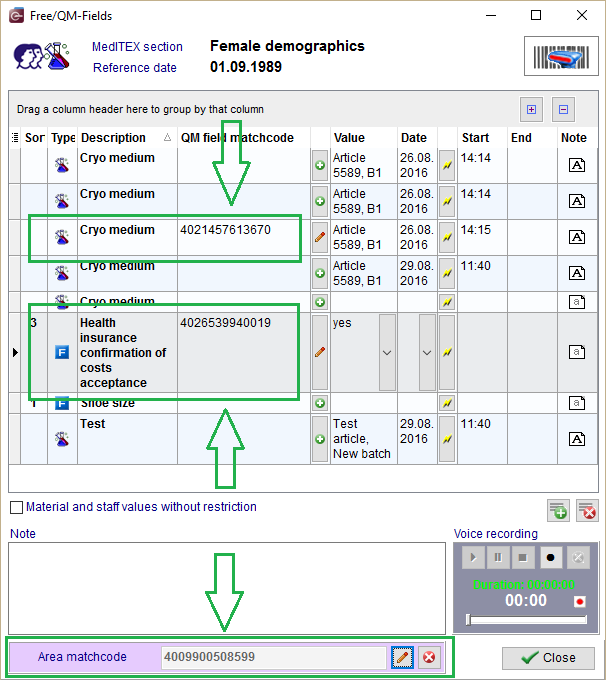
Oltre che alla sezione QM, i matchcode possono essere assegnati a qualsiasi campo QM premendo sul pulsante "+" a fianco della colonna "Matchcode Campo QM".
 |
 |
Matchcode per i materiali
MedITEX IVF offre la possibilità di inserire campi QM di tipo materiale mediante la scansione del matchcode (Barcode o RFID) assegnato al materiale collegato con quel campo QM.
 |
Material matchcode assigning
Matchcode (Barcode or RFID) of a material is assigned over the following window (System settings -> Material), by clicking on the "+" button.
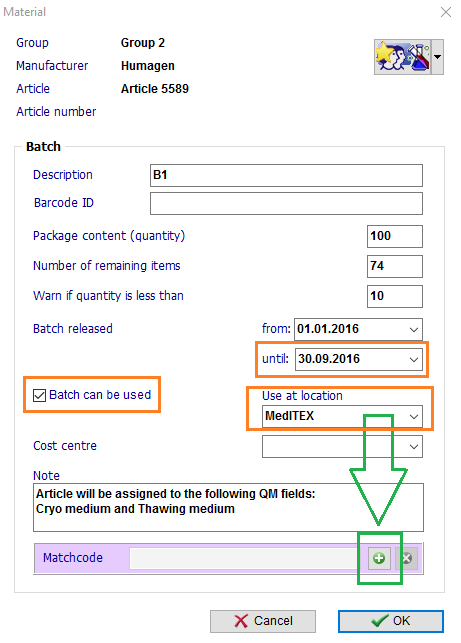 |
IMPORTANT: Field "Barcode ID" is not matchcode. This is clinic Internal Barcode ID, used for material import.
The content of the note field here is just an info which should make this example easier to follow.
The following window opens, and after the code is scanned, field "Code" is filled.
 |
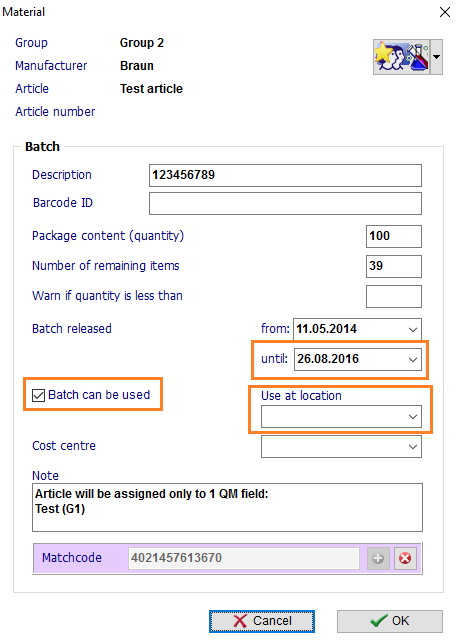
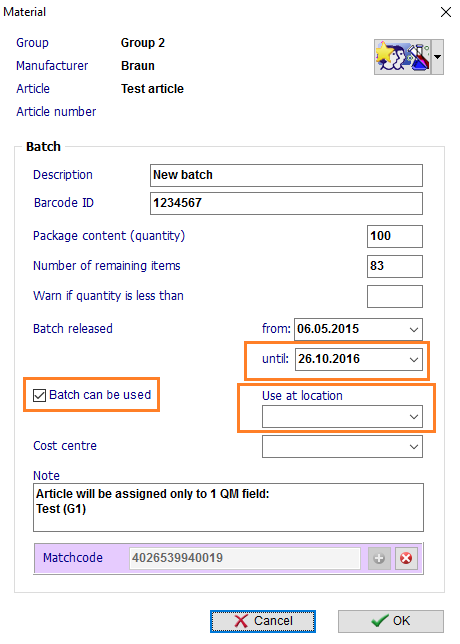
The following articles (batches) will be used in this document as examples:
 |
 |
Material matchcode scanning
1. If a material needs to be inserted as QM field, user has to open QM window of the section where he wants to add the QM field. Otherwise, the program will jump to System settings, and opens details about scanned material.
2. In the following cases, it will not be possible to insert certain materials as QM fields:
- Article's batch is not active (checkbox "Batch can be used" is unchecked).
- Article's batch cannot be used in patient location (if the location where article's batch can be used is not specified -> it can be used in all locations).
- Article's batch is not valid, it is expired (date of use has passed).
In any of these situations, an info-message will show up to the user (containing information about the article in form of "Article name (Batch)"):
 |
E.g.:
- Patient location "MedITEX".
- Article "Test article (New batch)" is scanned. This article is assigned to only one material QM field (field "Test").
- When code is scanned, the following window opens:
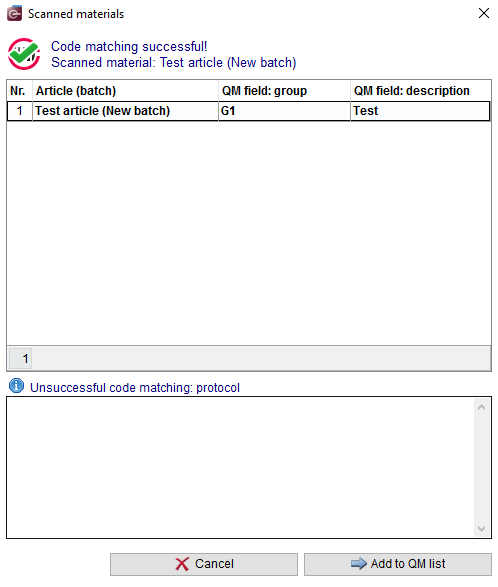 |
- After several seconds, the window will change slightly and the top of the window will look like this:
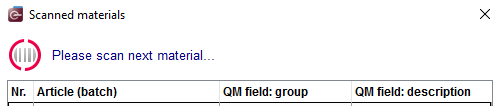 |
While this window is open, the user can scan as many materials as he wants.
- If the scanned material is assigned to several material QM fields, an additional window will be displayed to the user, offering the possibility to choose which field he actually wants to add to QM list:
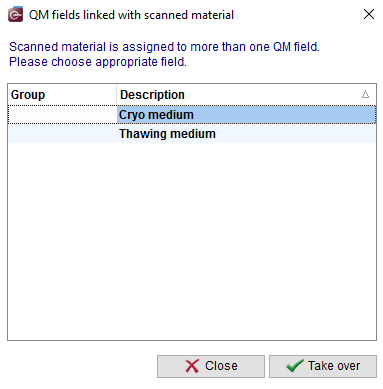 |
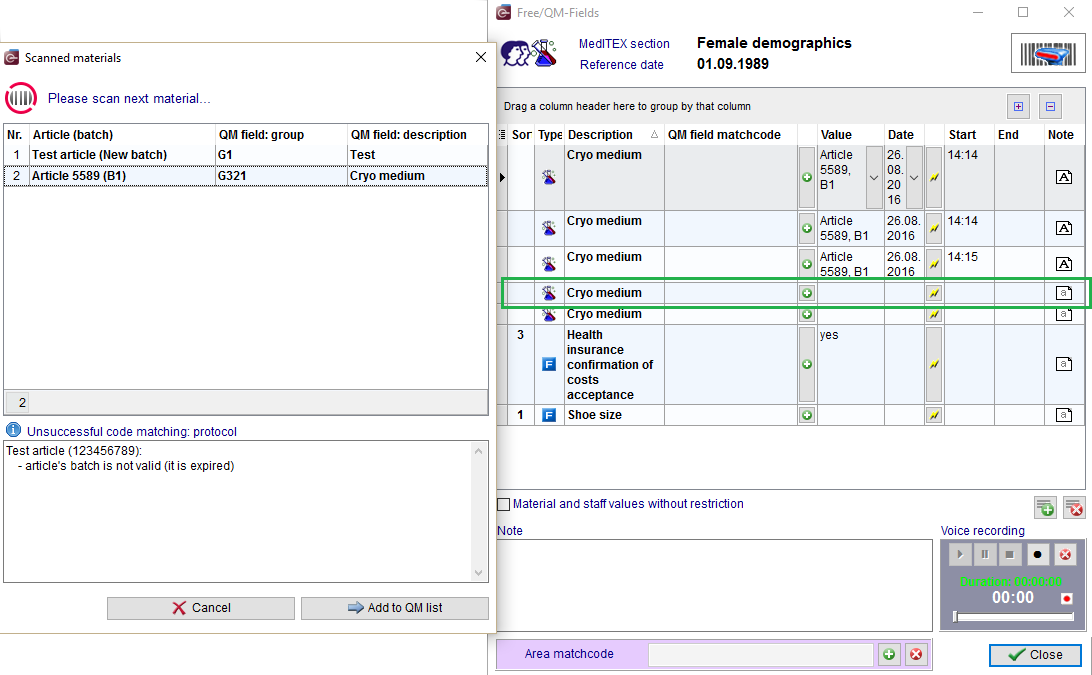
- If the scanned material cannot be added to QM list (for the reasons mentioned above), it will be added up to the list displayed in the area "Unsuccessful code matching: protocol".
- At the end, the window "Scanned materials" will contain information about all the scanned materials (scanned material can be also deleted).
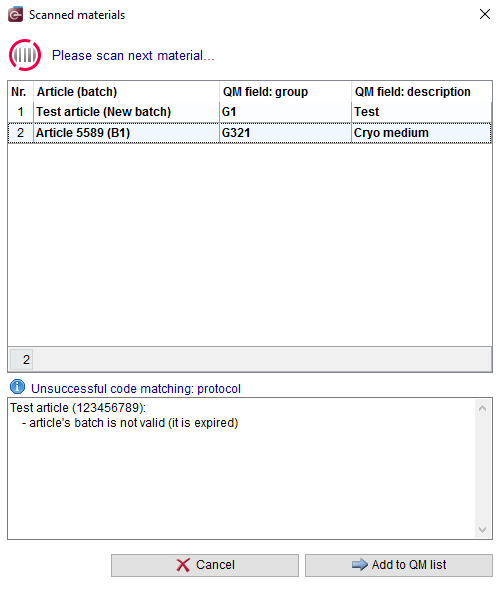 |
- Fields can be added to QM list by clicking on the button "Add to QM list".
- If the QM list already contains some empty fields present in the list of "Scanned materials", their content will be filled. Otherwise, new QM fields will be created.
In this example, empty QM field "Cryo medium" exists in QM list:
 |
- After adding fields, the QM list will look like this:
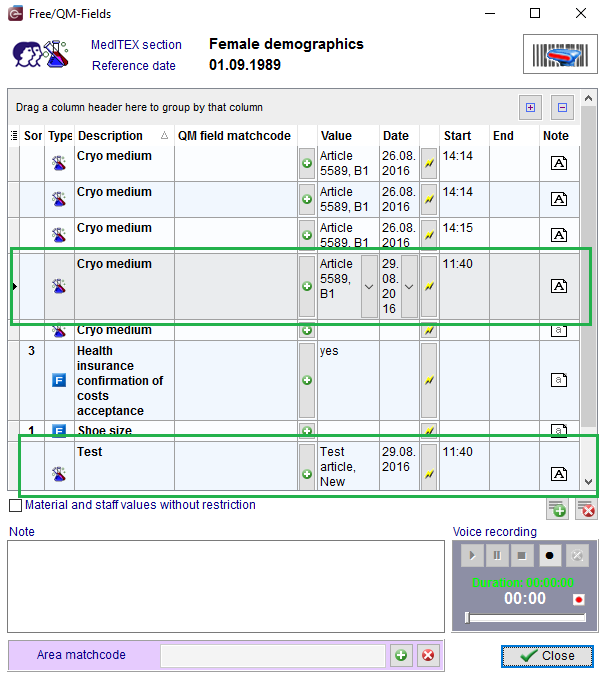 |
| Back to top |