Anamnesi
From MedITEX - Wiki
Torna alla home page del Manuale MedITEX IVF
| INSERT HERE THE UPDATED IMAGE RELATED TO MEDICAL HISTORY "HOMEPAGE" |
Fare click su questa icona per tornare alla Homepage |
||
| Fare click su questa icona per stampare la lista delle Anamnesi e dei messaggi | |||
| Fare click su questa icona per aggiungere una nuova anamnesi o una nuova nota/messaggio di attenzione | |||
| Fare click qui per accedere all'anamnesi del partner |
|||
| INSERT HERE UPDATED COMMUNICATION ICON | INSERT ICON DESCRIPTION | ||
| |
Fare click su questa icona per aprire una finestra che mostra maggiori informazioni sull'esito delle gravidanze precedenti. |
La pagina delle anamnesi è suddivisa in due parti principali. La superiore contiene un riassunto delle precedenti gravidanze e di alcuni dati antropometrici. Se si fa click sul riassunto delle gravidanze precedenti, si aprirà una finestra con i dettagli relativi. La parte inferiore contiene la lista delle anamnesi, delle note e dei messaggi di attenzione registrati per la paziente.
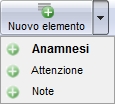
Per creare una nuova anamnesi o una nuovanota/messaggio di attenzione fare click sulla freccia alla destra dell'icona "Nuovo elemento" e selezionare l'opzione desiderata.
Contents |
Creare una Nota o un Messaggio di Attenzione
Se si sceglie "Attenzione" o "Note" si apre la seguente finestra (la sola differenza tra Note o Attenzione, consiste nell'intestazione).
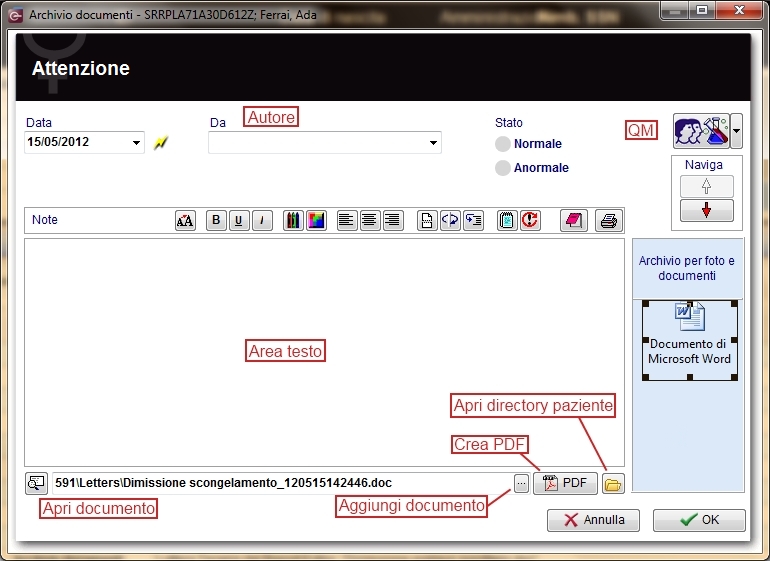
Spiegazione dei campi e delle icone:
- Data: data della registrazione del documento
- Da: autore del documento o delle note
- QM: icona Campo QM. Può essere usata per accedere ai campi QM associati al documento.
- Naviga: facendo click sulle frecce si scorreranno i documenti archiviati verso l'alto o verso il basso.
- Area testo: uno strumento simile a "WordPad" che può essere usato per inserire un testo.
- Archivio per foto e documenti: foto e documenti possono essere facilmente collegati all'archivio documenti trascinandoli nel riquadro azzurro. Possono essere quindi aperti facendo doppio click sull'icona.
- Apri directory paziente: apre la directory che contiene tutti i file relativi al paziente
- Crea PDF:
- Aggiungi documento: consente di cercare un singolo documen to e di aggiungerlo.
- Apri documento: consente di aprire il documento aggiunto.
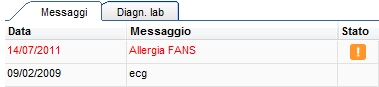
Facendo click su "OK" la nota/messaggio di attenzione sarà creata e pubblicata nella homepage. I messaggi di attenzione sono pubblicati in rosso, le note in nero.
Creare un'anamnesi
Se si seleziona "Anamnesi" si apre una finestra. Esistono due differenti finestre, una per la donna ed una per l'uomo.
Creare una anamnesi per la donna
Se "Anamnesi" viene scelta in quando il paziente selezionato è una donna si apre la seguente finestra:
 |
|
Fare click su questa icona per accedere ai campi QM relativi a questa area o sulla freccia a destra per bloccare i campi QM o per vedere il registro delle modifiche |
|
| Fare click su questa icona per documentare l'esito di gravidanze precedenti | |||
| Fare click su questa icona per documentare i risultati degli esami relativi all'anamnesi. |
On each section of the Medical History may be documented several data. The fields with the red background have to be filled in order to fullfil the D.I.R. (German Registry for assisted reproduction techniques) requirements. From this page it is possible to access to the previous pregnancies section and to to the examination section. When all the data you need to document are insterted just press ok.
Note: it is possible to customize the "Prior illness" and the "Sterility factors" modifing the related system tables
Note 2: If exists at least one previous Medical History the system will ask if the user wants to take over data from the most recent Medical History.
Note 3: If the date of the new Medical History is empty or younger than the date of an existing Medical History, the system will ask if the date of the first interview is to be updated to the date of the Medical History.
Documentare gravidanze precedenti
Clicking on the "Gravida:_Para:" link or on the red arrow icon will lead to the following window:
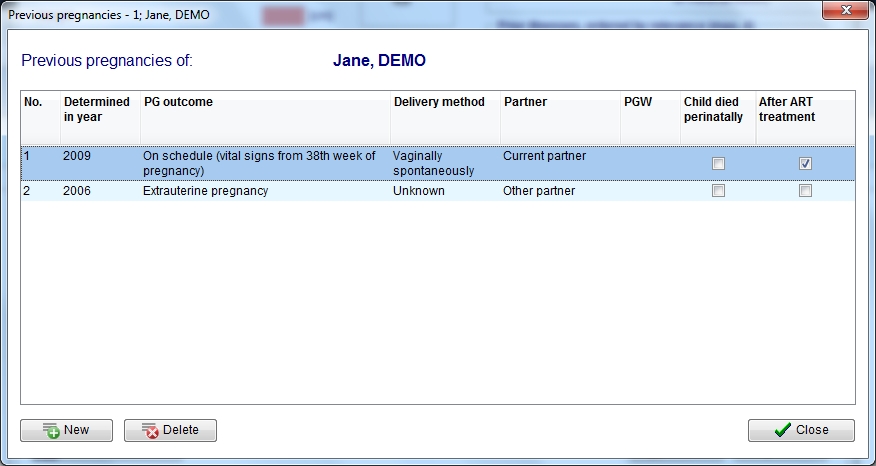
In the new window you will see a list of all pregnancies assigned to this Medical History. To document a pregnancy just click on the button "New". It is also possible to remove a wrong documented pregnancy: just select it and click on the button "Delete".
Documentare i risultati degli esami
It is possible to link examination findings to a Medical History just clicking on the button "Examination" in the section "Female Medical History". The following window will open:
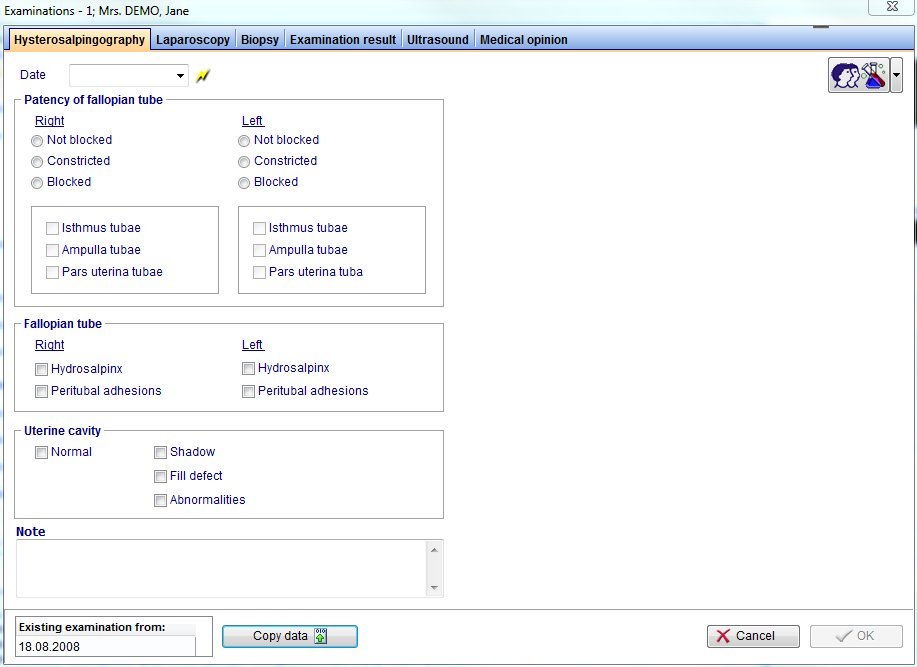
In the examination section it is possible to document several exames. If you want to import data from an existing examination, select the examination desired and press "Copy data" button. When all the data you need to document are insterted just press ok.
Creating a male Medical History
If "Medical History" is selected when the selected patient is a man the following window will open:
 |
|
Click on this icon to access the QM field section related to this area or on the right arrow to block the QM fields or to see the change log. |
| |
Double click on the empty field or press the lightning icon to create a new spermiogram and link it to the Medical History |
On each section of the Medical History may be documented several data. The fields with the red background have to be filled in order to fullfil the D.I.R. (German Registry for assisted reproduction techniques) requirements. When all the data you need to document are insterted just press ok.
Note: it is possible to customize the "Prior illness" and the "Sterility factors" modifing the related system tables
Note 2: If exists at least one previous Medical History the system will ask if the user wants to take over data from the most recent Medical History.
Note 3: If the date of the new Medical History is empty or younger than the date of an existing Medical History, the system will ask if the date of the first interview is to be updated to the date of the Medical History.